Setting up RSpace - Google Drive app
Aim of this document
This section explains how, as an RSpace admin, you can set up GoogleCloudProject that enables your RSpace to let users link to their Google Documents directly from within RSpace.
You don't need to do this if your RSpace web address has .researchspace.com domain.
This is a one-off step - it does not need to be done for every RSpace user!
Pre-requisites
- A Google account that uses an email address that matches the domain that your RSpace is running on. For example if you are using RSpace at https://myrspace.myorganisation.ac.uk then you would need to have a Google account linked to myname@myorganisation.ac.ukYou might consider using a service email account rather than a personal email account, so that other staff can maintain the App if you leave your organisation, or are away on leave, for example.
- Access to RSpace server - you will need to set some properties in the RSpace property file (usually in
/etc/rspace/deployment.properties). These are described later. - Please read all of these instructions before starting, so you have an overview of the scope of the work required.
1. Setting up a Google Cloud Project
This is required in order to generate API keys and clientIds. You can also configure permissions and a consent screen for users who will connect to GoogleDrive. This documentation assumes little or no knowledge of GCP.
- Logout of all Google accounts you may currently be using in your browser
- Navigate to https://console.developers.google.com/apis/dashboard and login using an email address belonging to the same domain as your RSpace.
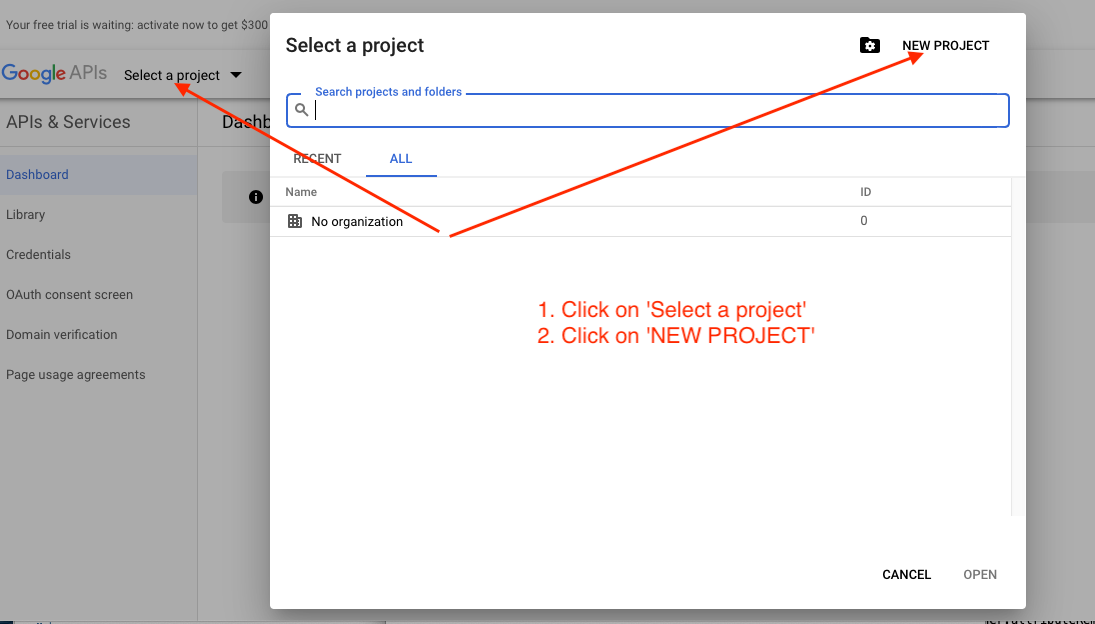
- Create a new project by clicking on 'select a project' then 'New project':
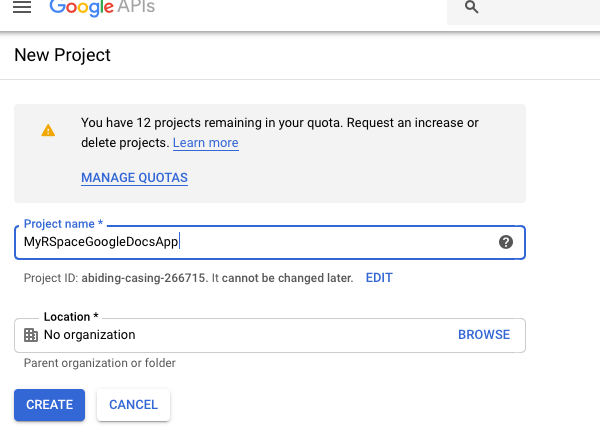
- Give your app a name - this isn't the name that end-users will see, it's just an identifier within GCP console. Then click Create:
- Wait a few seconds for the App to start. You will see a screen like this:

You have now completed the first stage. Next we will enable the Google APIs that the RSpace application requires.
Enabling Google APIs
- Click on the 'Enable APIs and services' shown in the screenshot above
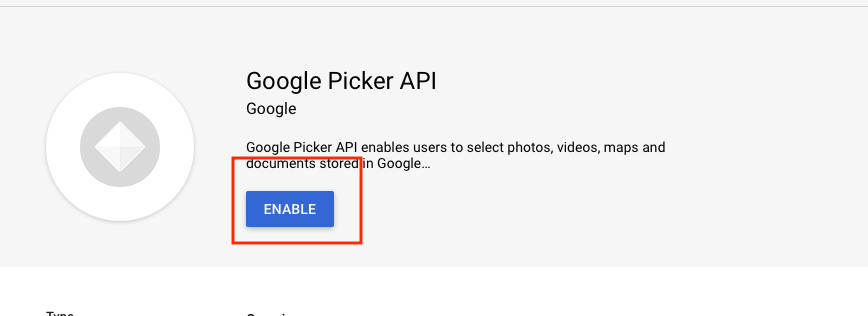
- Search for 'GooglePicker' API and select it. Don't forget to enable it.
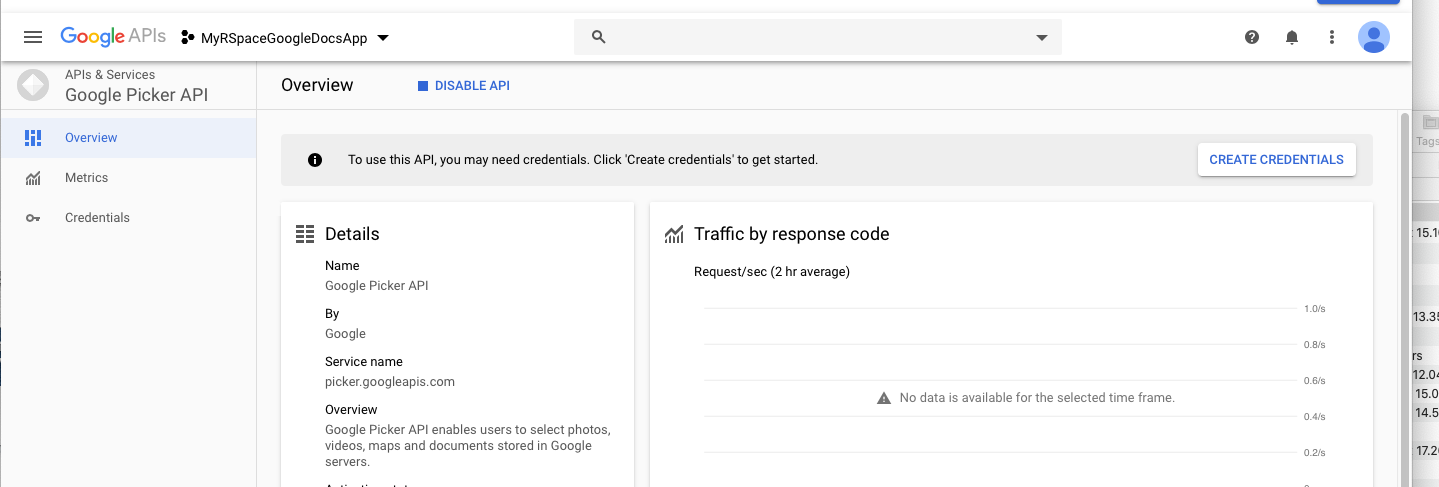
- You should now have this enabled:
Obtaining an API key
Now, we have to obtain credentials, starting with an API key
- Click on the 'Credentials' tab on the left-hand side of the screenshot above.
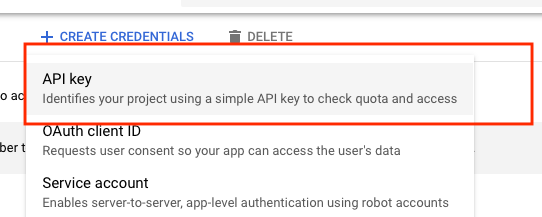
- Click on 'Create Credentials' then 'API key'
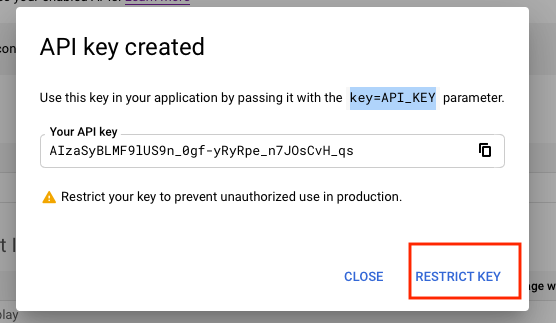
- Once the key is created, click on 'Restrict key':
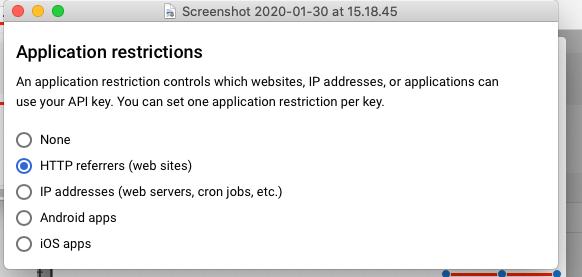
- In the 'Application restrictions' restrict to HTTP usage:
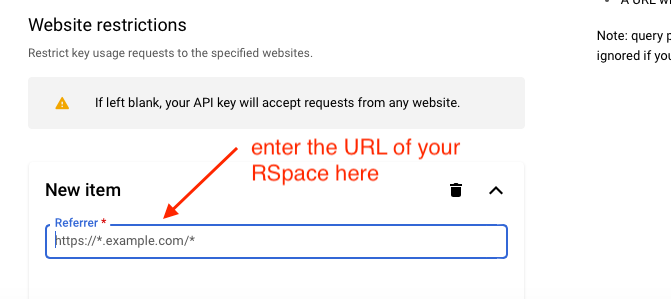
- In 'website restrictions' restrict to the URL of your RSpace installation:
- Click 'Save' at the bottom of the page.
- Your API key should now appear in the 'Credentials' section:

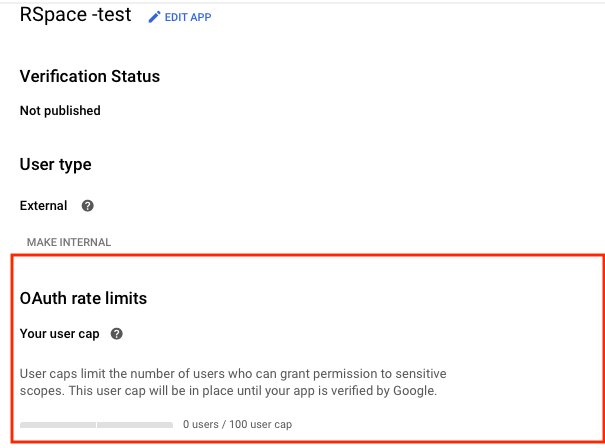
- You'll probably see a warning to configure your consent screen - click on 'Configure Consent screen' and select your 'User Type'. If you have a GSuite paid-for Google account, you will be able to choose 'Internal application', otherwise only 'External' is possible:Note that if you choose 'External' UserType, Google will want to verify that you own the domain that you are configuring the application for. If the App has less than 100 users, it will enable people to use the App, but will show many warnings about requiring verification. It will block usage altogether once the limit of 100 users has been reached.
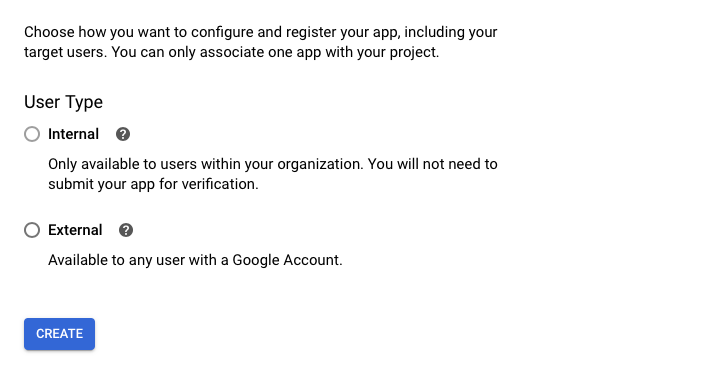
- Here we assume that you have chosen 'External', then 'Create'. Fill in the details on the OAuth consent screen. RSpace users will see the details on this screen when they access Google from RSpace for the first time. The 'authorised domains' must match the domain of your RSpace URL. At a minimum, the name of the app and the authorised domains must be completed.If your RSpace URL is https://myrspace.mydomain.com, then 'rspace.mydomain.com' should be entered as an authorised domain
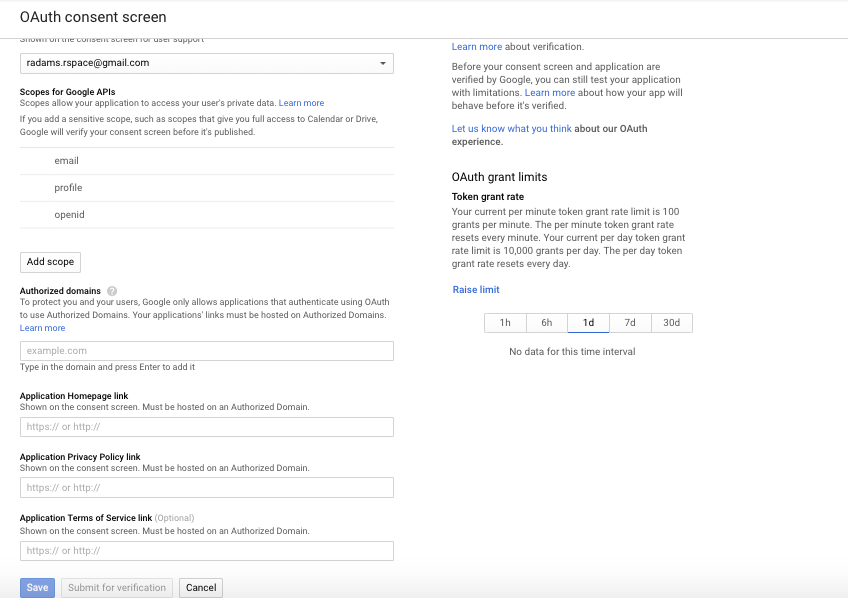
- Once you have added details, then click 'Save' and your OAuth consent screen is complete. Note the information about the user cap.
Creating OAuth Client Id
The final step inside GCP console is to create an OAuth client ID.
- Go to the 'Credentials' tab, then 'Create new credentials' and choose 'OAuth client ID' to see the following form:
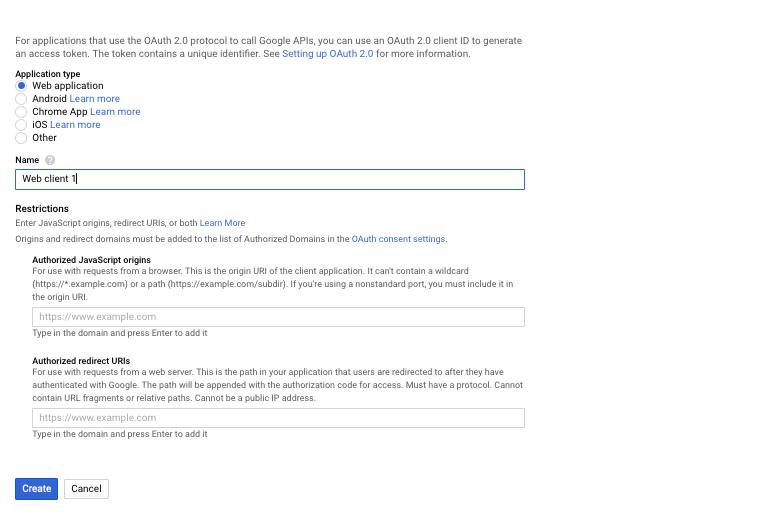
- Select 'Web application' as the Application type
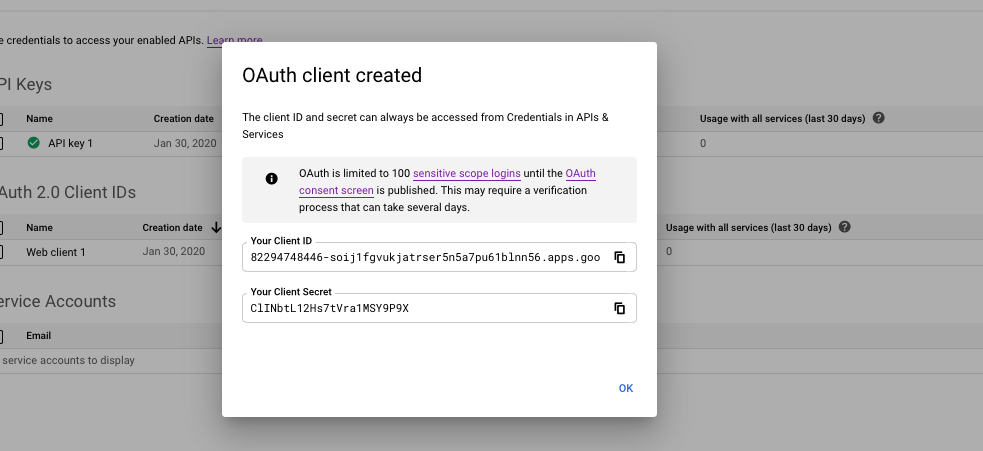
- In the 'restrictions' section, add the URL to your RSpace in both 'Authorised Javascript Origins' and 'Authorised redirect URIs'. Click 'Create' and you should see the confirmation screen:
Recap
You have now :
- Created A Google Cloud Project
- Generated an API key for the project and restricted its use to your RSpace web application
- Configured a consent screen that users will see when they connect to GoogleDrive from RSpace
- Created an OAuth client Id.
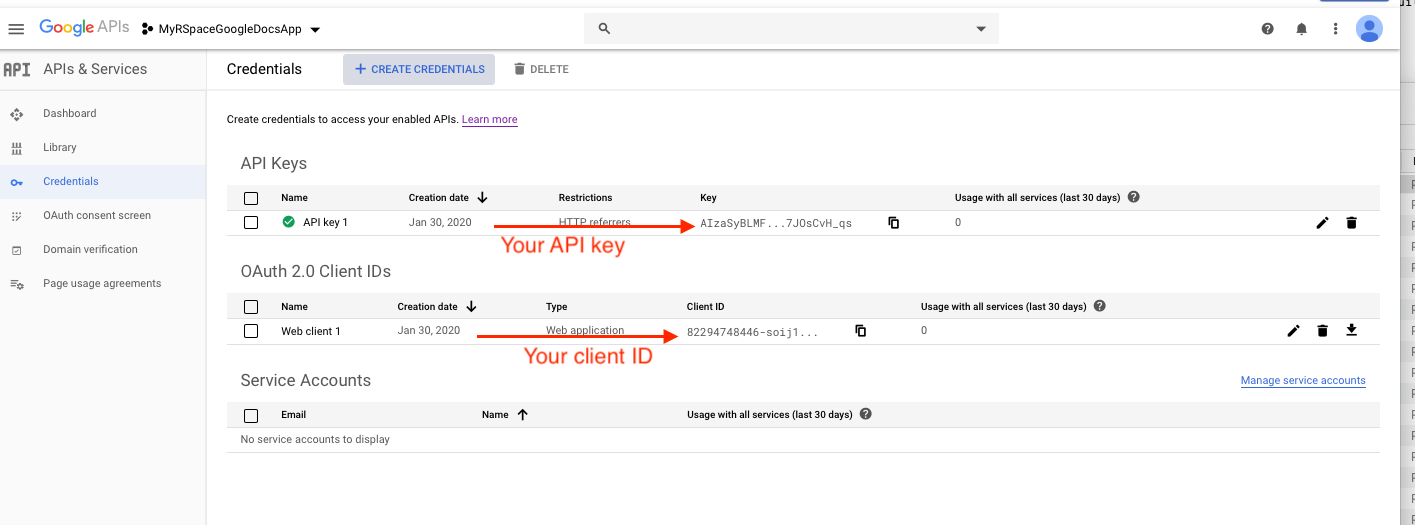
In the Credentials section of your GCP console you should now see something like this:
Setting up RSpace
You will need your OAuth Client Id and API key which you can obtain from the above screen.
- Access the RSpace server
- Open /etc/rspace/deployment.properties
- Add the following properties to the end of your property file:
googledrive.developer.key=MY_DEVELOPER_KEYgoogledrive.client.id=MY CLIENT ID - Restart RSpace
To test:
- Login to RSpace
- Logout of Google
- Go to 'Apps' page and ensure 'Google App' is enabled
- Create a new document or open an existing document and start editing a text field.
- Click on the Google icon in the editor toolbar ( or do Insert...from Google)
- You should see a dialog appear to login to Google, after which you should see your OAuth consent screen.
- After agreeing to let RSpace view your GoogleDrive you should see your GoogleDrive listings appearing in RSpace.You may see warnings about that the application is unverified. If you want these to go away, you will either have to ask Google to verify your application, or use a paid-for GSuite account that allows private applications. This typically requires you to demonstrate ownership of the domain that the App is using. There is more information on Google cloud support.