Omero Integration
This integration requires setup by your local RSpace admin who has to configure a connection to your local Omero instance. We have so far developed the integration to use password based authenticatio…
Testing the integration with your data on Demos server:
Sign up for an account on the RSpace demos server: https://demos.researchspace.com This will allow you to use our demo Omero Integration with data on the Omero demo server in Dundee (https://demo.openmicroscopy.org). You will also need to create an account on that Omero server. See the 'Getting Started' section for what to do next in RSpace after you have created that account. You can also watch an example video of the integration in action.
Testing the integration with your data on your local RSpace:
Your RSpace admin has to enable the Omero Integration from the 'system' -> 'configuration' -> 'system settings' page and then configure it to connect to your local Omero Service by setting the correct values in RSpace properties (a restart of RSpace will then be required). RSpace admins must configure two properties:
- omero.api.url=
- omero.servername=
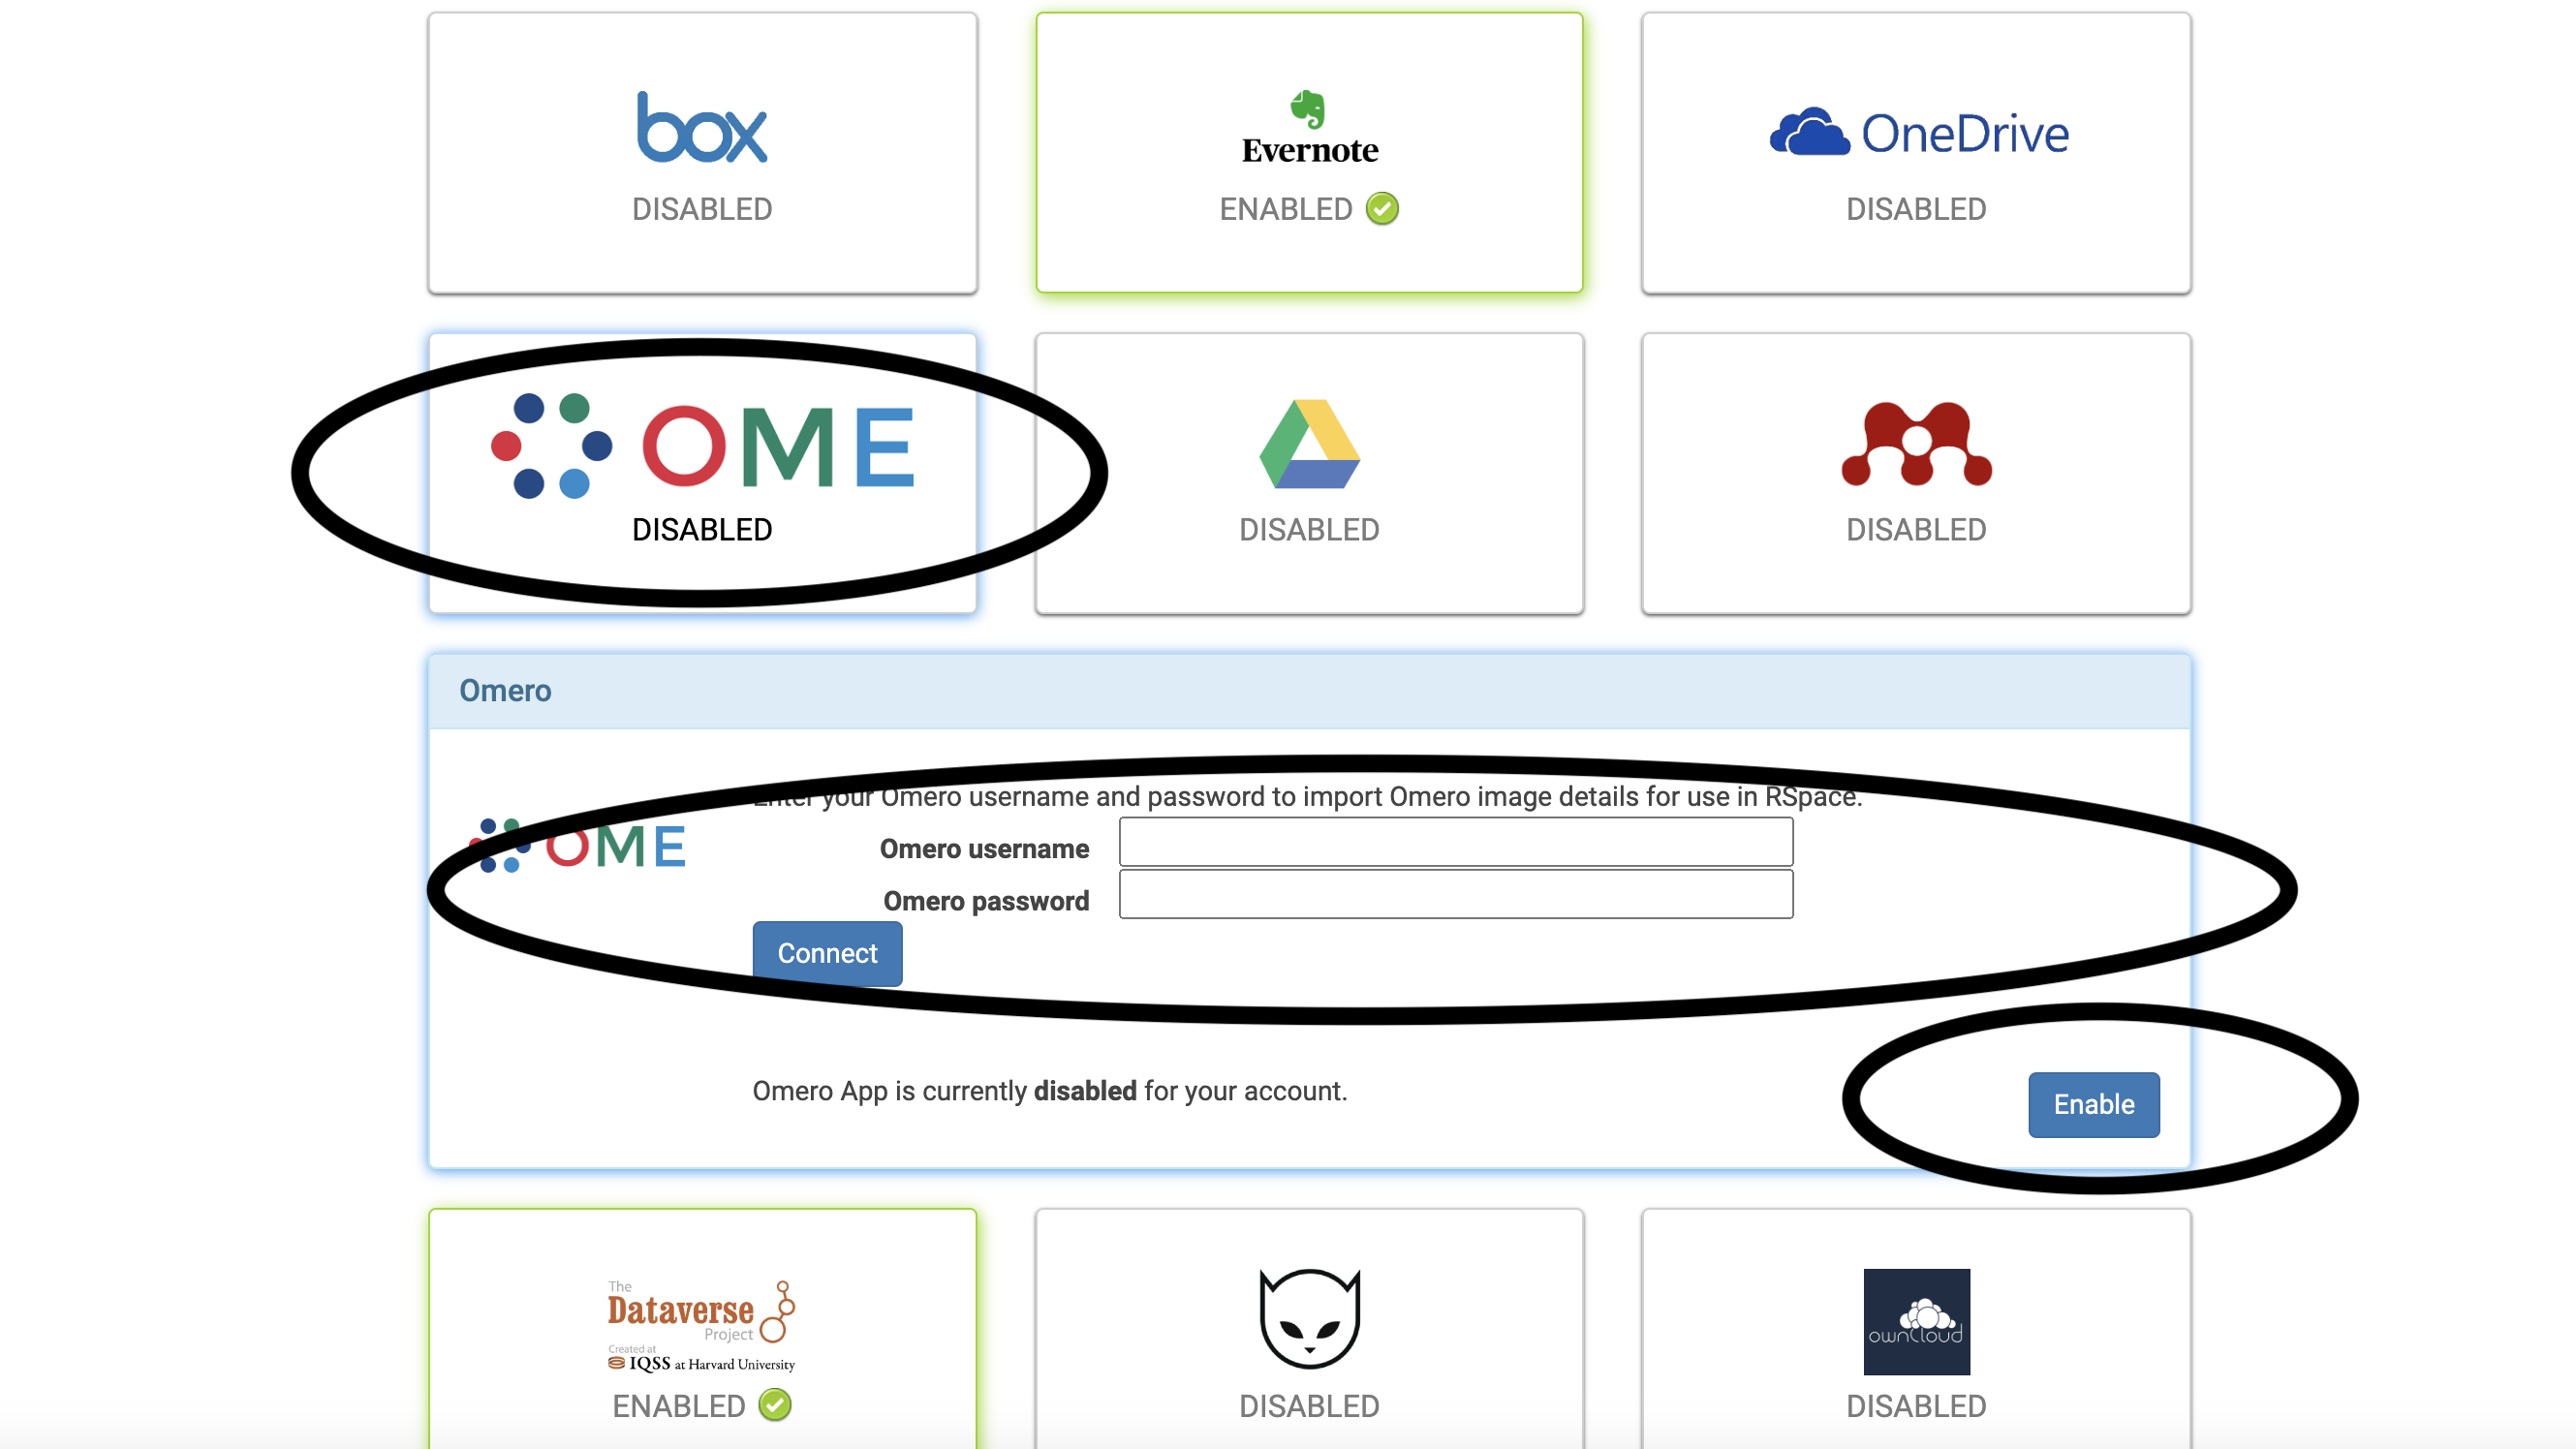
Omero.api.url should be the url of your Omero server. Omero.servername can be used as 'omero'. Enable Omero from the Apps page (as show below) and enter your Omero username and password: the Omero Integration will now display data from your local Omero account.
Getting started
Enable Omero on the RSpace Apps page and enter your username/password for your account on the Omero demo server. Click 'connect'. You will be taken to a page with a success message. You will stay logged in to Omero until such time as you log out of RSpace.
An Omero icon will now be visible in the texteditor for RSpace documents:

The Omero Integration will display data from your Omero account.
Navigating the data in the integration
First chose to edit a document that has a text field in it and click on the 'Omero' icon in the text editor. The following screen will appear:
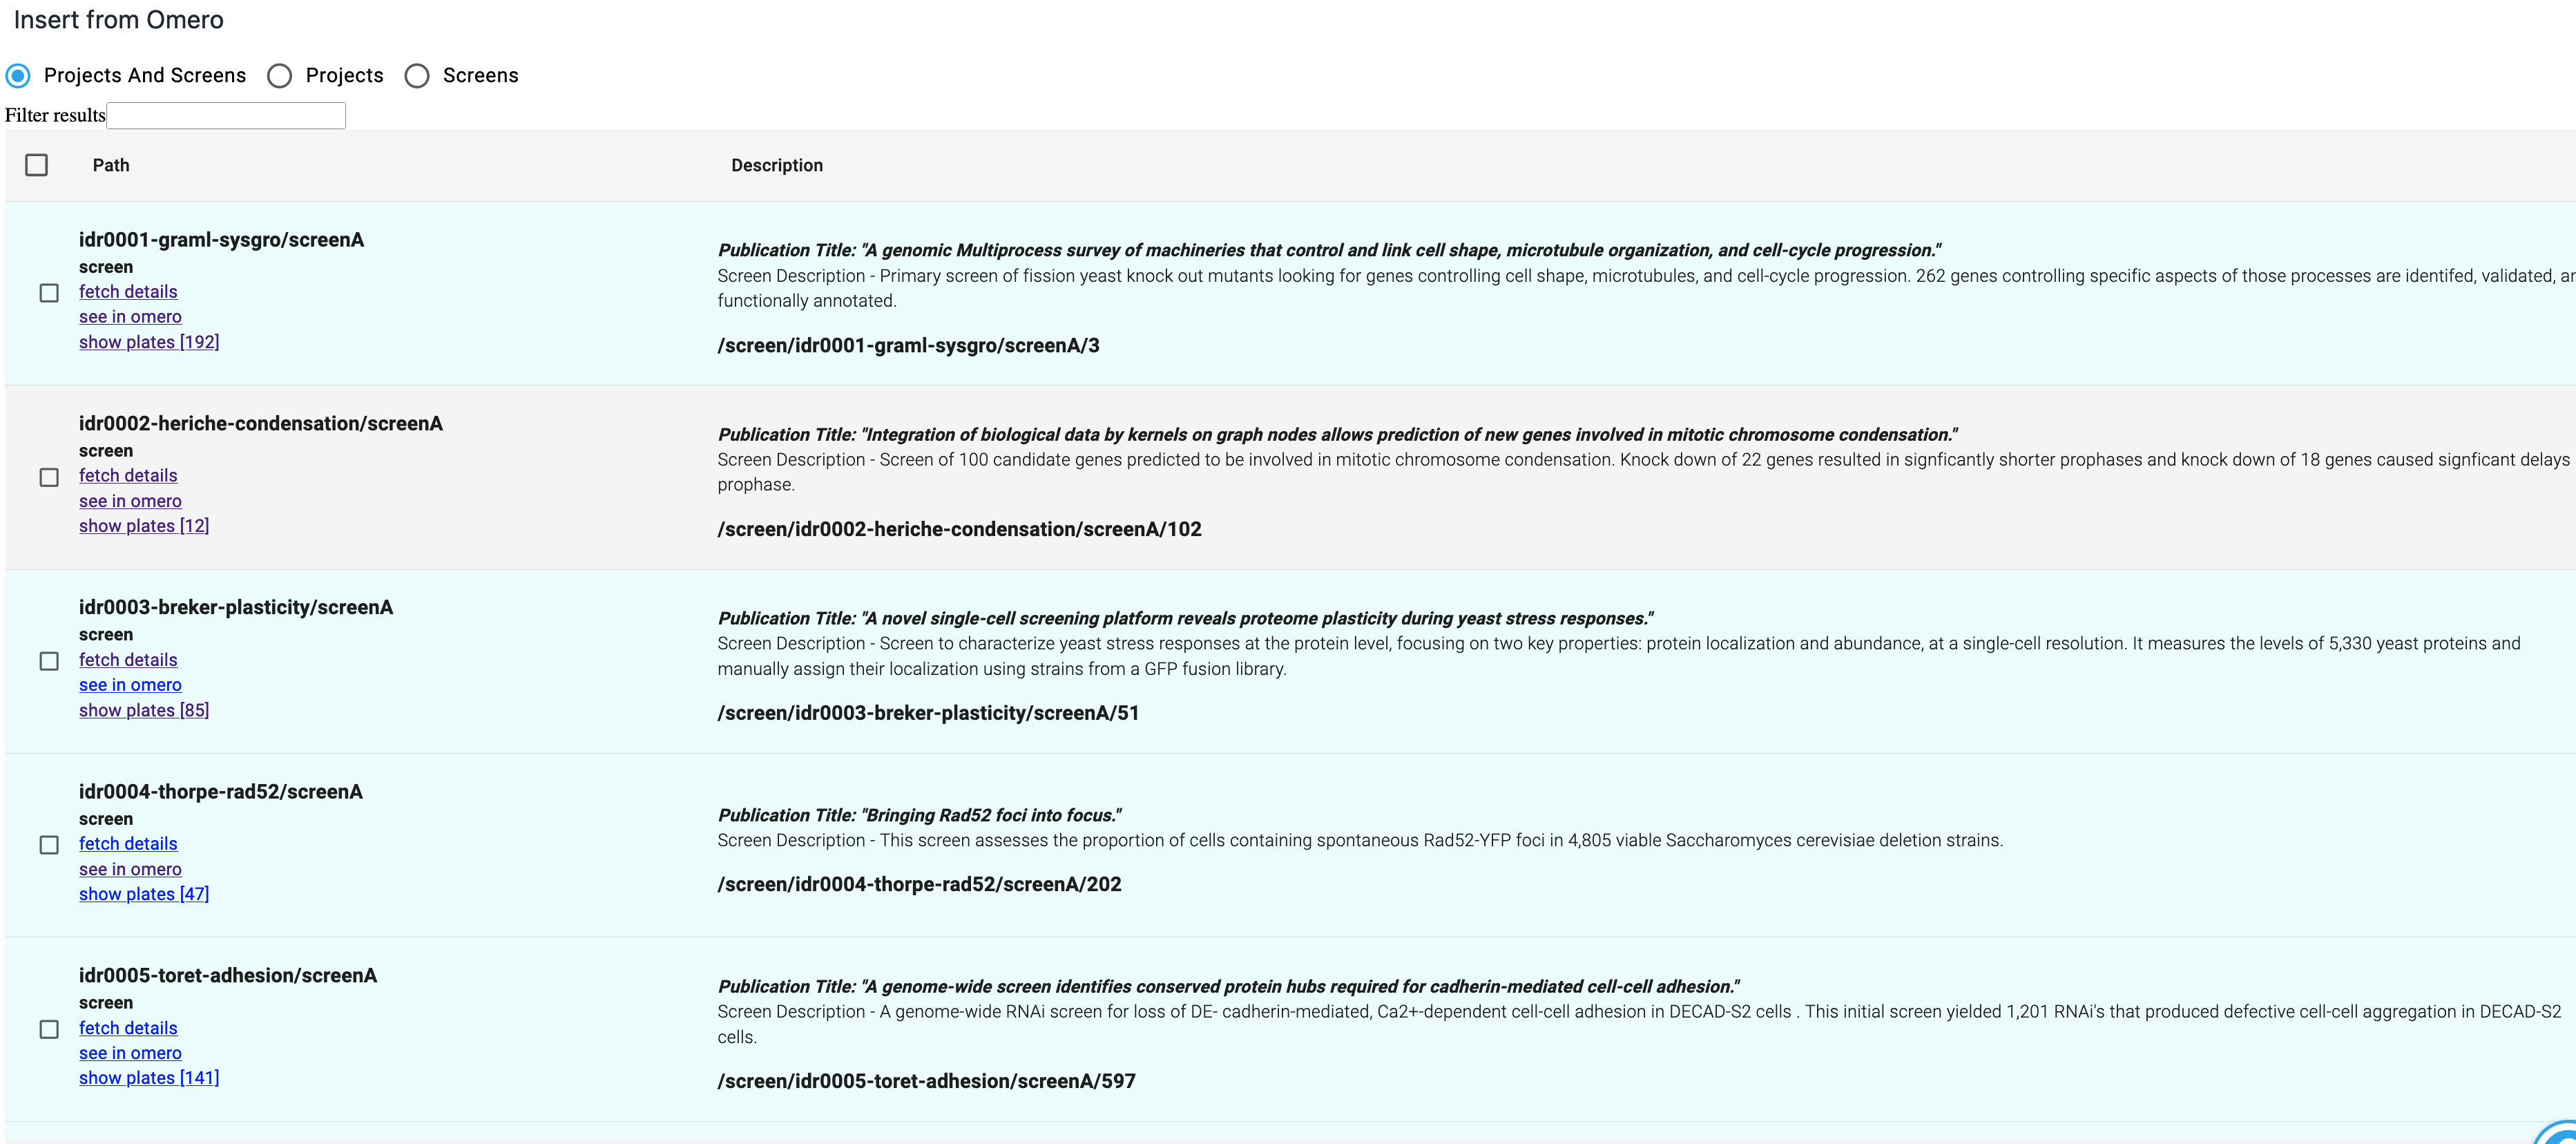
Your images will not be shown initially. The data represents a hierachy, with 'Projects' and 'Screens' at the top level. 'Projects' contain 'datasets' which contain 'images'. The 'children' of Projects and Screens are not displayed until you click on a 'show ...' link. See the screenshot below for how this works.
'Screens' contain 'plates' which contain 'plate acquisitions' which contain 'images'. Plate Acquisitions may contain multiple 'sample fields'. Each field links to its own grid of image data.
Clicking on the 'show...' links will fetch the next level of data and finally display a grid of images. The grid of images corresponds to the wells in a plate acquisition if you are drilling down from a screen; for a Project the grid is just a convenient representation of the individual images.
It is also possible to navigate from low level data back to its parent. Images will have links to their Plate Acquisition, these will link back to Plates and Plates link back to their Screen. The same applies to Projects with Datasets etc.
It is possible to 'hide' child data - this will hide all children and their children etc. Subsequent clicks on 'show children' will then reveal child data and any previously displayed children of that data etc.
Click on 'see in omero' to see the original data on the omero server.
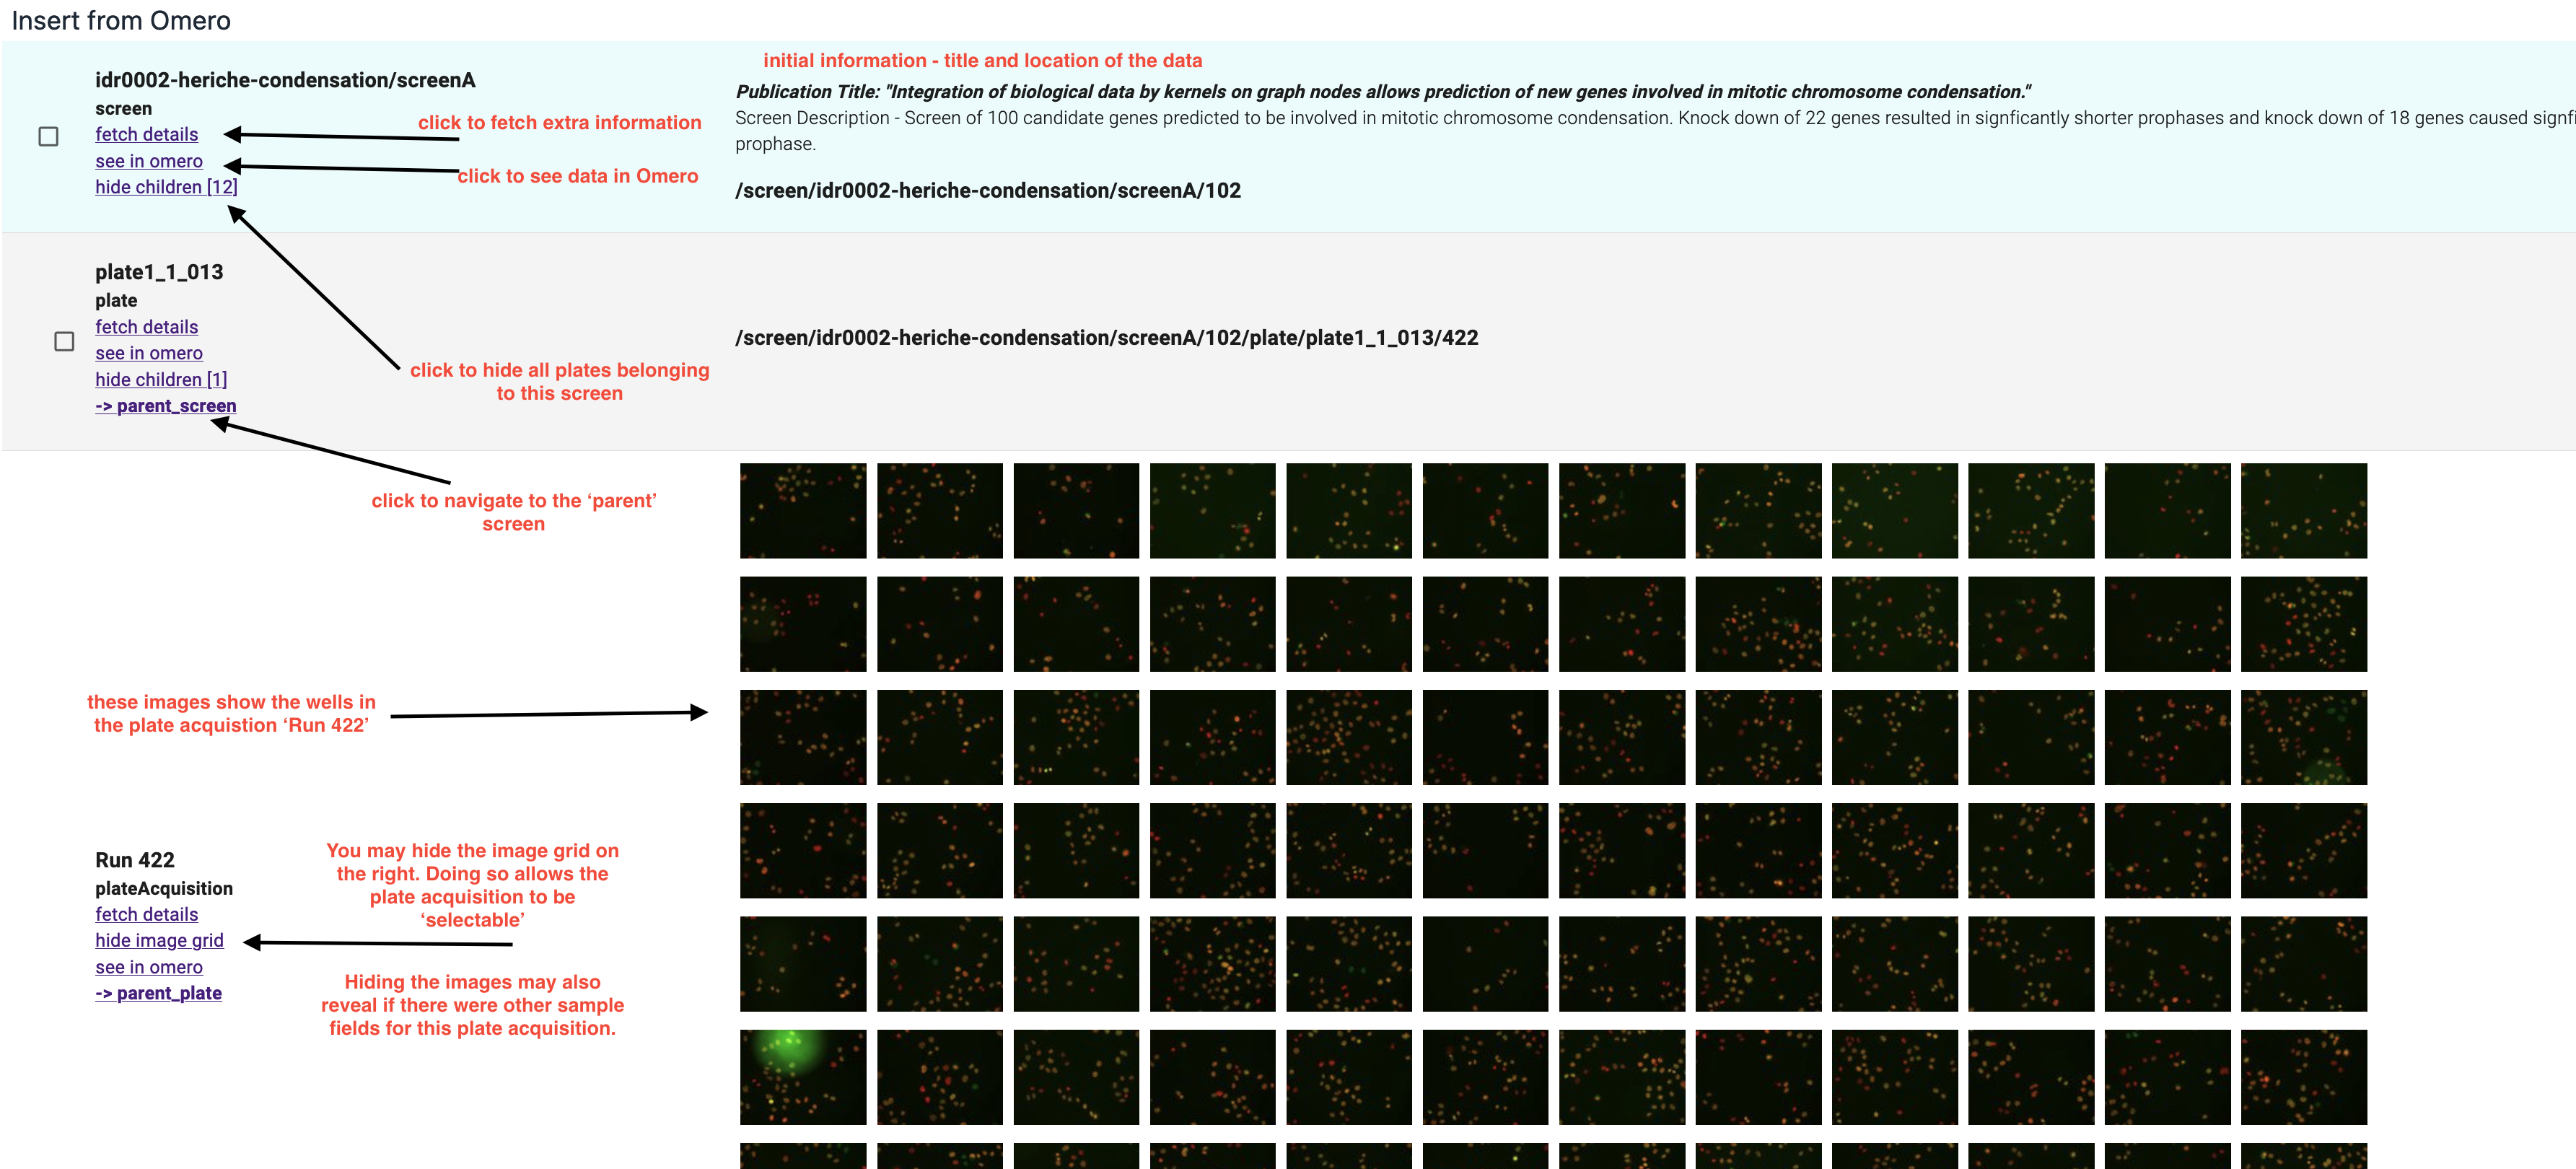
Clicking on any item in the grid of images will fetch details of that image and draw a larger thumbnail of the image.
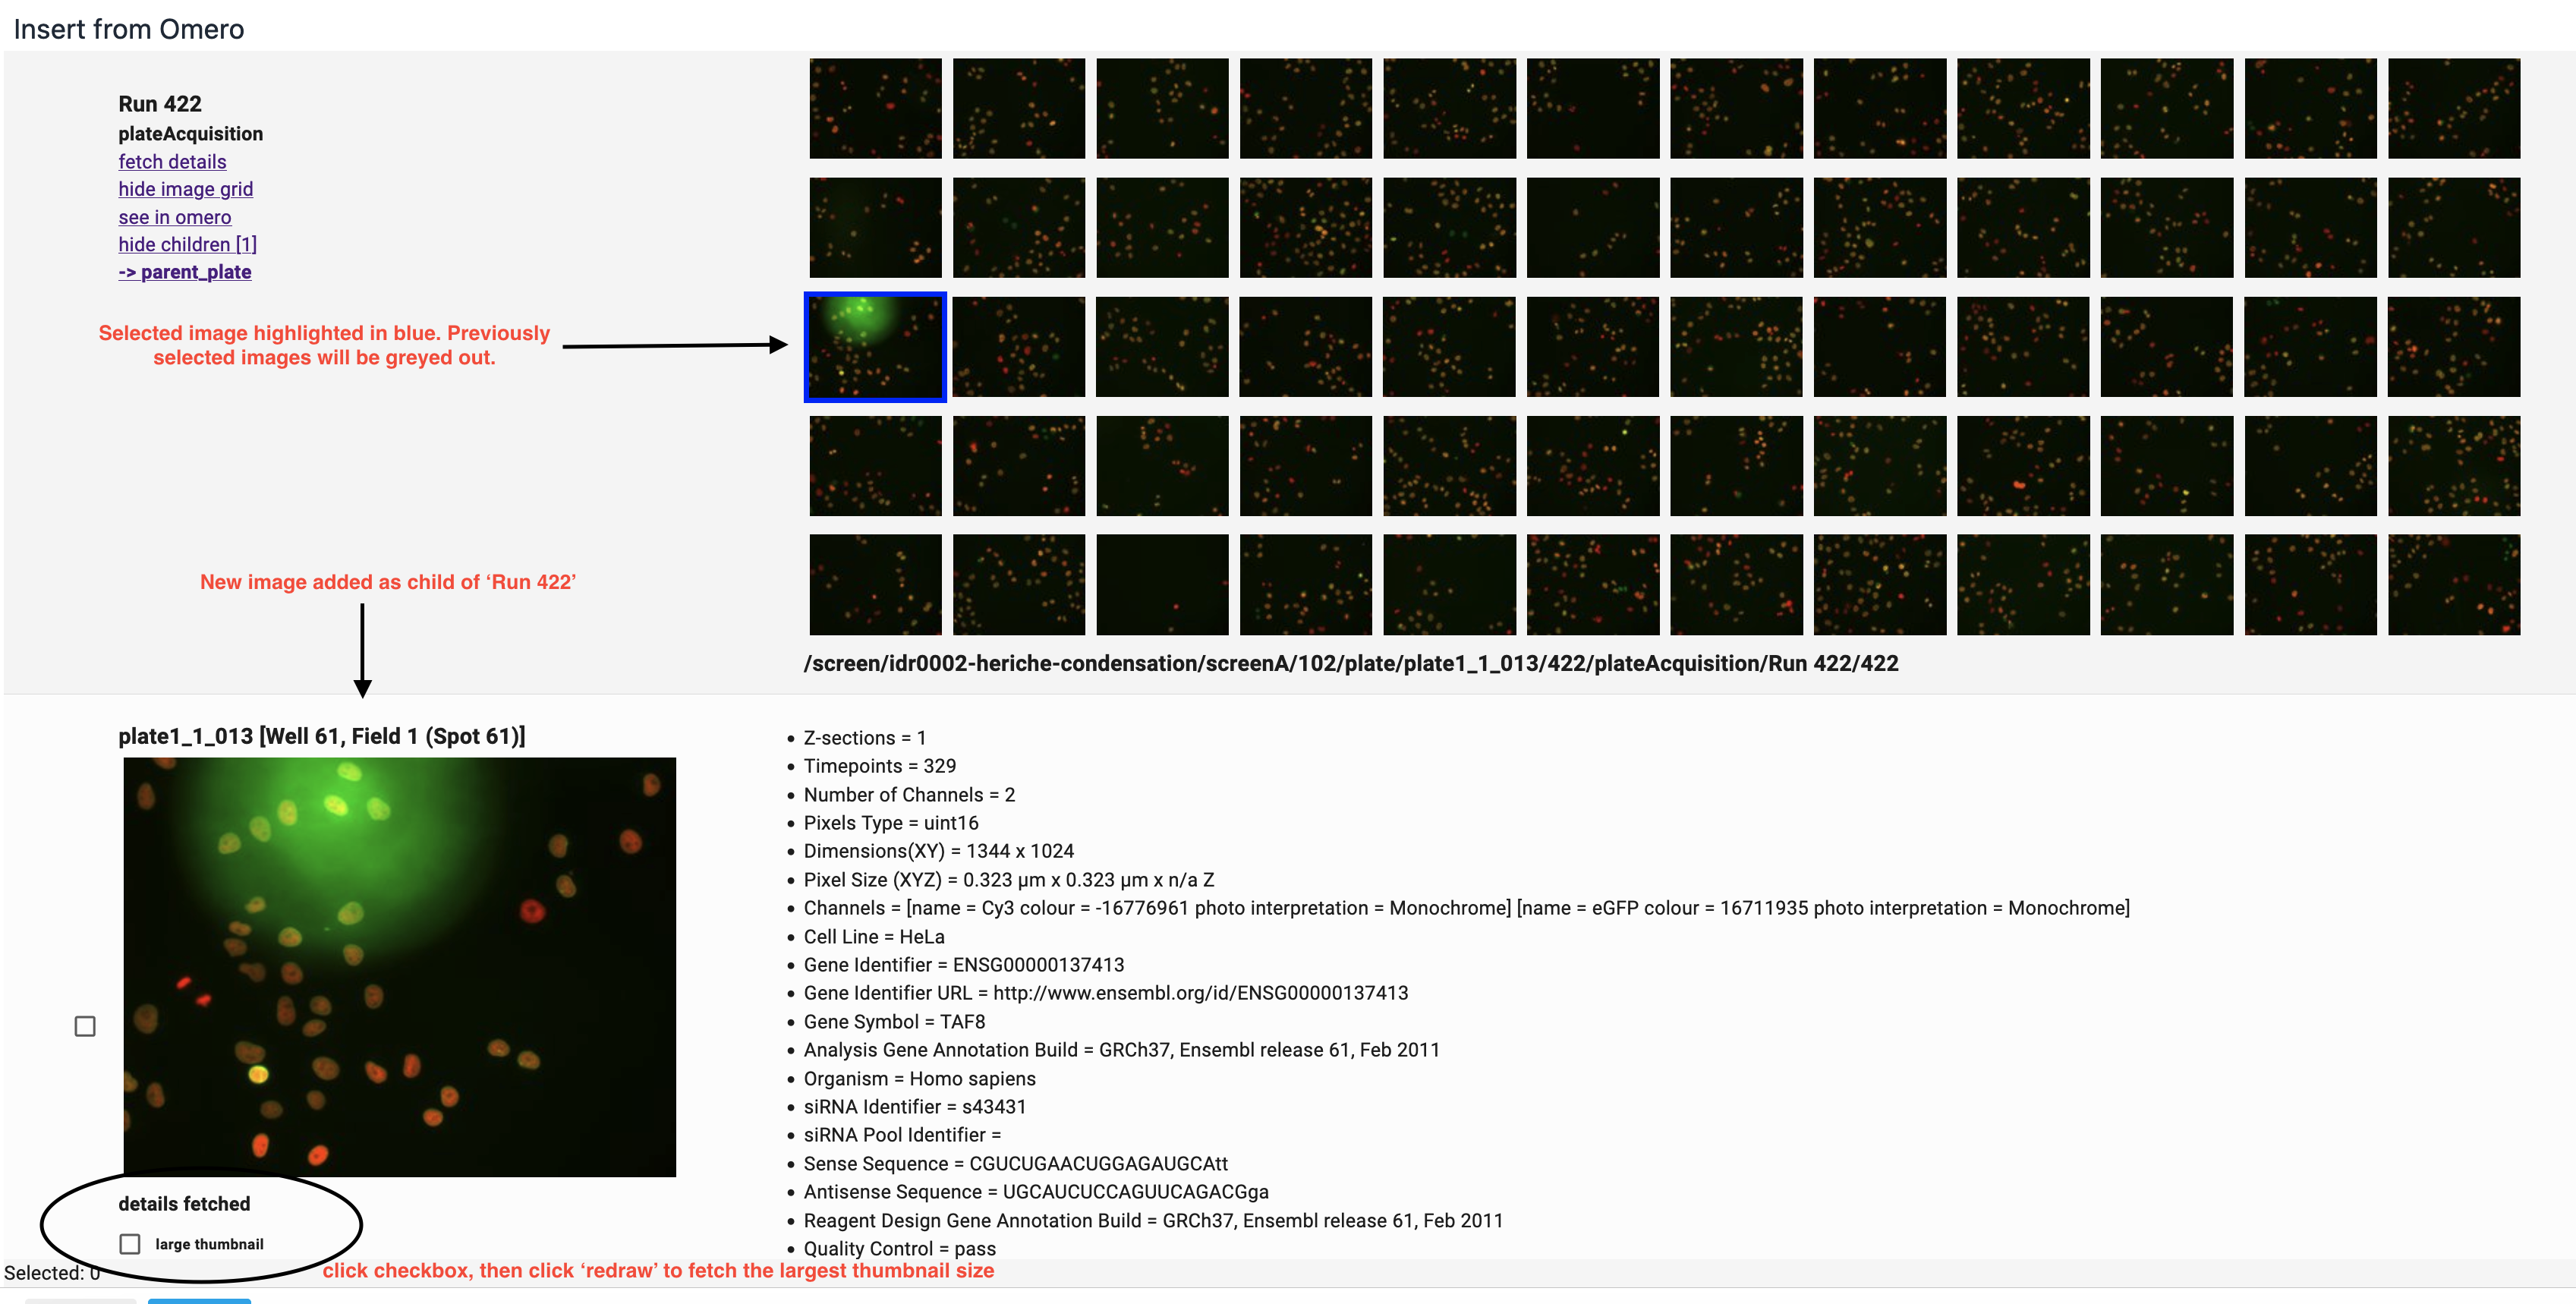
The new thumbnail and its detailed data will be added as 'children' of the Plate Acquisition (or dataset). As such they can be hidden via the 'hide children' link of their parent. They can also be selected for insertion into an RSpace document.
Fetching additional details
There is sometimes additional information about the data which can be fetched by clicking on an item's 'fetch details' link. The new data will be displayed on the right, in the 'description' column. If there was no additional data, nothing will be displayed.
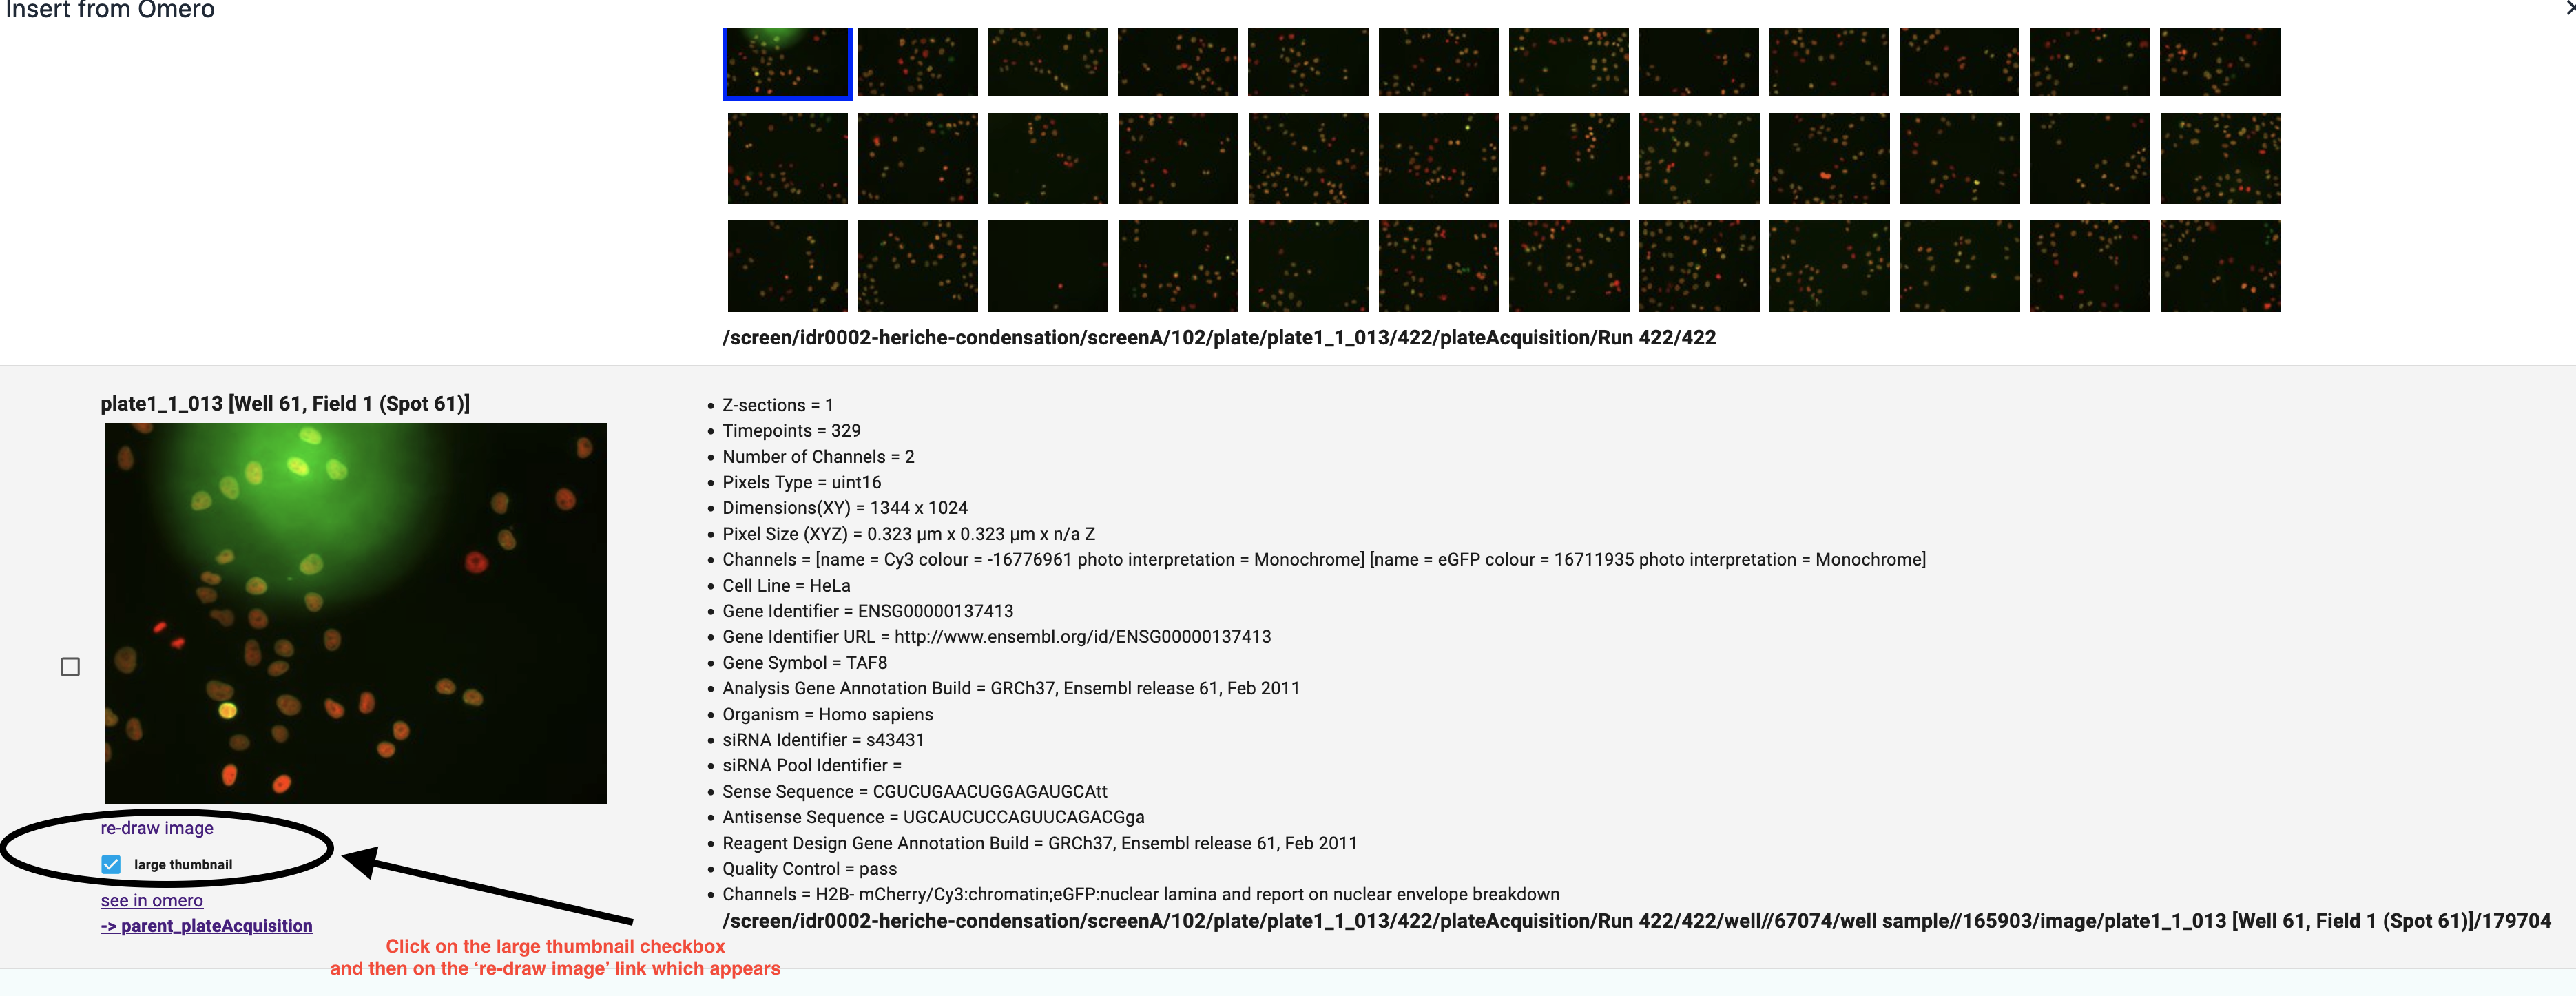
Viewing extra large thumbnails
Small thumbnails are displayed in the grid of images for a dataset/plate acquisition. When you click on one of these thumbnails, a larger thumbnail along with full image details is added as a child of the dataset/plate acquisition. You may chose to fetch an extra large thumbnail. Click on the 'large thumbnail' checkbox below the image and then on the 're-draw image' link which appears.
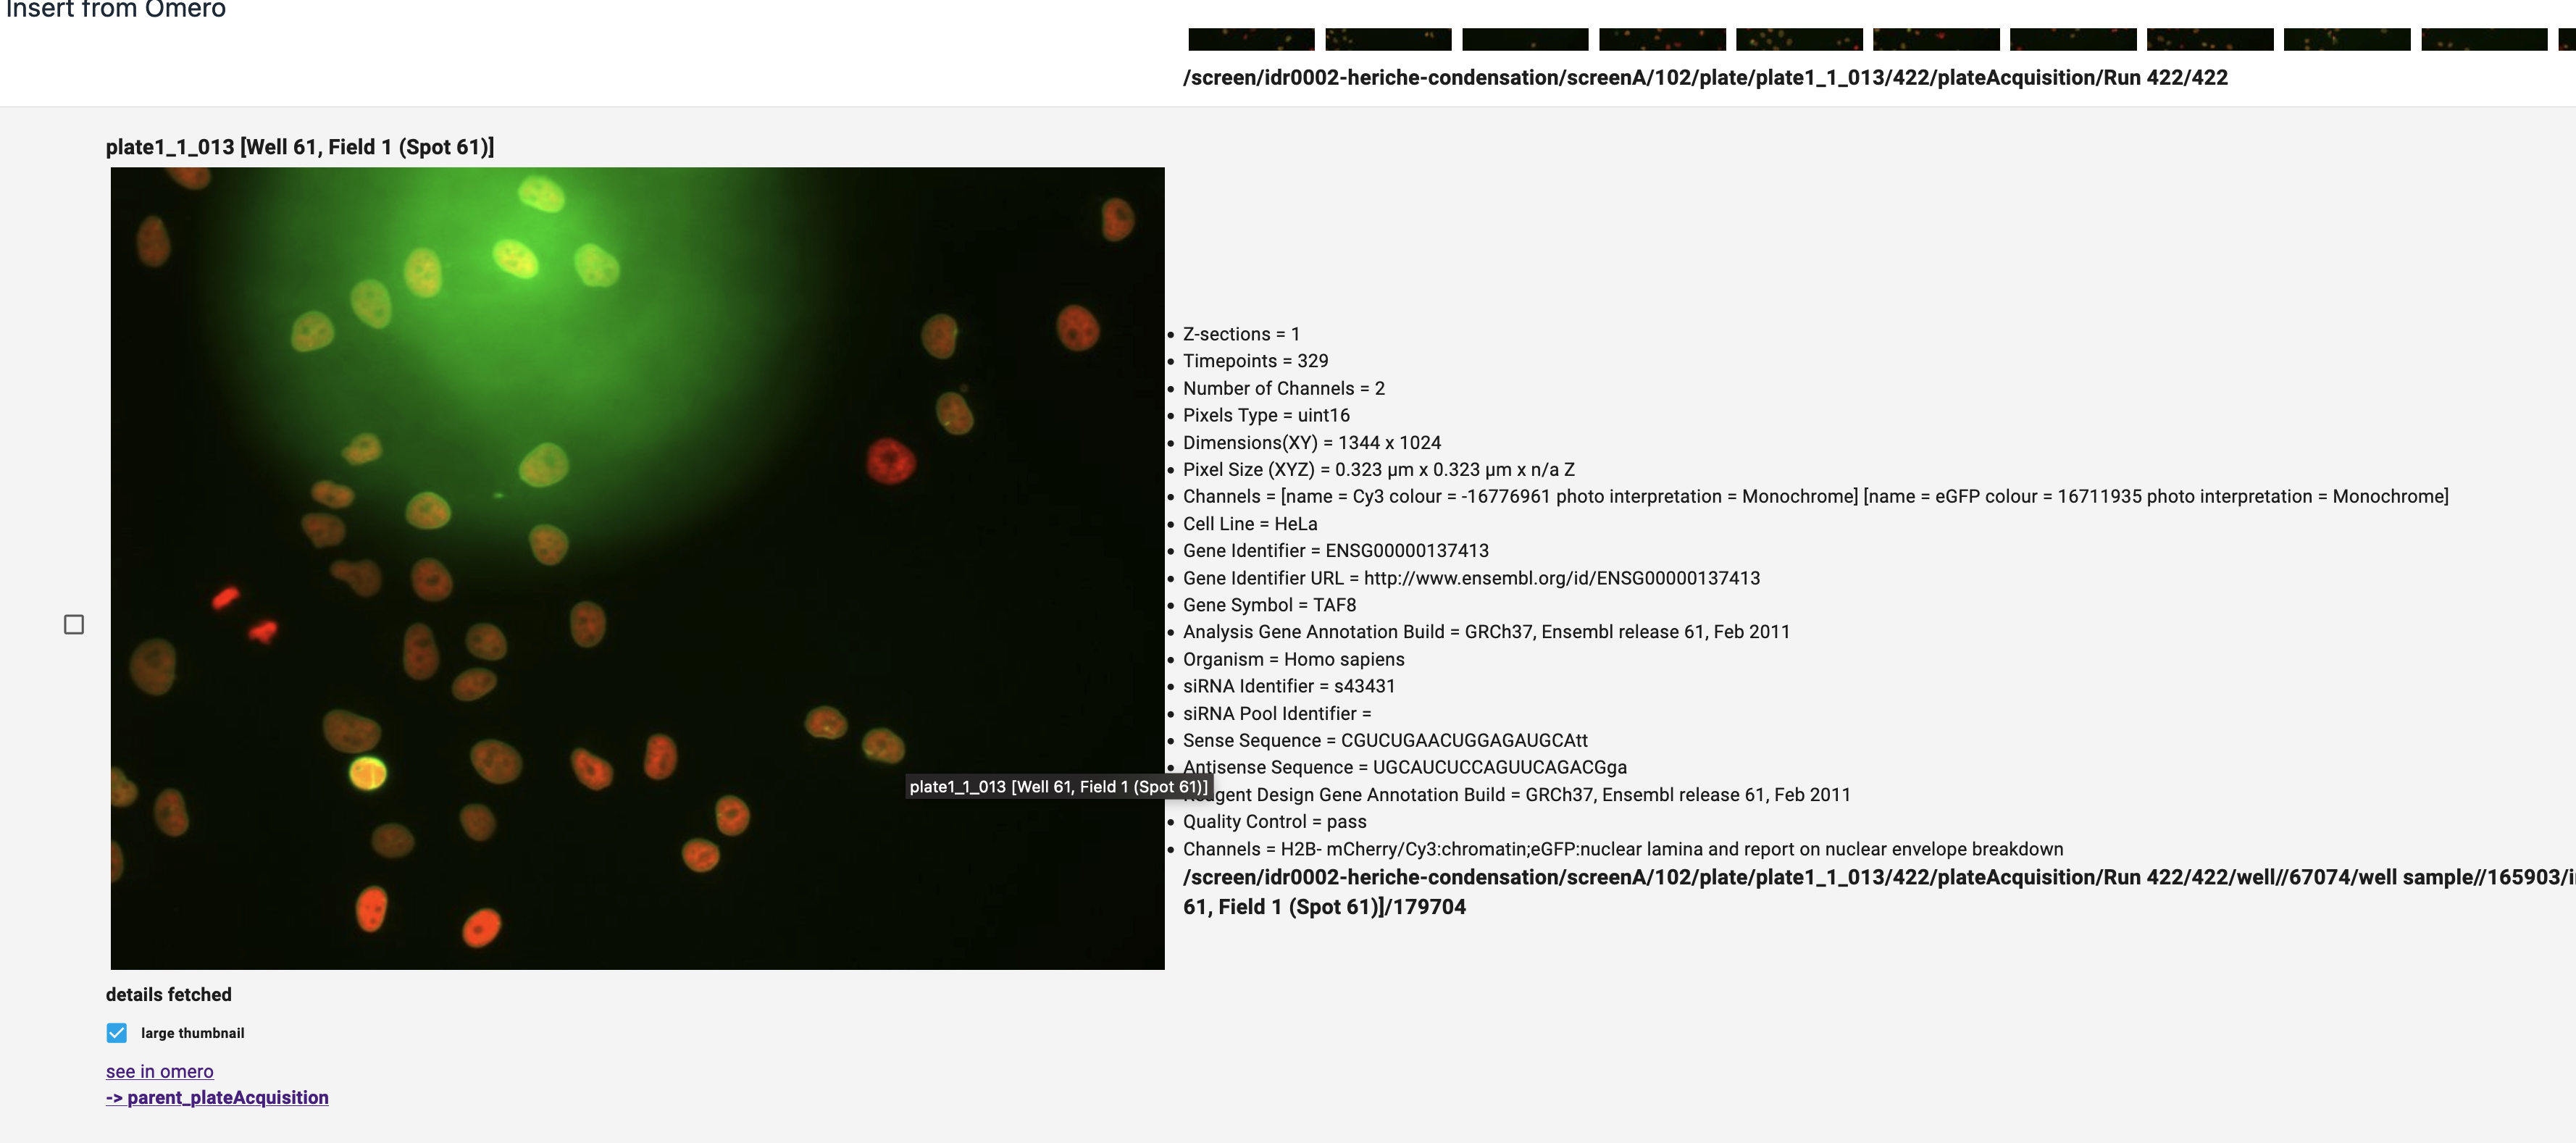
You will now see an extra large thumbnail (see below). If this is inserted into RSpace, vieiwing alongside its description data will require sideways scrolling. You can click on re-draw image again to return to the smaller thumbnail.
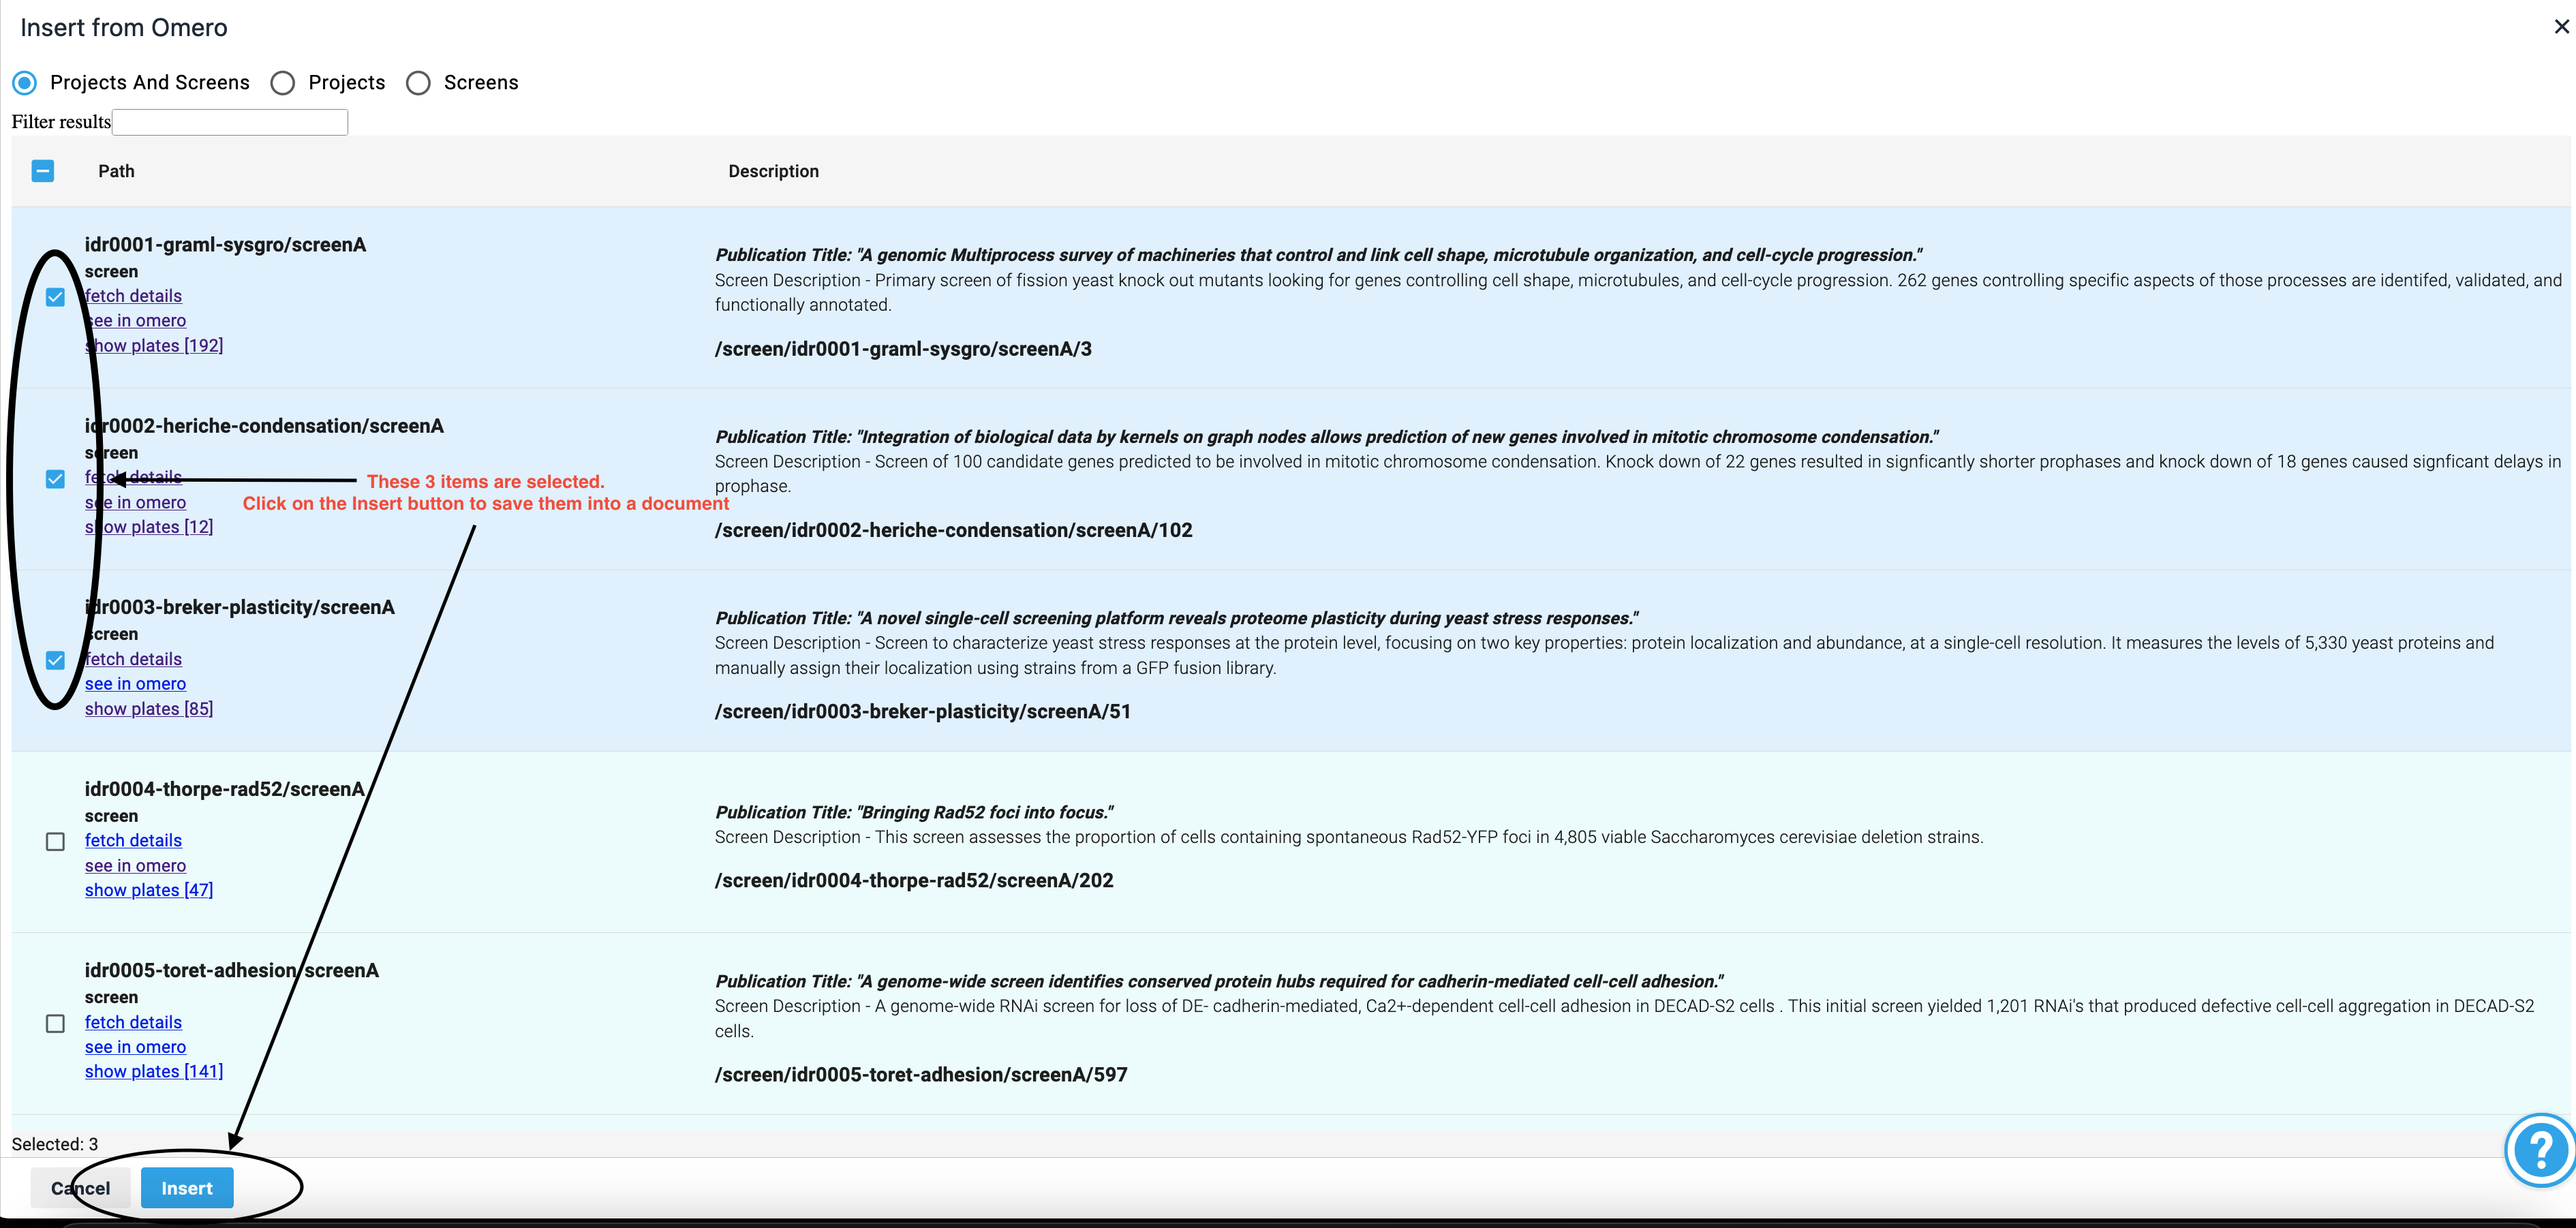
Inserting data into RSpace
Click on the checkbox to the left of any row of data and it will be inserted into RSpace when you next click the 'Insert' button. Clicking on the checkbox at the top left of the page will select ALL data on the page. Entire grids of images are not insertable into RSpace. However, if you chose to 'hide' the grid of images, its associated dataset or plate acquisition will be insertable.
Filtering data on the screen
You can choose to see both Projects and Screens or only Projects or only Screens using the radio selections at the top of the page. You can also choose to filter the data displayed on the screen. Enter text into 'Filter Results' then hit 'return' - only matching rows of data will now be displayed.

Sorting data
Data may be sorted by clicking on the table header at the top of the page - click on either 'path' or 'description'. Sorting is alphabetic.
How did we do?
PyRAT Integration
Embedding Video Content