How to Install RSpace on SURF Research Cloud
Overview. Running RSpace on Research Cloud is ideal for you if you want to experience all the features and benefits of running RSpace in your lab while enjoying easy deployment options in a sovereign…

Overview
Running RSpace on Research Cloud is ideal for you if you want to experience all the features and benefits of running RSpace in your lab while enjoying easy deployment options in a sovereign local cloud:
- Deploy and Update RSpace in a few simple clicks
- Low technical maintenance. The RSpace Team pushes config updates and RSpace updates each time you deploy your Workspace
- The Research Cloud servers are hosted at the SURF data centre in Amsterdam to ensure data sovereignty
Deploying RSpace on SURF Research Cloud is formed of two main steps. You must create your persistent storage volume first, and then create your Workspace (what SURF calls a VM).
Prerequisites
- Before you deploy, ensure that you have SSH keys setup with your SURF Research Cloud account.
- You will need access to SURF Research Cloud with billing/credits setup. Contact SURF Service Desk if you require a Research Cloud account.
Step 1: Create a storage volume
Start the storage creation
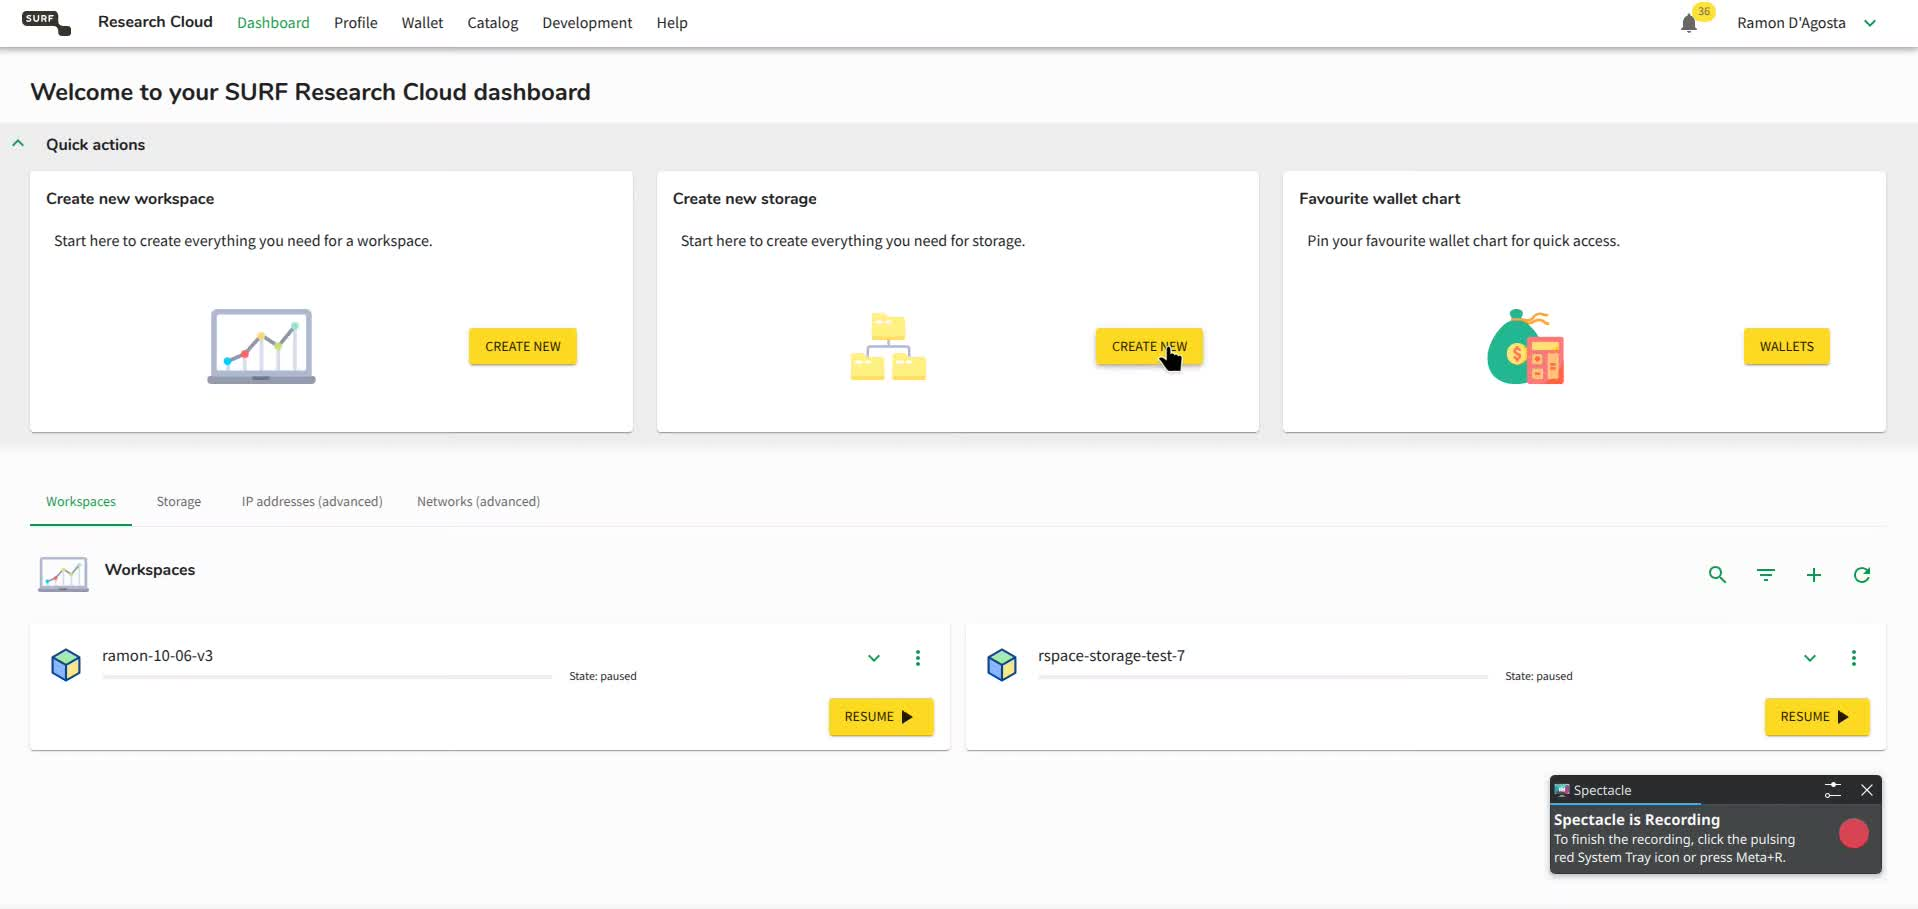
On the Dashboard, click CREATE NEW in the "Create new storage" card.
Pick your cloud provider and size
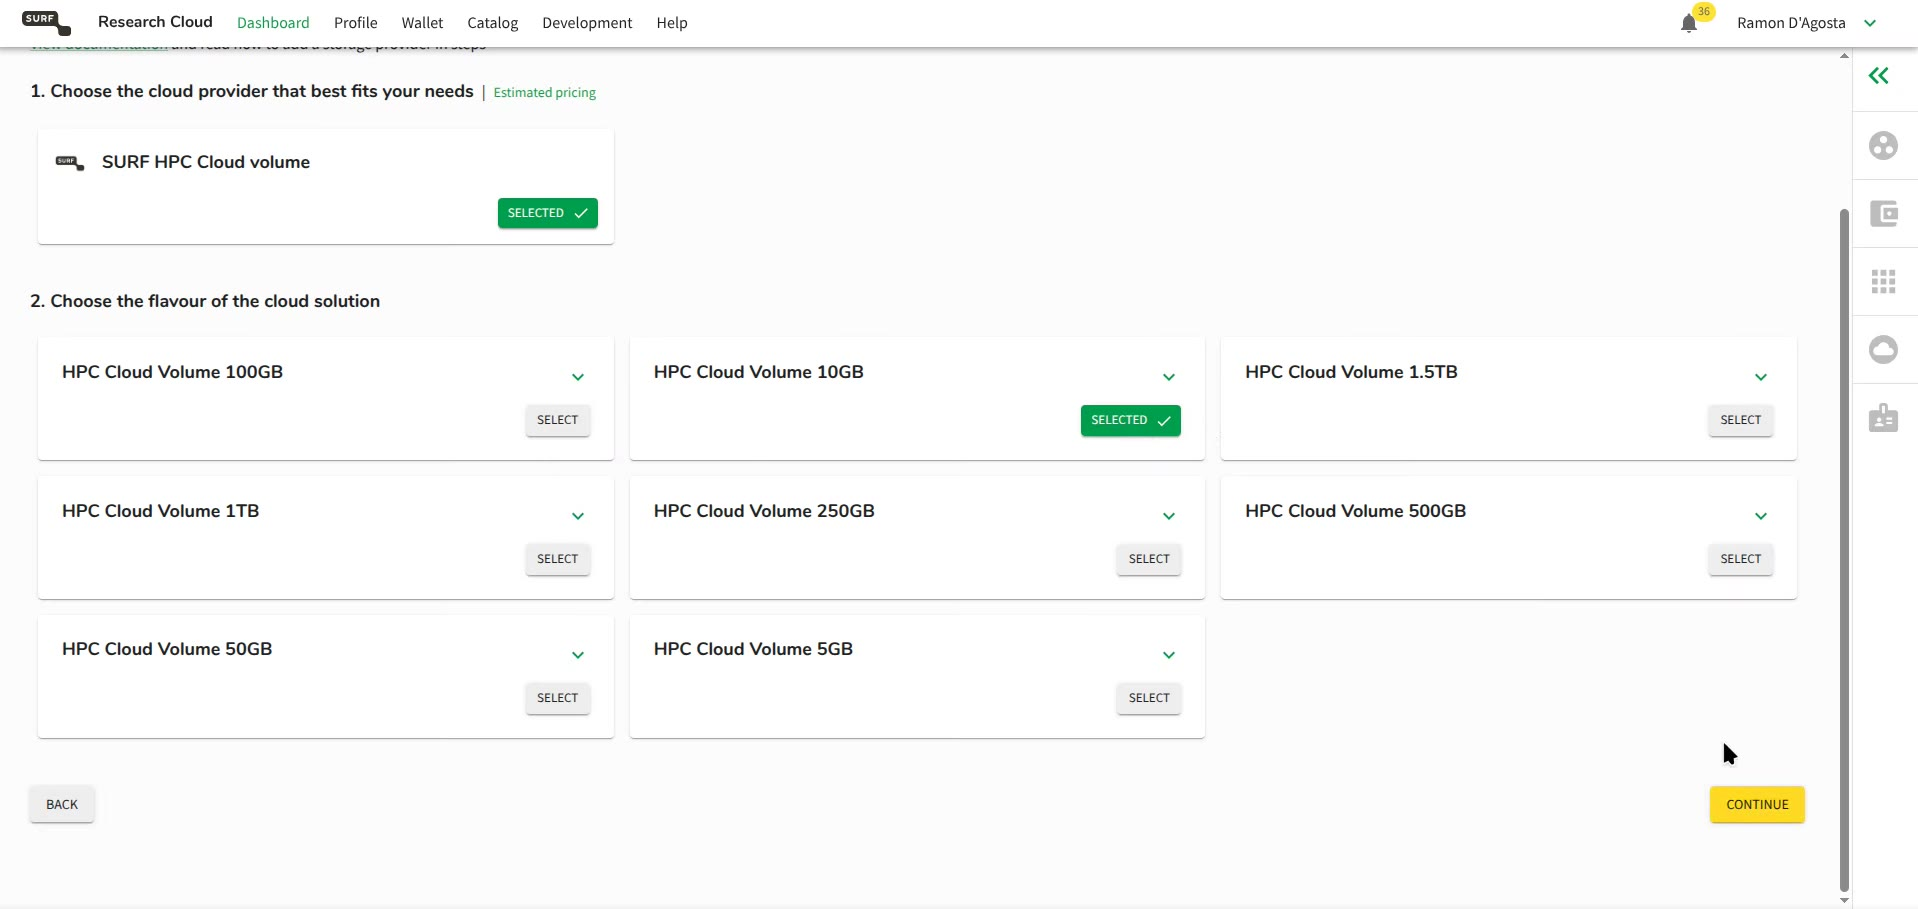
Select SURF HPC Cloud volume as the provider. Then choose your storage size. For most RSpace setups 50GB is a reasonable starting point; for this demo, we'll be testing with 10GB.
Click CONTINUE when done.
Give the volume a name
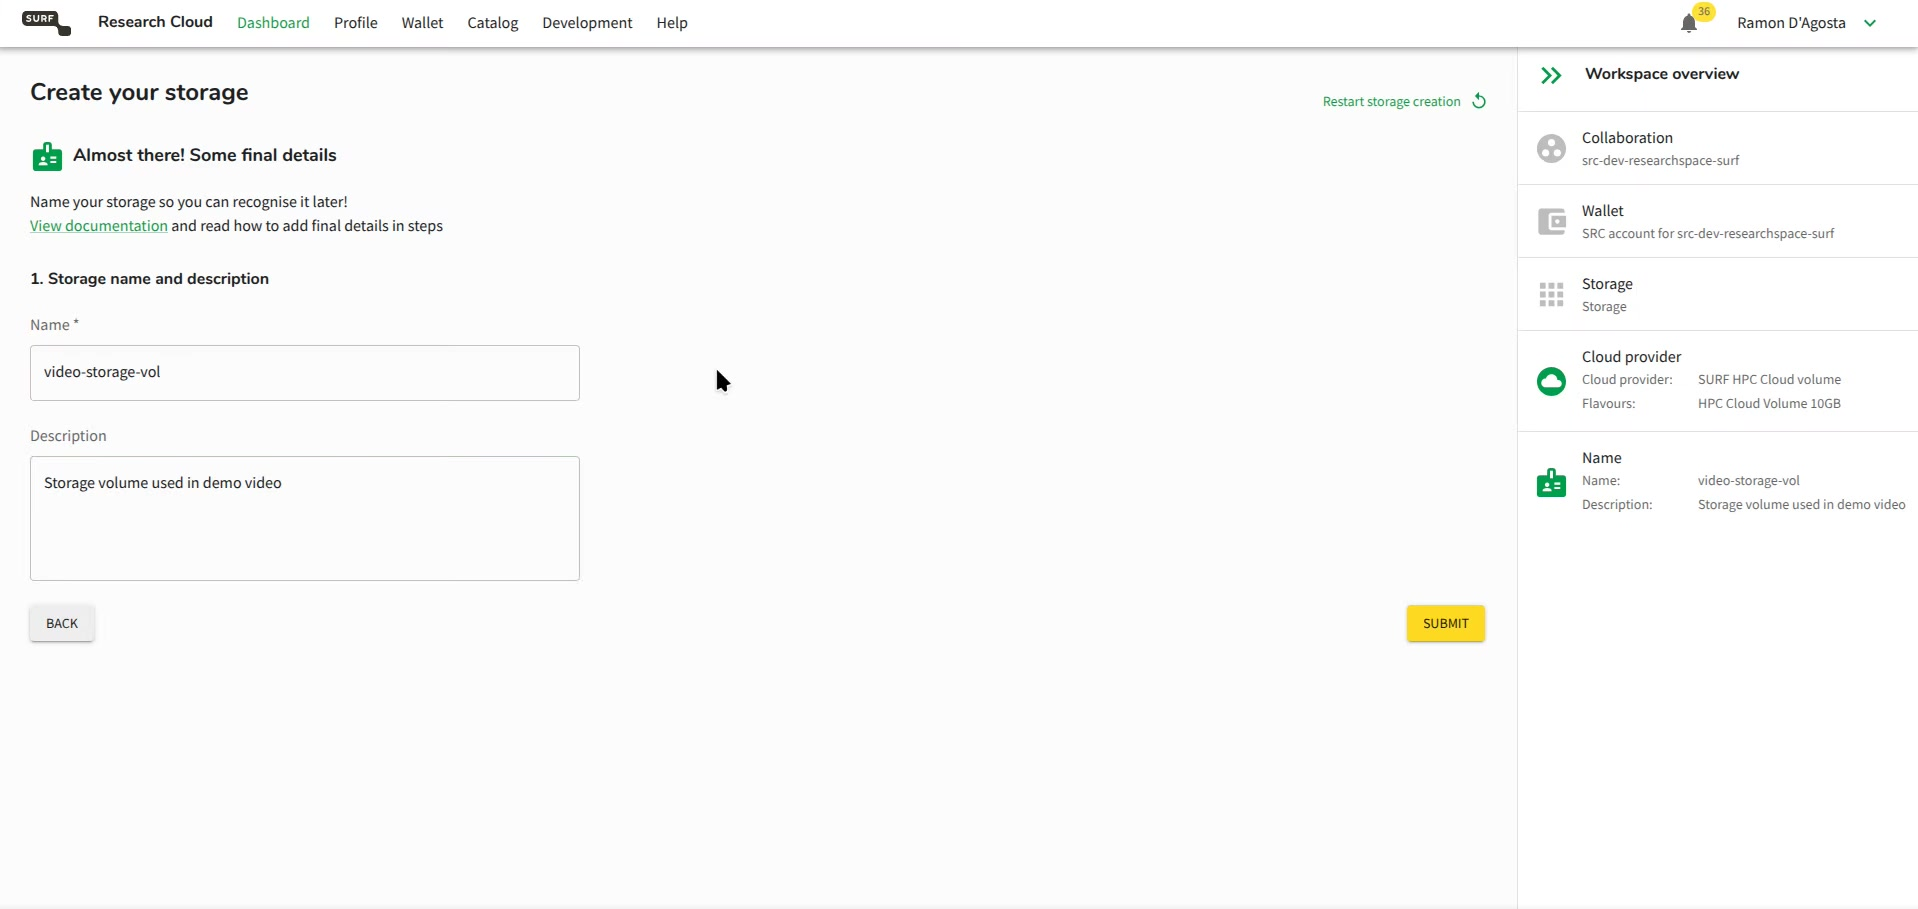
Enter a name you will remember, something like rspace-storage . (For the demo we'll be using the name video-storage-vol). Keep it simple because you will need to reference this later, then click SUBMIT.
Wait for it to be ready
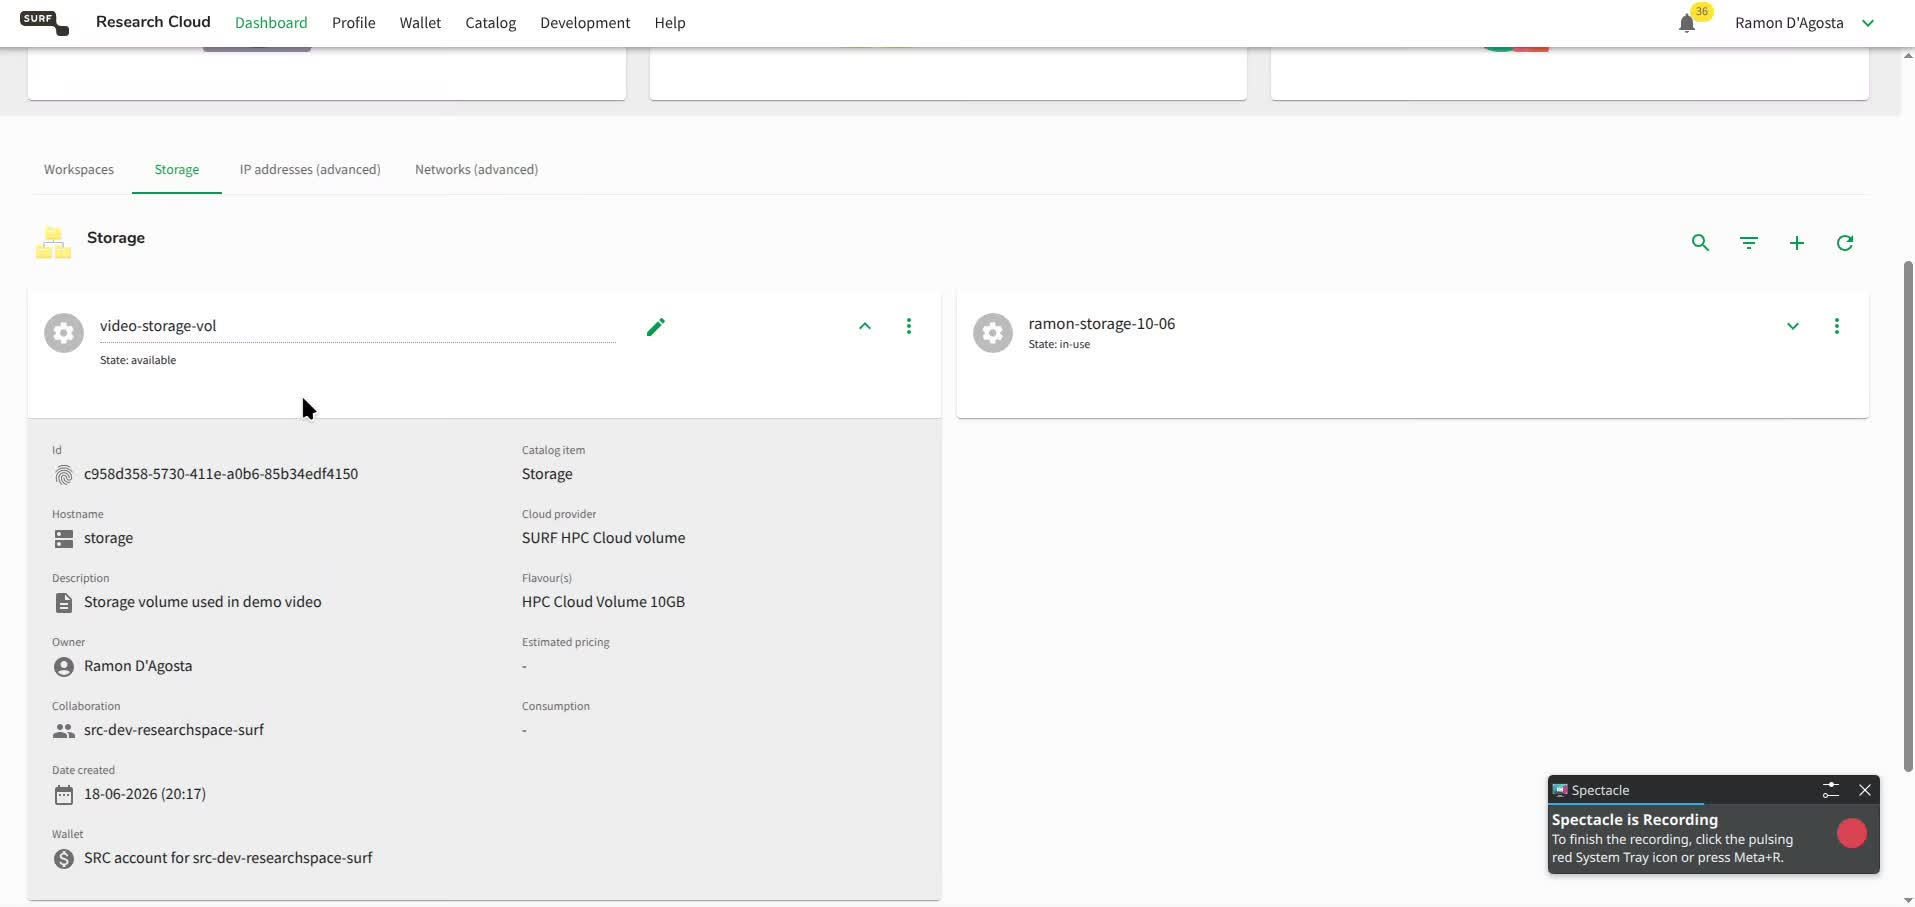
You will be redirected back to your Dashboard. Click the Storage tab and you should see your new volume sitting at State: creating. Give it a few minutes until it switches to State: available.
Step 2: Deploy RSpace
Start a new workspace
Back on the Dashboard, click CREATE NEW under "Create new workspace". The page will load a list of catalog items.
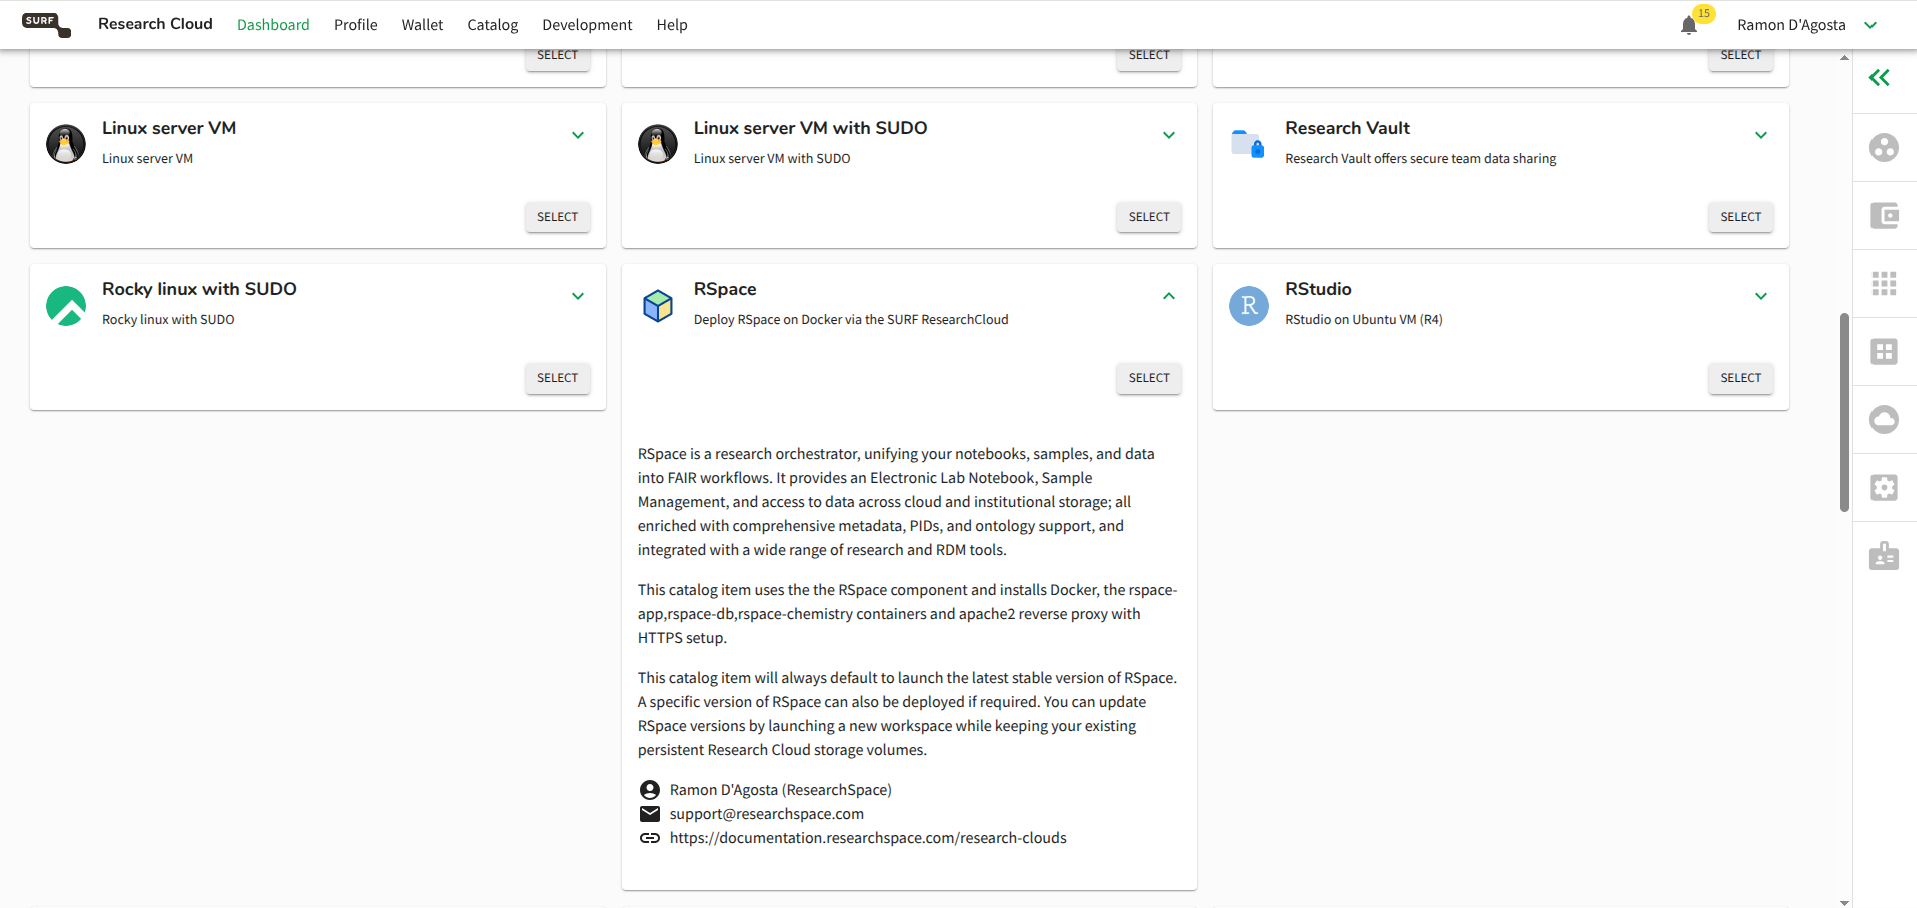
Choose RSpace from the list
Scroll down to find RSpace and hit SELECT.
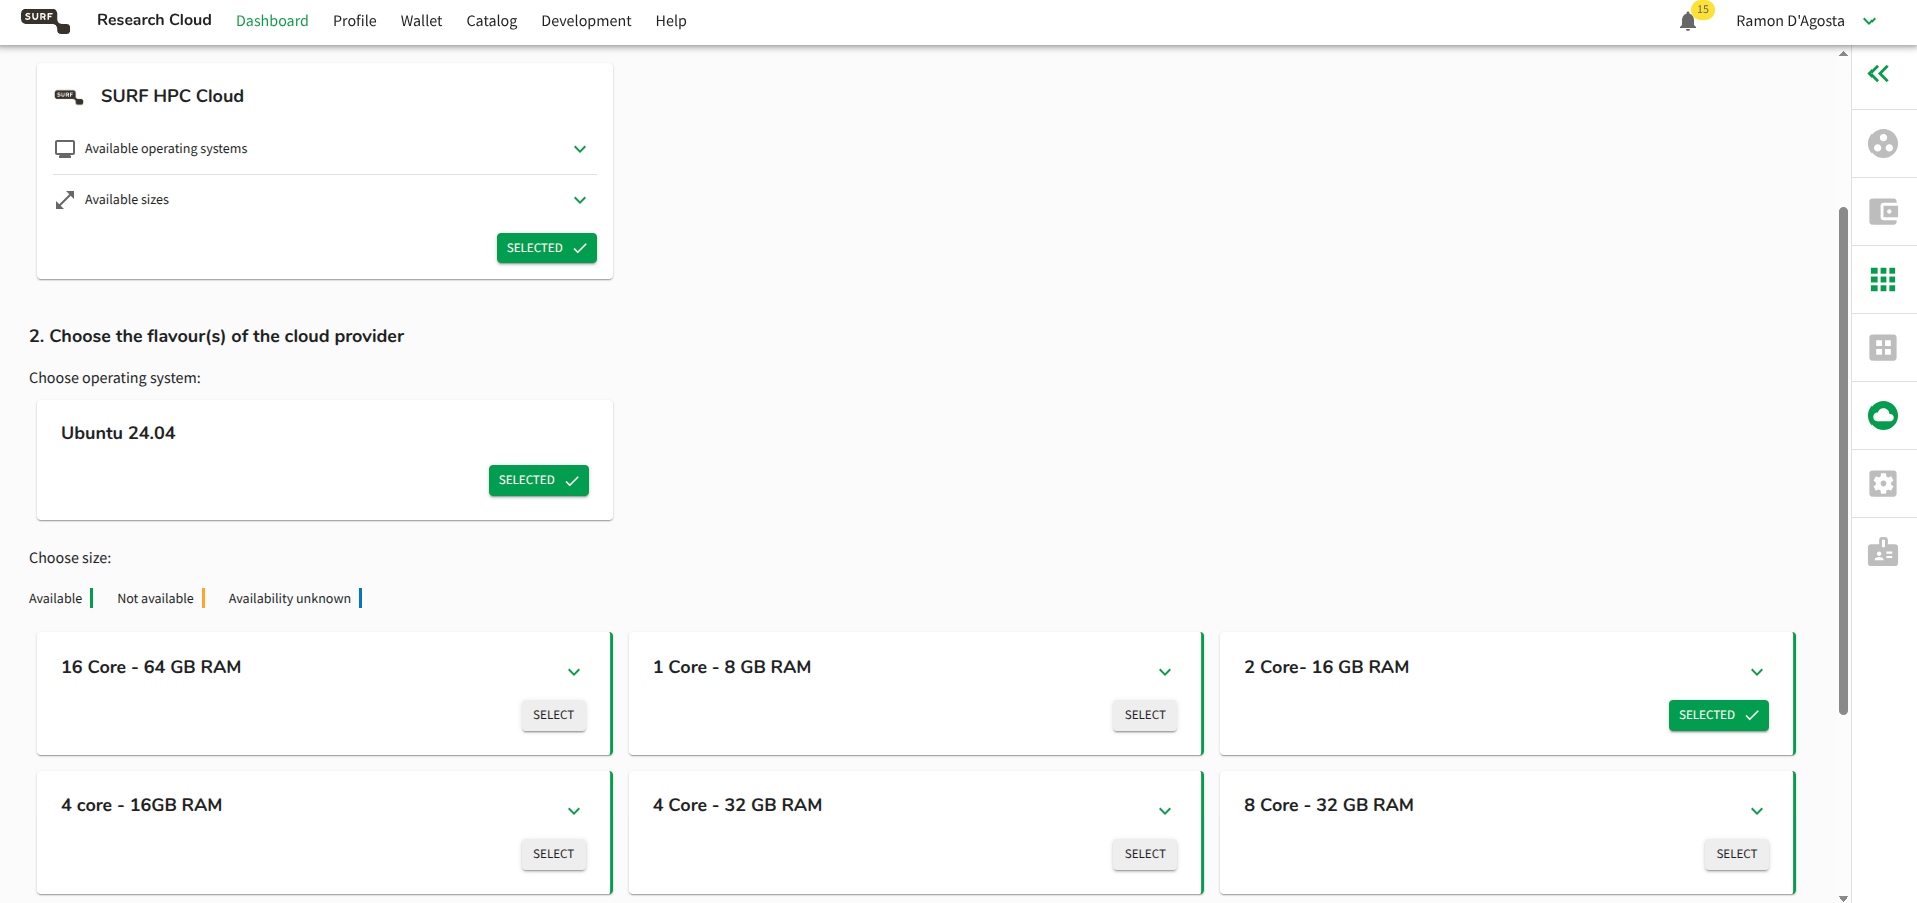
Choose your cloud provider and VM size
SURF HPC Cloud and Ubuntu 24.04 will be pre-selected. For the VM size, 2 Core - 16 GB RAM works fine for most uses. If you are expecting heavy load, pick something larger. Click CONTINUE.
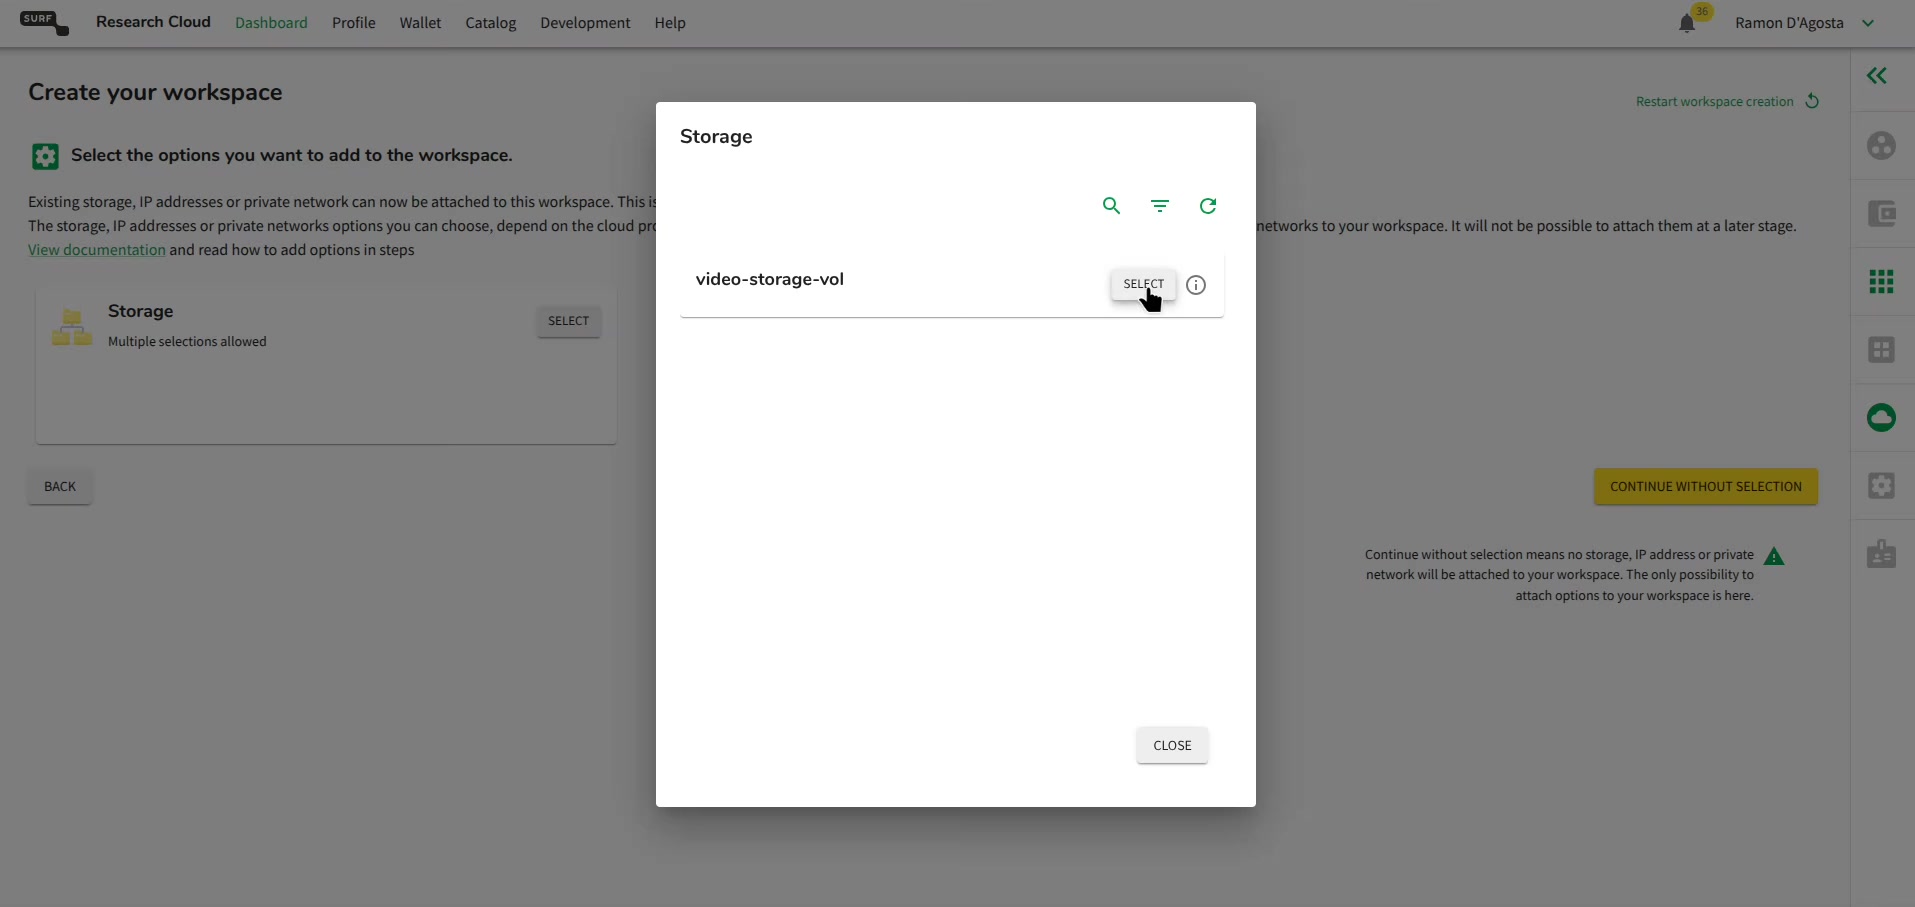
Attach your storage volume
Click SELECT next to the Storage option. A small dialog will pop up showing your available volumes. Find the one you just created and click SELECT next to it. The dialog will close and the volume name will appear in the summary panel on the right.
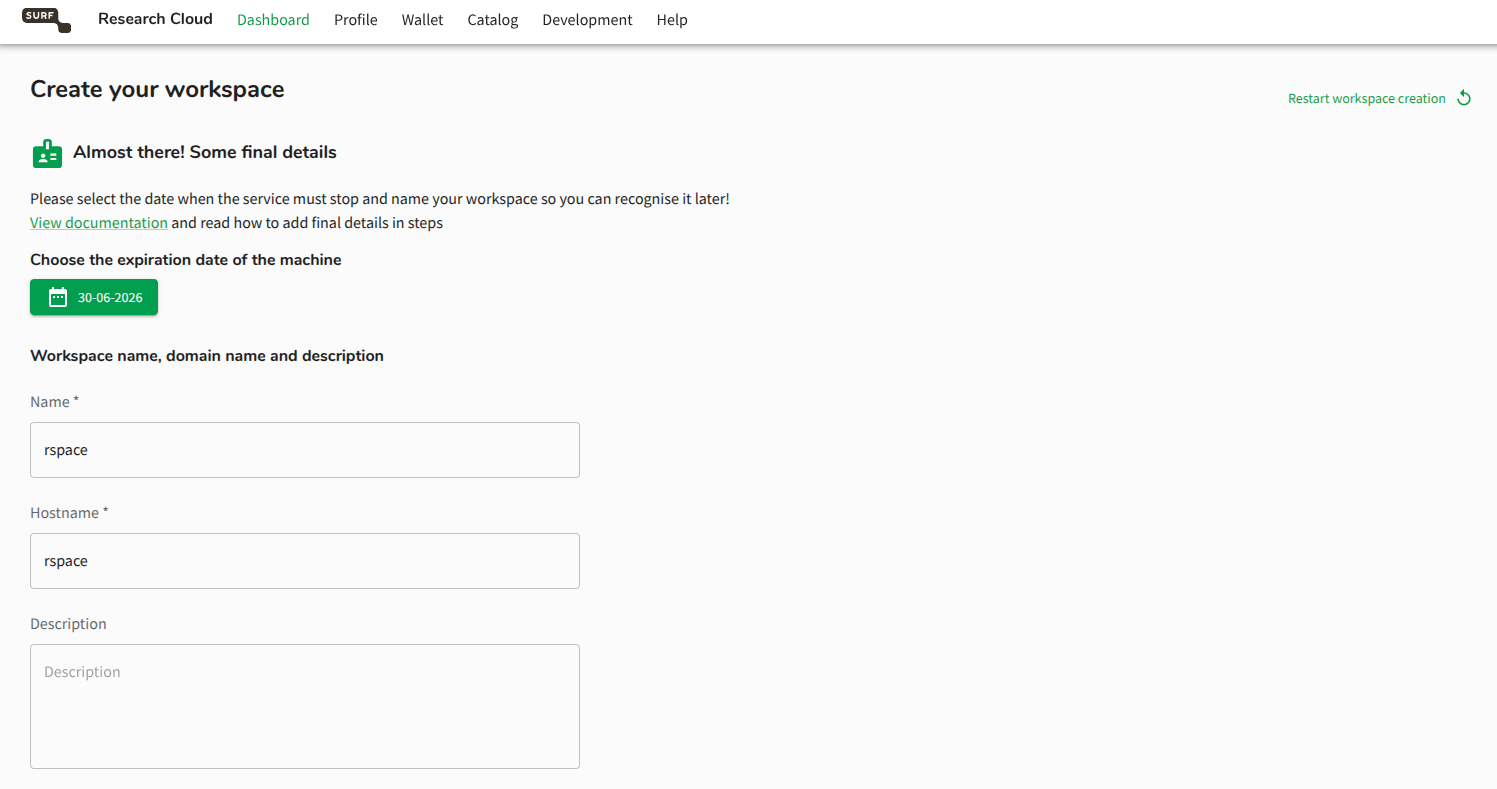
Fill in the final details
Set an expiration date for the workspace (it will automatically shut down on this date - If you plan to use RSpace for a while, set this as a date 1 or 2 years in advance). Give it a name and a hostname, both without spaces. You can use hyphens in the name, but not in the hostname.
Scroll down a little and you will see a Workspace parameters section with a warning box. There is one required field: Enter storage volume name. Type in the exact name of the volume you created in Step 1. It has to match exactly, so copy it carefully.
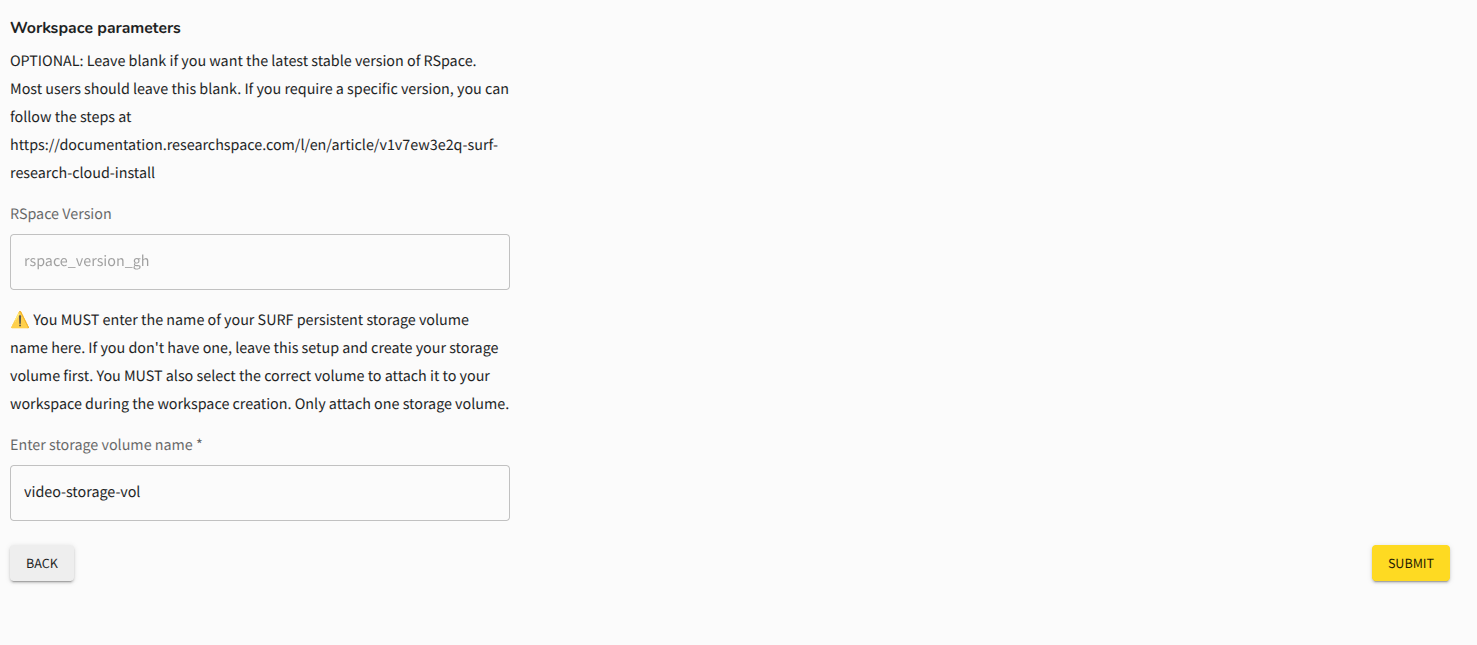
There is also an option to deploy a specific version of RSpace. This is optional and by default you will always fetch the latest stable version of RSpace when deploying RSpace on SURF Research Cloud, however there are cases where you might want to run a specific version. In this case, go to our GitHub Releases area and find the version number you want. Enter the version number in the box following the format: 2.19.0 (numbers and dots only).
Before clicking Submit, check the summary panel on the right. It should show:
- Catalog item: RSpace
- Cloud provider: SURF HPC Cloud, Ubuntu 24.04, your chosen size
- Options: your storage volume name
- Your workspace name, hostname, and expiration date
If everything looks right, click SUBMIT.
Wait for the workspace to come up
You will be redirected back to the Dashboard. Your new workspace will appear under the Workspaces tab showing State: creating. Give it a few minutes. Once it is running, you can access RSpace. It usually takes 5-10 minutes for the Workspace to boot up.
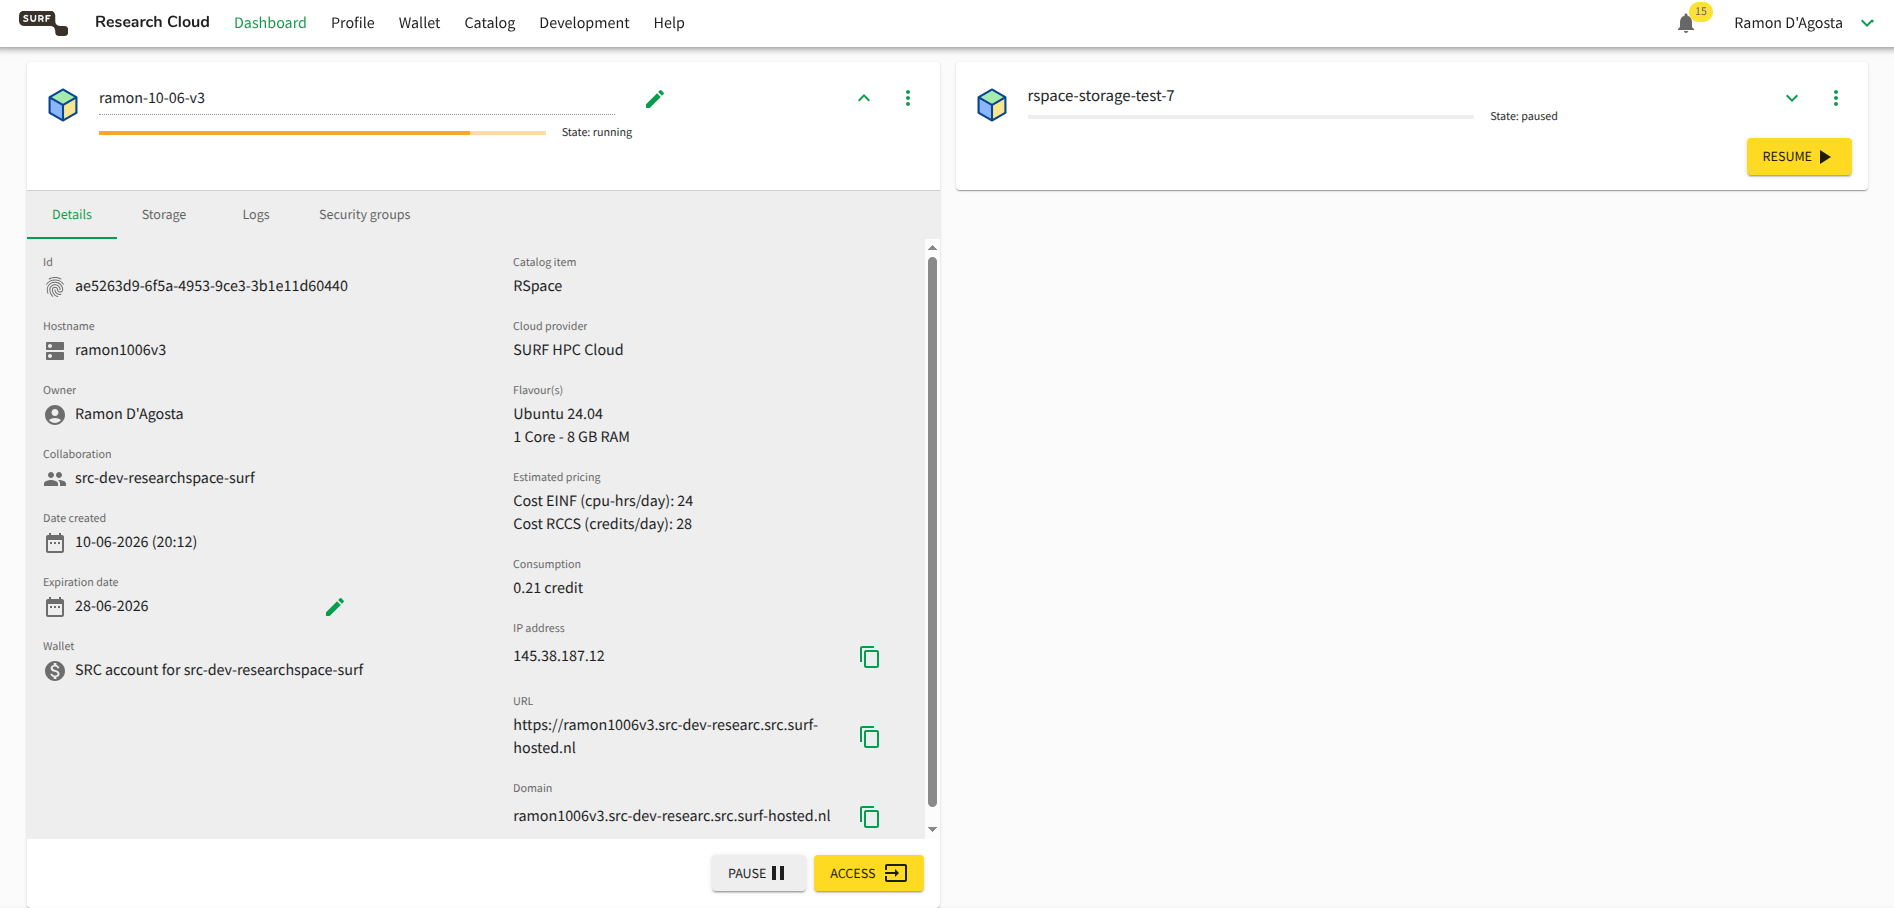
You will see an ACCESS button, if you click that, it will take you to the RSpace login page in a new tab.
- For SSO servers: You will be redirected to the signup page. Your username will be pre-filled from SURF SRAM. You can enter your preferred first/last name and the email address you'd like to be tied to your account
- For standalone servers: You can log into RSpace using the default sysadmin credentials found here. Change the password as soon as you login.
If you click the drop down, you will see details about your VM, like the hostname, IP address and SSH details. If your instance fails to boot up, you can download the detailed logs for your Workspace.
If you have any questions about this guide, please email support@researchspace.com!
How did we do?
How to Update RSpace on SURF Research Cloud