Creating a New LabGroup on the Community Edition server
In RSpace Community , anyone can create a group and self-assign or delegate the PI role to a user. In RSpace Team and RSpace Enterprise , the SysAdmin needs to create or assign a PI to a group. LabGr…
LabGroups can be created to bring together users and their documents in order to promote collaboration and facillitate controlled data access. LabGroups are created with a single PI (Principal Investigator) who can view the work of individual group members and organise the group's shared work. You can read more about LabGroups here.
• Users can belong to a single LabGroup or many LabGroups. PIs may lead a single LabGroup, or may lead many LabGroups
• You can create LabGroups that are arranged as a flat list of non-intersecting sets of users, or concentric nested subgroups, or more complex Venn diagrams. Clever arrangement of LabGroups allows organizations to control access to data very precisely.
• LabGroups can represent permanent associations of scientists who always work together, with shared work organised using folders, or may represent temporary groupings associated with short-term projects.
• Some adjustments to LabGroups can only be performed by the RSpace System Admin. On the Community Edition server, ResearchSpace support serves as the System Admin, and can perform these types of adjustments for you. Contact support@researchspace.com if you need assistance.
Creating a Group
In RSpace Team and RSpace Enterprise Editions, PIs are designated by the System Admin and LabGroups are either created by and managed by the System Admin, or the System Admin can grant PIs the ability make new LabGroups.
In the Community Edition, every user has an option to create a group and nominate PIs and an existing LabGroup PI can create groups with themselves or someone else as PI. To create a new LabGroup on the Community Edition server follow these steps:
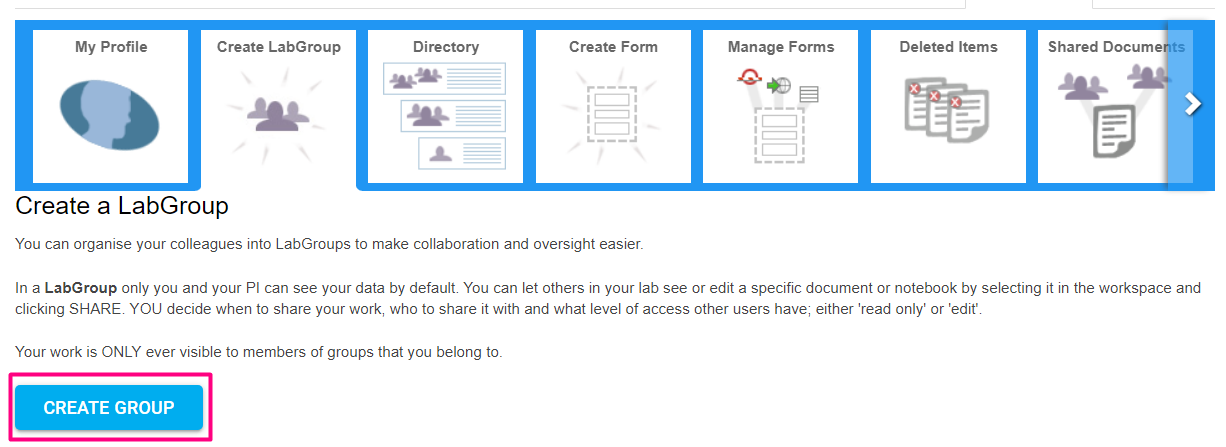
- Navigate to the My RSpace tab

- Click on Create LabGroup

- Click on Create Group
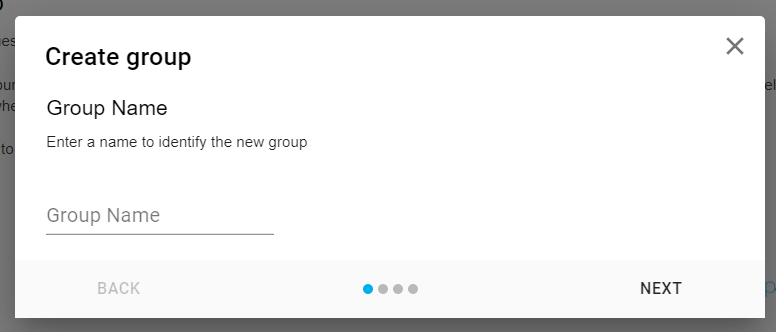
- Choose a descriptive name for the group, then click on Next
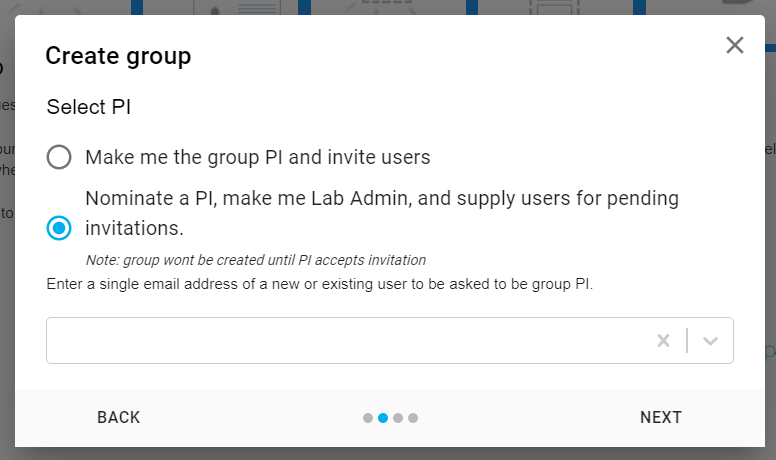
- Next, select whether to make yourself PI or to nominate someone else, then click on Next. Any group created will require a PI as a point of contact and basic administration purposes. For more information about LabGroups and roles, see LabGroups.
Creating a new LabGroup with yourself as PI will instantly generate a group on the system and contact anyone you have chosen to invite to be group members by email (both registered RSpace users and/or external addresses can be contacted).
If nominating someone else as PI, enter the e-mail of the individual you wish to invite as PI into the box which appears – RSpace autocomplete will offer options of known users as you type, or you can enter the full address of any other non-registered individual (they will be asked to sign up to RSpace before becoming a PI). You will become a LabAdmin for this group.Please note that if selecting someone else as a PI, the group will not be created and invitations to potential members will not be sent until the PI approves the group.
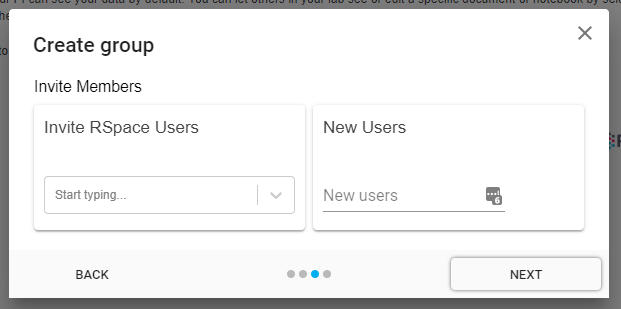
- Add emails to the invitations list to invite members when the LabGroup is created. Entries in the known users box will be autocompleted, and non-registered users can also be invited by typing and entering in the second box. Further users can also be invited any time after the creation process is completed.
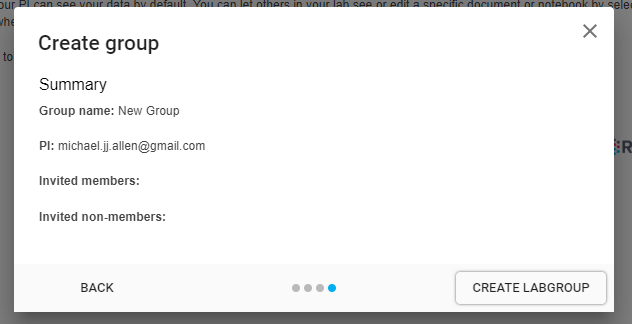
- The final page will display a summary. You can still go back at this stage and change details. After you have reviewed you can then click Create LabGroup to complete the process.
- You will be notified that your new group has been created. You can then either create another group, or review the newly created group within the My LabGroups section (My RSpace > My LabGroups).

How did we do?
Collaboration Groups
PI-created "self-service" LabGroups