LabGroups
Overview
Groups can be used to bring together users and their documents. Being in a LabGroup enhances collaboration, through instant sharing of documents with the whole group, or easily accessing individuals in your group.
There are three types of Groups in RSpace:
LabGroups
Discussed below, LabGroups are the most common type of group, especially in Universities. They can be created for any subset of users, by the sysadmin, or, if your server policies allow it, by PIs. A LabGroup must always have a single primary PI (Principal Investigator) who it is assumed is in charge of and overseeing the group's work. In a LabGroup, the PI can automatically see all the work of all the members, except for work of group members who also happen to have the rank of PI in other LabGroups. This professional courtesy allows one PI to be a guest or visitor in another lab without the PIs seeing each other's work. LabGroups can use autosharing to make all members' work accessible to the group and autosharing can be turned on by individuals, or group-wide by the PI.
Collaboration Groups
Collaboration Groups are generally used for formal collaboration between members of two or more different LabGroups with full knowledge and consent of all involved PIs. This group allows fusion of the two groups for close collaboration beetween tehm. Only work shared with the group is visible to all members.
Project Groups
Project Groups, if allowed on your server, allow for more ad-hoc sharing between two or more users, without necessarily involving any PI. Only work shared with the group is visible to all members. Unshared work in each user's workspace cannot be seen by project group members. Project groups do not support autosharing. Members' PIs are not necessarily aware of what has or has not been shared into project groups.
LabGroup Features
- In RSpace, access to documents and notebooks is controlled by Group membership. If you don't belong to any Groups, you cannot share anything with anyone, nobody can see your data, and the "Share" button will not appear in your toolbar.
- Users can belong to a single LabGroup or to many LabGroups. PIs may lead a single LabGroup, or may lead many LabGroups.
- Although a LabGroup can include several users with the role of PI, each LabGroup can only be led by a single PI. If your LabGroup needs more than one main administrator, the PI can promote other users to "LabAdmin with view all permission" also called a senior LabAdmin. The Senior LabAdmins have almost all the same capabilities as the PI.
- Your organization can create LabGroups that are arranged as a flat list of non-intersecting sets of users, or concentric nested subgroups, or more complex Venn diagrams. Arrangement of LabGroups allows organizations to control access to data very precisely.
- Your server can be configured to allow ONLY the System Admin to create new LabGroups or the server can be configured to allow PIs to make new LabGroups without assistance from the System Admin.
- LabGroups can represent permanent associations of scientists who always work together, or they may also represent temporary groupings associated with short-term projects and temporary collaborations. LabGroups can be easily created and dispanded by the System Admin. You can read about various scenarios for controling data access and segregating data into various types of projects using different types of groups here.
- The PI can see a list of LabGroups they lead in My RSpace > My LabGroups. PIs can manage group membership, invitations, roles and certain groups settings in that area too.
LabGroup Roles
Every group member can have one of three roles:
- PIs have permission to view all documents owned by members of the group and may administer the group’s membership. A PI can create Lab Admins, and therefore delegate some administrative responsibility to other members of their LabGroup. See The PI Role for more.
- Lab Admins have permission to administer the group (e.g., add/remove group members), but do not by default have the ability to view all content pertaining to the group. A Lab Admin can be promoted to Lab Admin with view all permission (also called a Senior Lab Admin). Senior Lab Admins have most of the capabilities of the official PI. See The Lab Admin Role for more details.
- Users do not have permissions to view documents (unless explicitly shared) or administer the group's membership.
A PI of a LabGroup can also:
- Be a standard user or Lab Admin in other groups they belong to.
- Become PI of more than one group or create new Groups if your server configuration allows it.
- Initiate Collaboration Groups in conjunction with other PIs.
- Turn certain features on or off for LabGroups they lead.
Creating a New Labgroup
There are several ways to create LabGroups depending on the server you are using and how it has been configured. For an overview from the System Admin's perspective see here.
Viewing a LabGroup
Users can easily see information on the members of their LabGroup, group activity, as well as pending invitations and disabled accounts.
If you're a PI, you can view the LabGroup page by going into My RSpace > My LabGroups:

If you are a member of a LabGroup, you can view the LabGroup page by going to My RSpace > My Profile, and clicking on the relevant group name under LabGroups:

You can switch which LabGroup you are viewing by using Change Group on the right-hand side.

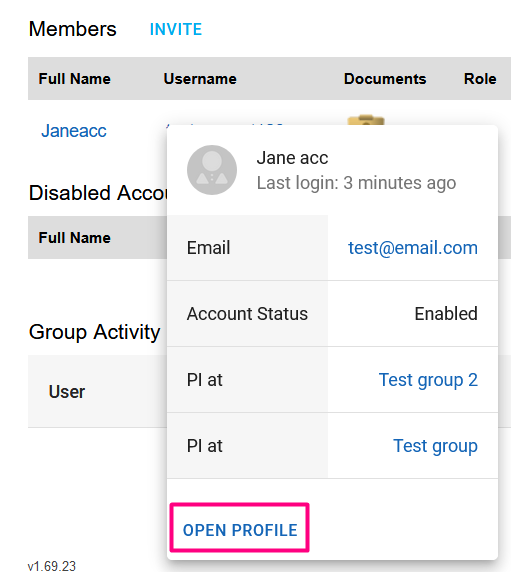
In the Member's area, you can open a miniprofile by clicking on a user's full name or username. You can then click on Open Profile to view more detailed information about that user.

Managing a LabGroup
The LabGroup page is where:
- Users can leave the group (if on Community) or PIs can remove users (if on Team or Enterprise)
- PIs can change user roles, view user's work (by clicking on the folder icon next to a user's username), and edit the LabGroup's information. Note that if a user in the LabGroup is a PI of a different group, the PI will not be able to browse that user's documents, to increase privacy.
- PIs can export an individual user's or the entire LabGroup's work by following Exporting a LabGroup’s Work

Group Management Permissions Table
The following table summarizes the roles needed to perform various group management actions:
Function / Role | User | Lab Admin | PI |
Add and remove users from their group | Y | Y | |
Alter roles of people within their group | Y | Y | |
Organise content that is shared within the group | Y | Y | |
View content created by group members | (Y)* | Y | |
Create collaboration groups with other PIs | Y | ||
View and search the audit trail for work performed by group members | Y | ||
Export and archive the group’s work | Y |
*if enabled by PI during LabAdmin assignment, see The Lab Admin Role.
Add New Members to a LabGroup
There are two ways that new users can join a LabGroup:
- A Principal investigator can invite a registered RSpace user to join.
- A system admin can add a user to a specified group.
Principal Investigators can invite new members by:
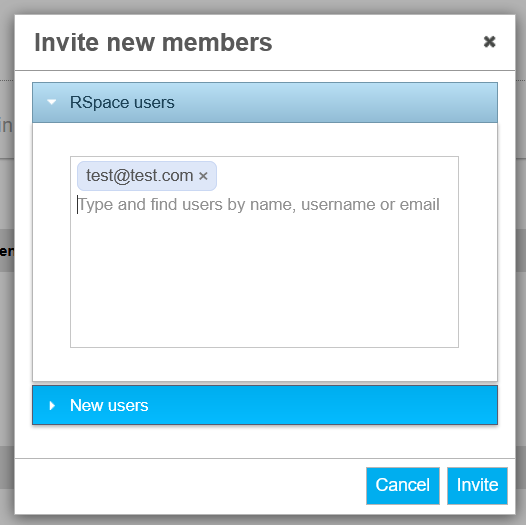
- Clicking on Invite next to Members in My RSpace > My LabGroups:

- Type in the names, usernames or emails of users you want to invite and click on the autocomplete suggestions to add them to the list. You can also invite non-RSpace users in the New Users list using their email address, if using RSpace Community. Clicking Invite will send the invitation to all users added to either list; you will be able to see pending invitations on the LabGroup page.

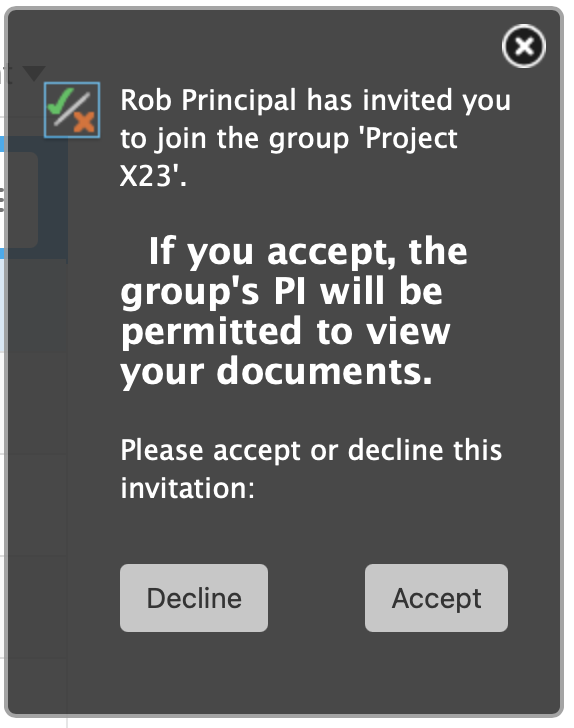
The new users will receive an alert email but will still need to log in to RSpace and click "accept" in the popup notification in order to join the LabGroup.

New group members automatically have access to the content of the shared LabGroup folder. The PI will be able to see the new member's workspace and gallery as soon as they accept the invitation.
Leaving or Removing a User from a LabGroup
In RSpace Community, a user can remove themselves from a Group, by going into My RSpace > My LabGroups > Leave Group:

In RSpace Team and Enterprise, the PI or LabAdmin needs to remove the user by going into My RSpace > My LabGroups and using Remove User action in the Members list:

Sharing with a LabGroup
Sharing is explained in Sharing Content; if you select Share with Group you will be able to choose which LabGroup to share your document(s) with. Working with shared content is explained in Viewing and Organising Shared Group Content. Some examples of sharing, various collaborative workflows, methods for segregating project work, and tips on regulating data ownership and access are discussed here.
