Table of Contents
- Allowing Users to Request Samples
- Finding Samples that can be Requested
- Requesting a Sample
- Cancelling a Sample Request
- Viewing and Responding to Sample Requests
Requesting Samples from Other Users 🧪
RSpace allows users to request the use of samples that belong to other users, for use in their own experiments. As a sample owner you can decide which samples you want to allow other users to request…
Table of Contents
- Allowing Users to Request Samples
- Finding Samples that can be Requested
- Requesting a Sample
- Cancelling a Sample Request
- Viewing and Responding to Sample Requests
- Allowing Users to Request Samples
- Finding Samples that can be Requested
- Requesting a Sample
- Cancelling a Sample Request
- Viewing and Responding to Sample Requests
RSpace allows users to request the use of samples that belong to other users, for use in their own experiments. As a sample owner you can decide which samples you want to allow other users to request, and as a user who needs access to those samples you can send a request to the sample owner.
Allowing Users to Request Samples
Samples cannot be requested by other users by default - they must be explicitly set to allow them to be requested. To do so, navigate to the desired sample, select Edit, go to the Overview > Sample Requests section, set the Requestable toggle to on, and then press Save.
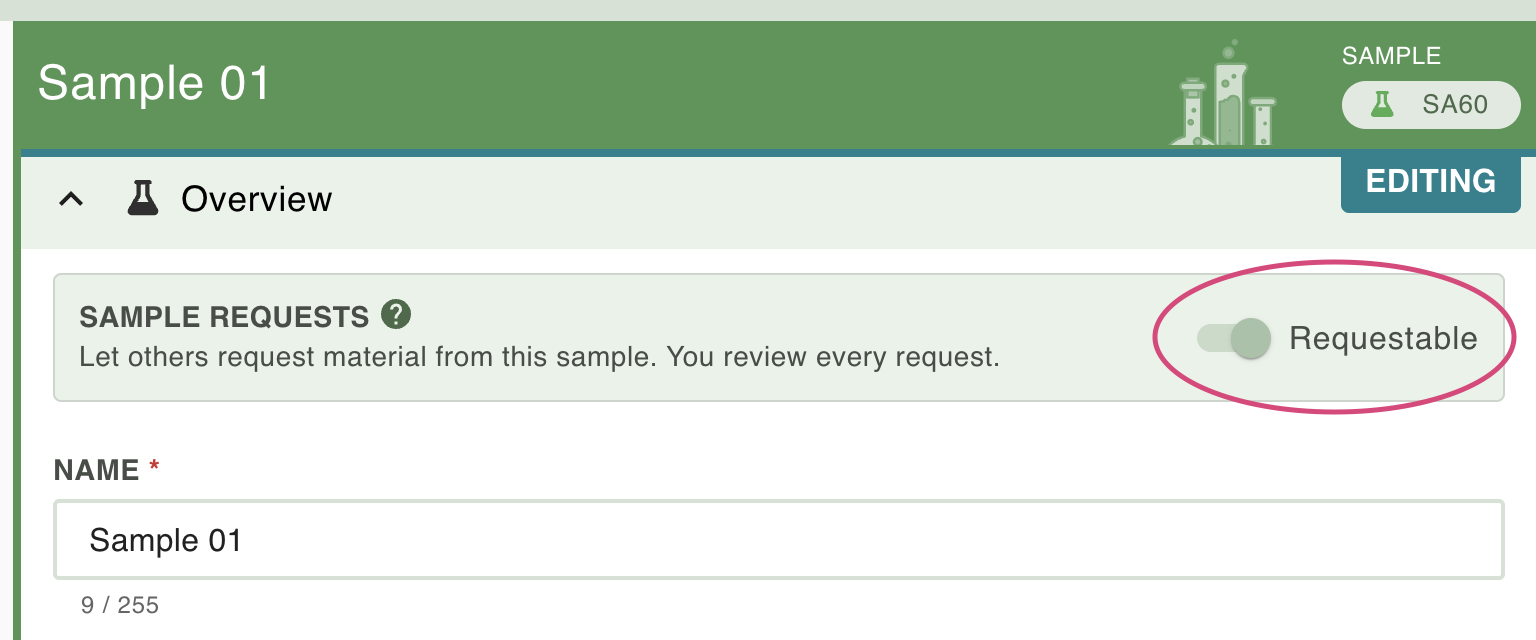
The sample is now requestable by other users. To stop the sample from being requested, simply switch the setting back again.
Finding Samples that can be Requested
If you know the name of the sample that you wish to request then you can find it as you would normally find samples. In order to browse all available requestable samples, go to the Samples section in the Inventory, go to the search and from the available search settings select the Requestable dropdown and select Requestable only.
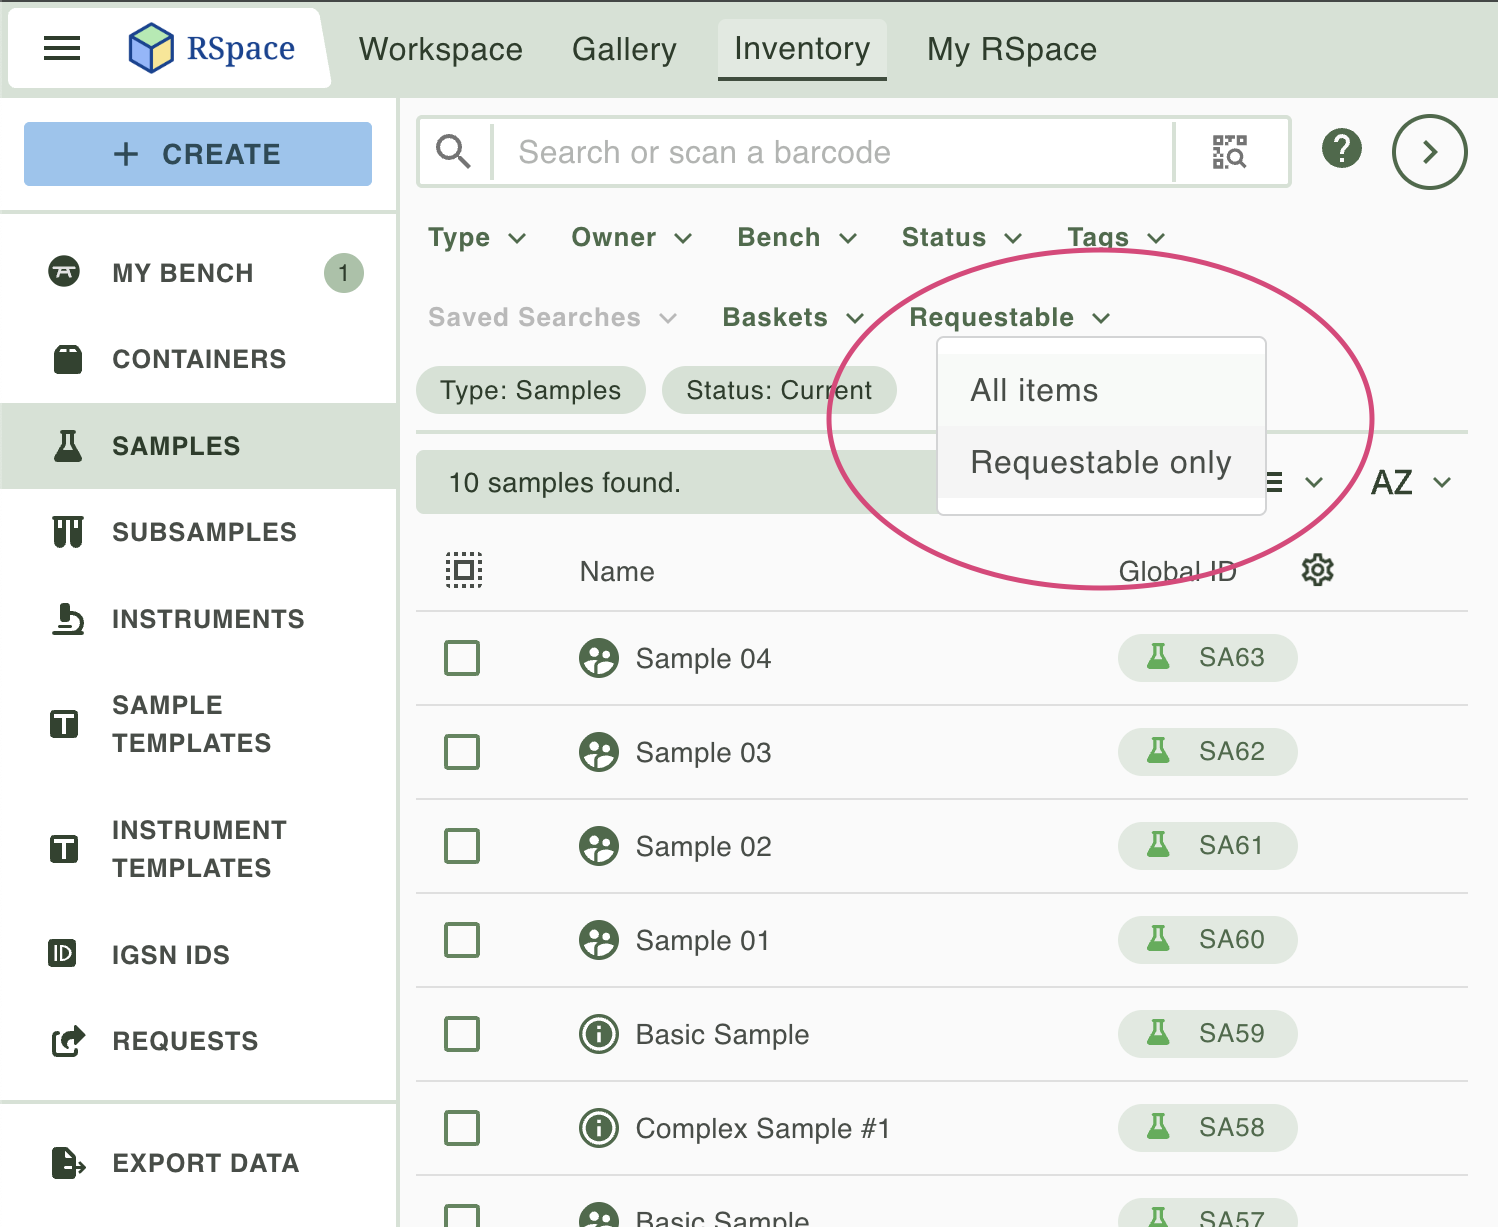
This will show all the samples that are available to be requested within RSpace.
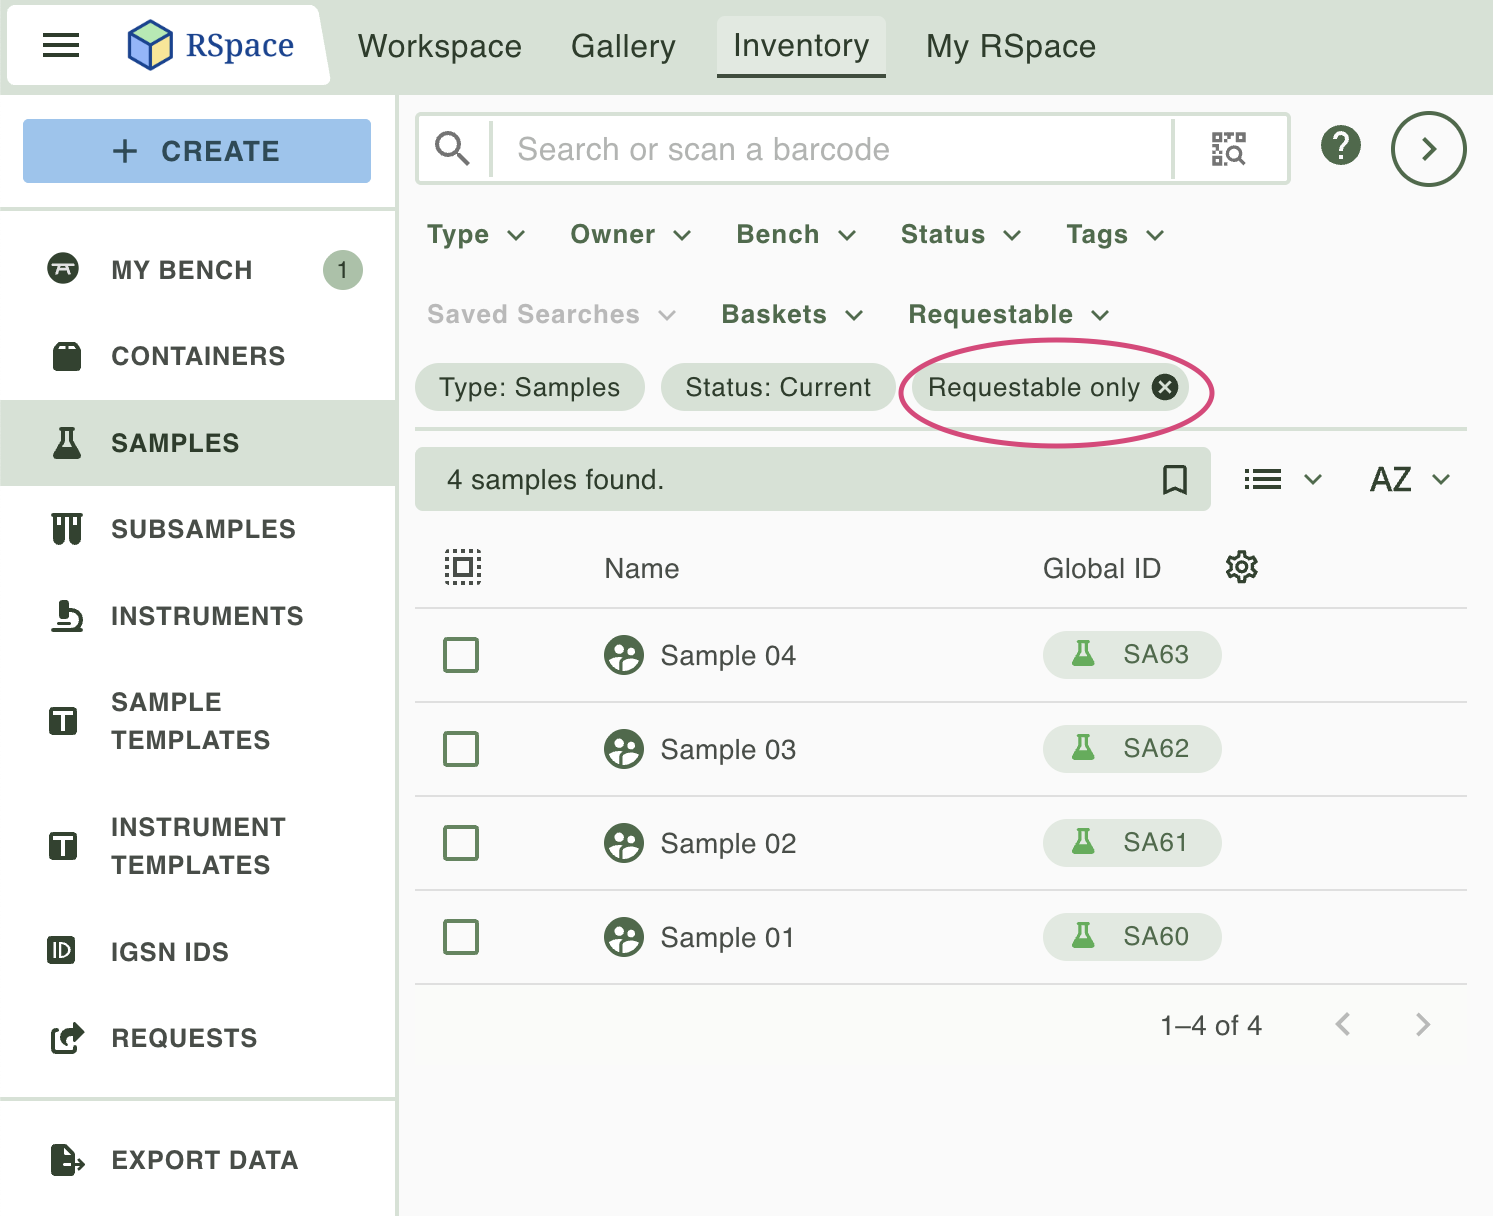
To no longer see all available requestable samples in your search results either select the Requestable dropdown again and select All Items, or click on the X in the Requestable only chip in the search filters area.
Requesting a Sample
To request a sample, find the sample using the Requestable feature, as above. In the Overview section of the sample press the Request Sample button.
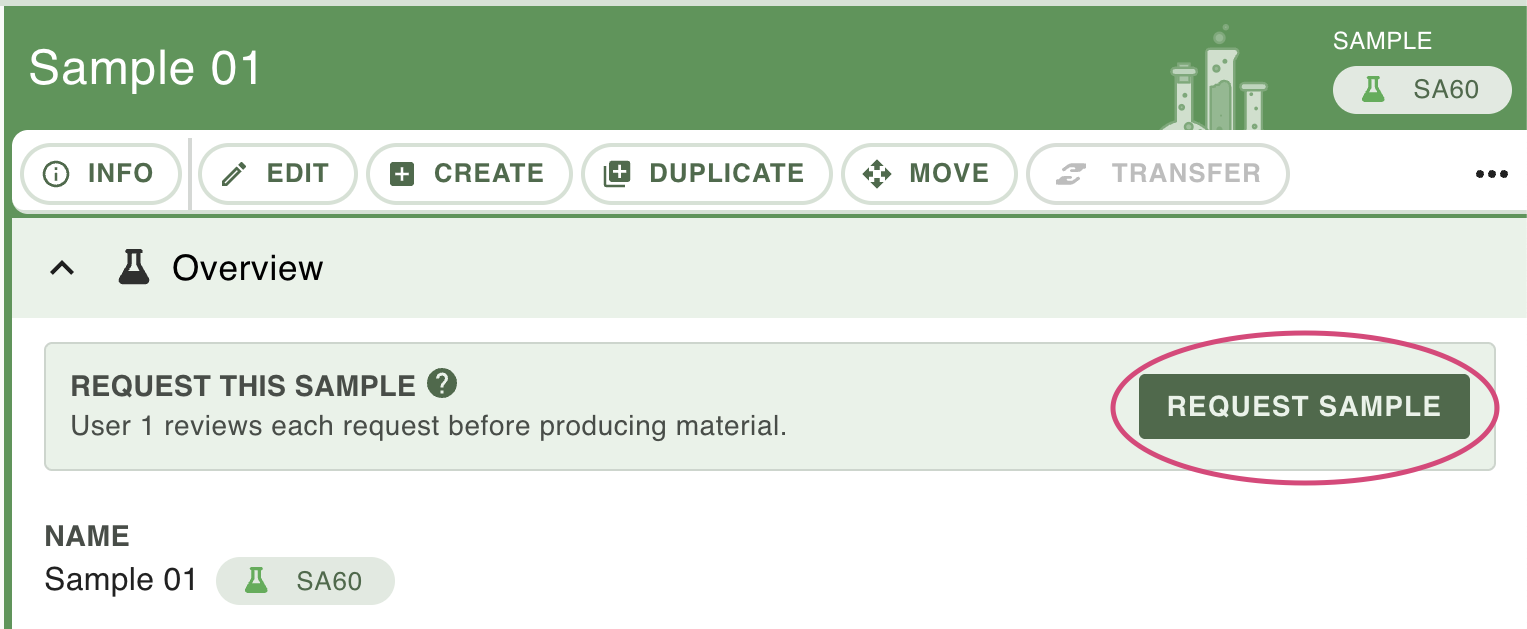
Pressing the button will launch a dialog that provides you with the option to add more information to your request, to help the owner of the sample to determine whether the request should be approved or not.
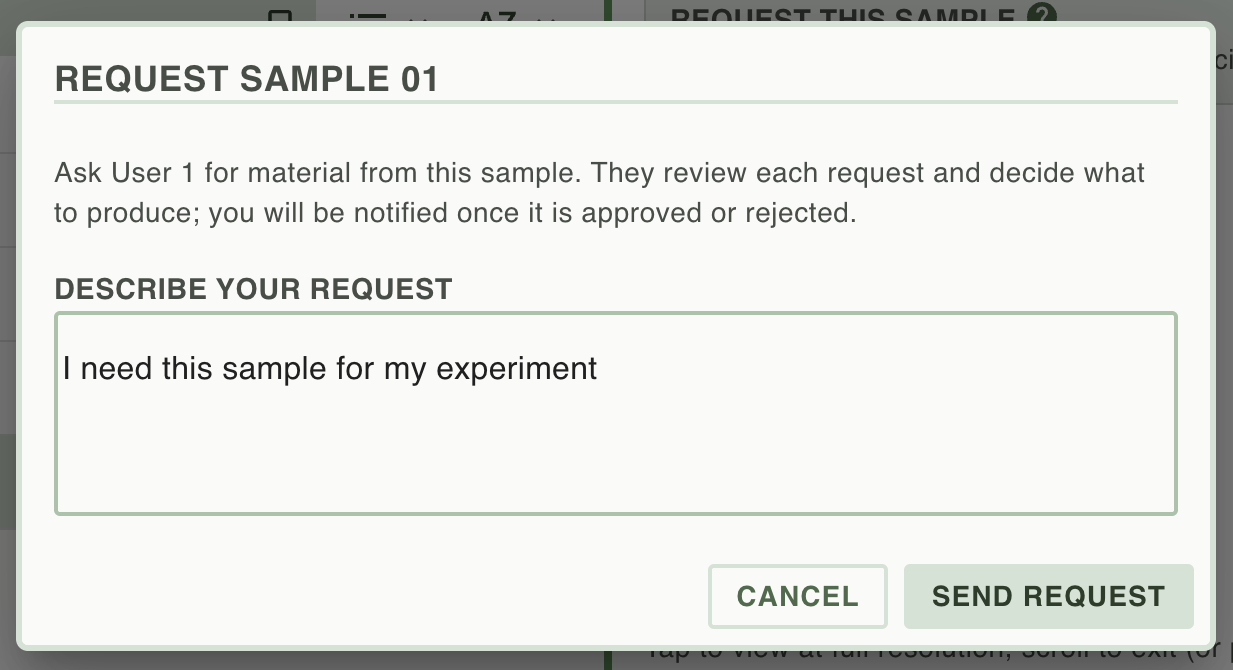
Once you have entered the additional information, press Send Request. The owner of that sample will now need to action your request.
Cancelling a Sample Request
If you no longer need the sample that you requested then your request can be cancelled, as long as the request is still in the Pending state.
You can cancel the request in one of two ways. You can go to the sample that was requested, and in the Overview > Sample Requests section press the Cancel button.
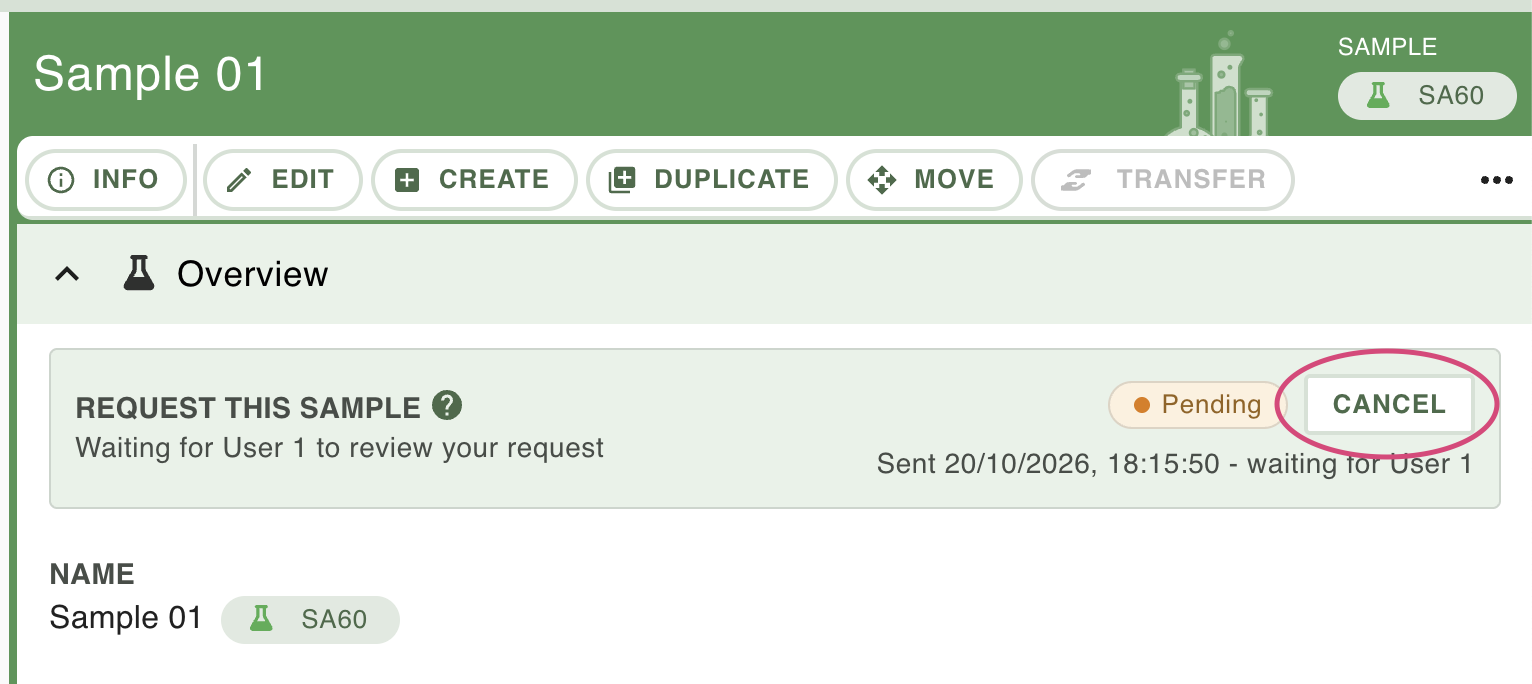
Alternatively, you can cancel the request from the Requests view. See the following section for more details.
Viewing and Responding to Sample Requests
To see all requests that you have made or that have been made on samples that you own use the inventory Requests view. This is accessed from the Requests entry in the left hand menu of the Inventory screen.
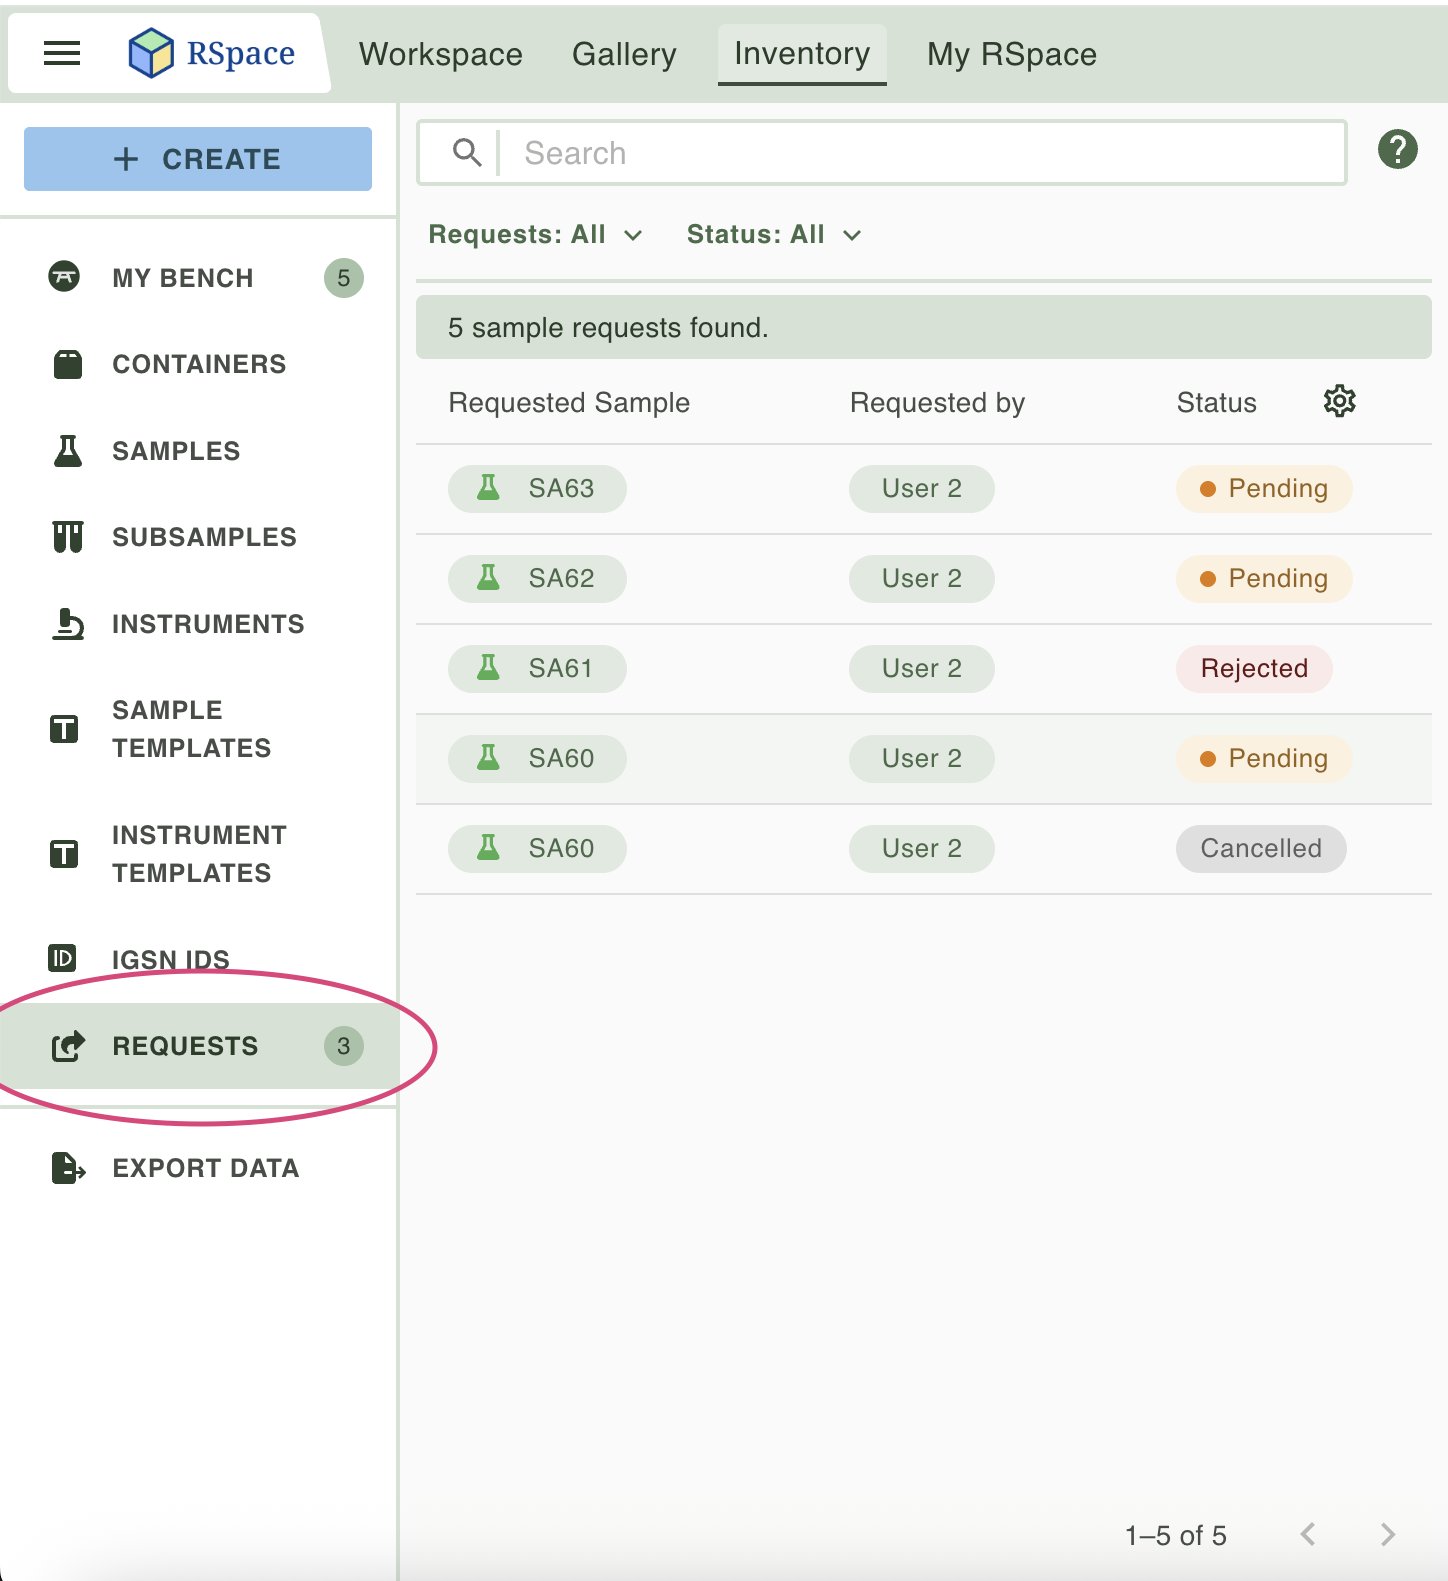
If other users have made requests for samples that you own then you will see a small indicator containing a number next to the menu option; this number is the count of the number of pending requests that have been made against you, and which need to be actioned.
The Requests view shows a list of all requests that you have made or that have been made against samples that you own. By default the view shows all such requests, however these can be filtered: The Requests filter allows you to filter to show only those requests that you have Sent, or those that you have Received against samples that you own; The Status filter allows you to filter to show All requests, Open requests (requests that are in either the Pending or Approved states), or Closed requests (requests that are in the Rejected, Cancelled or Fulfilled states).
The right-hand pane shows details of those requests, including actions that you can take (if any are available) and the history of the request.
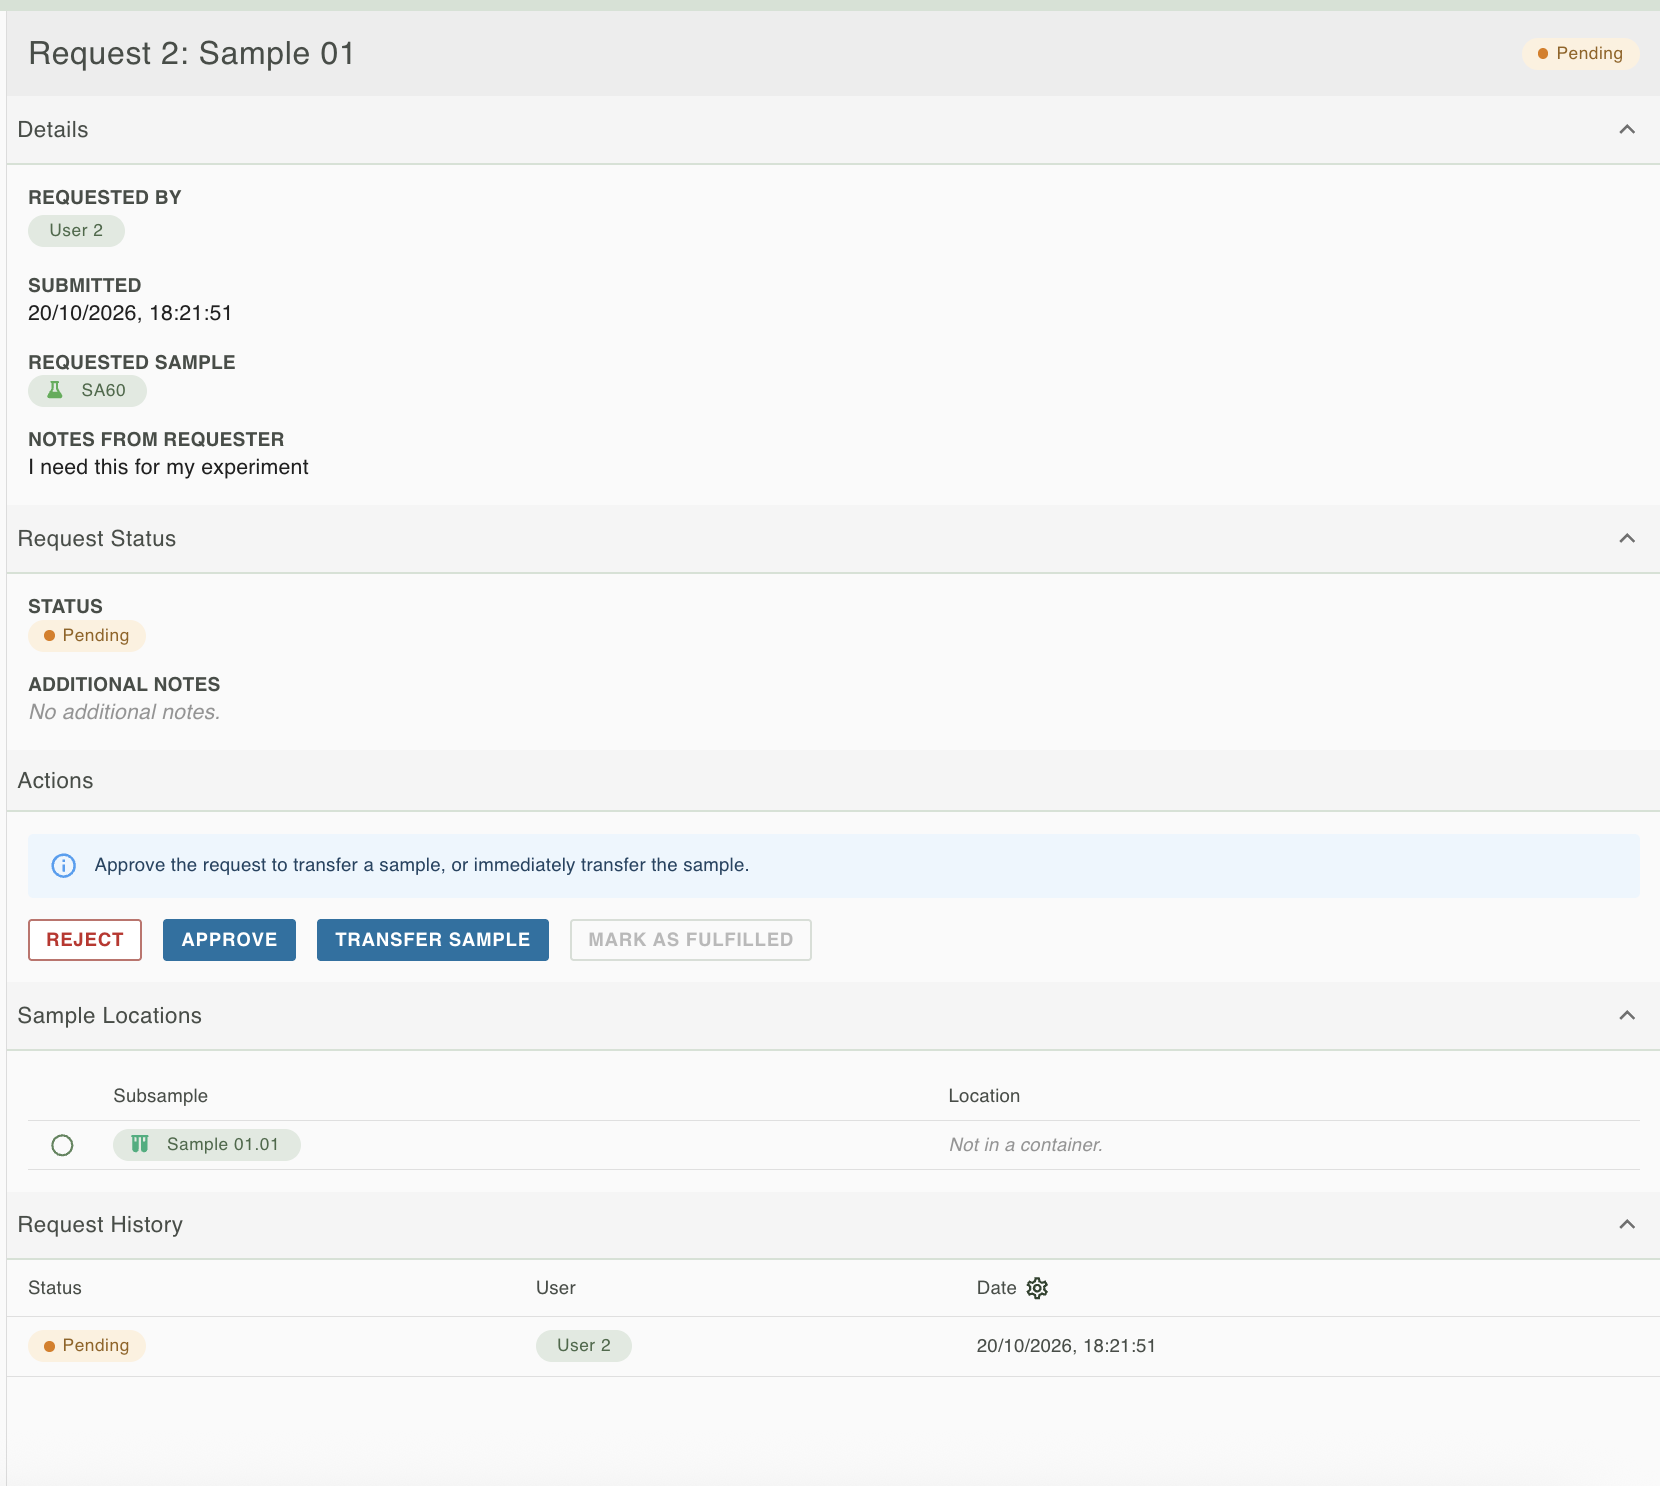
The actions panel will vary depending on whether the request was made by you or was made against a sample that you own. If you made the request, then the only available action will be to Cancel the request. This is only available until the sample owner has either Approved or otherwise responded to the request.
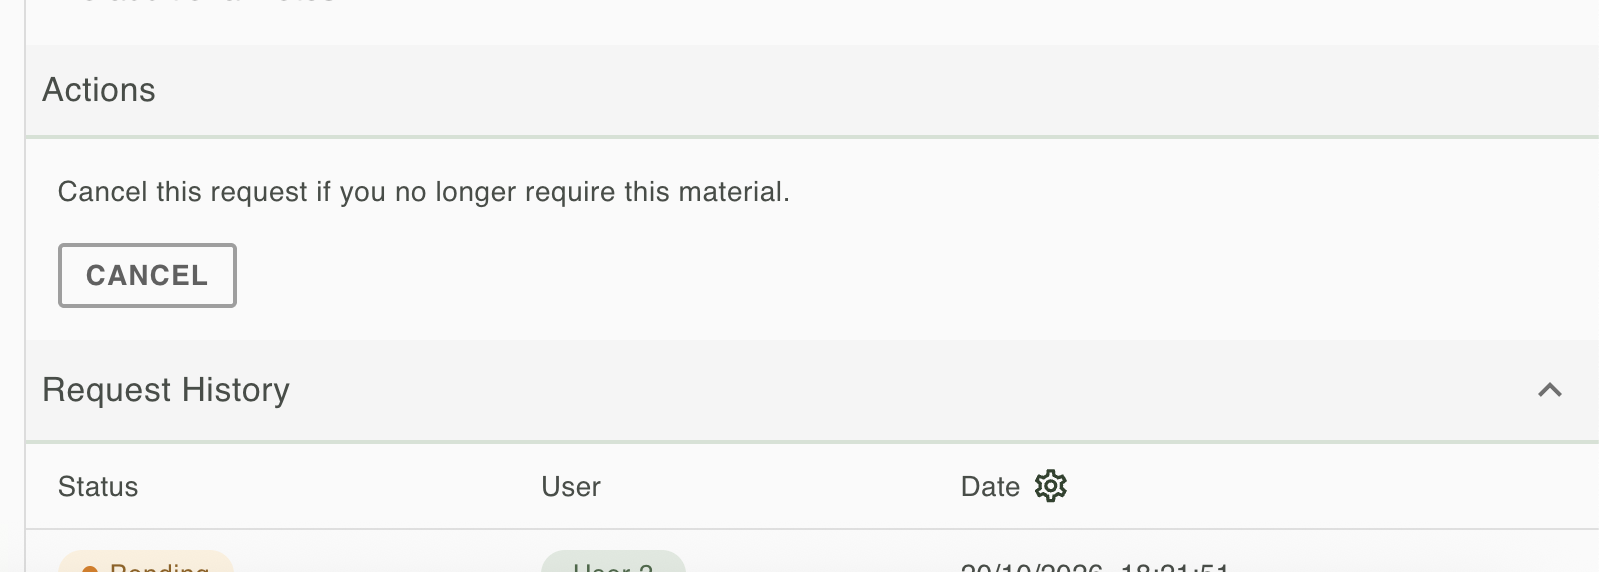
Available Actions for Responding to Requests
There are four available actions that an owner of a sample can make when responding to requests. One of these actions appears in two different forms, depending on whether or not the Operations Wizard has been enabled, and will display as either Transfer Sample or Prepare Sample.
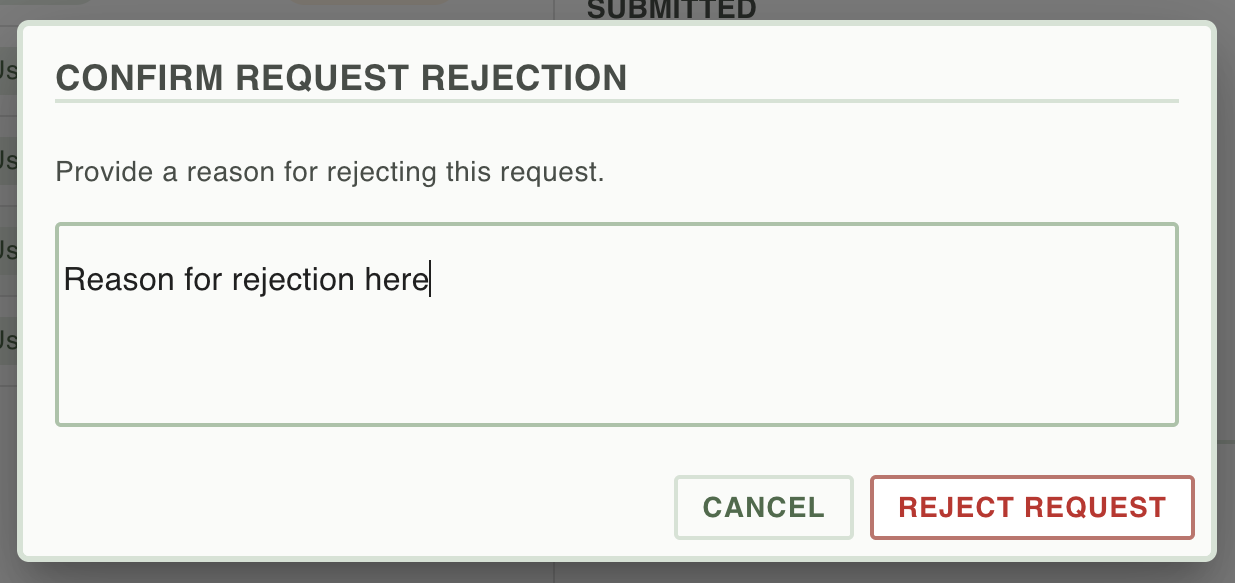
Reject
Rejecting the request simply closes the request and notifies the requesting user that their request cannot be fulfilled. You must provide an explanation for the rejection of the request.
Approve
Marks the request as having been approved. This does not perform the action of transferring the sample to the requesting user, but it does notify them that you will be working to transfer it. You can still Reject the request even when the request has been approved, in case further investigation shows that it cannot be fulfilled.
Transfer Sample
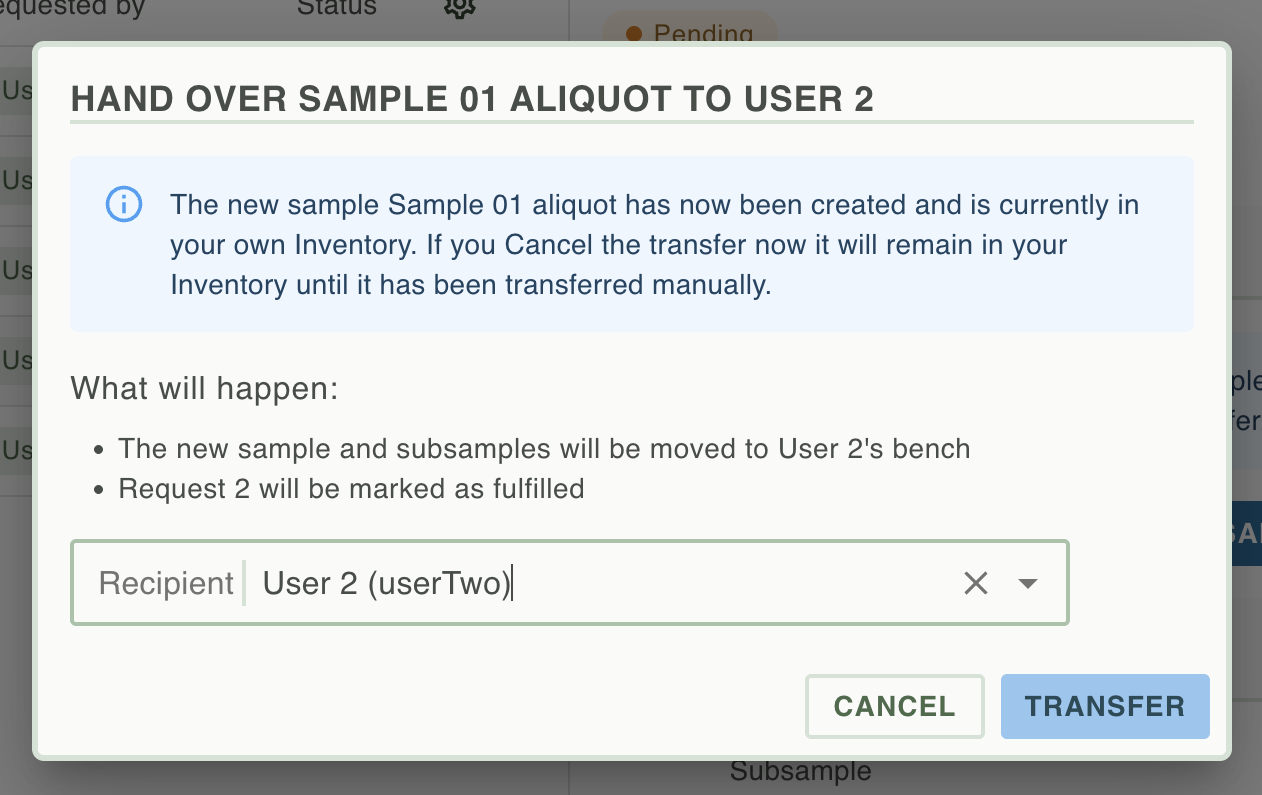
This action will be shown if the Operations Wizard has not been enabled. Selecting this option will take you to a transfer dialog that will explain what will happen next, and which will complete the task of fulfilling this request by transferring the request to the requesting user and marking the request as fulfilled.
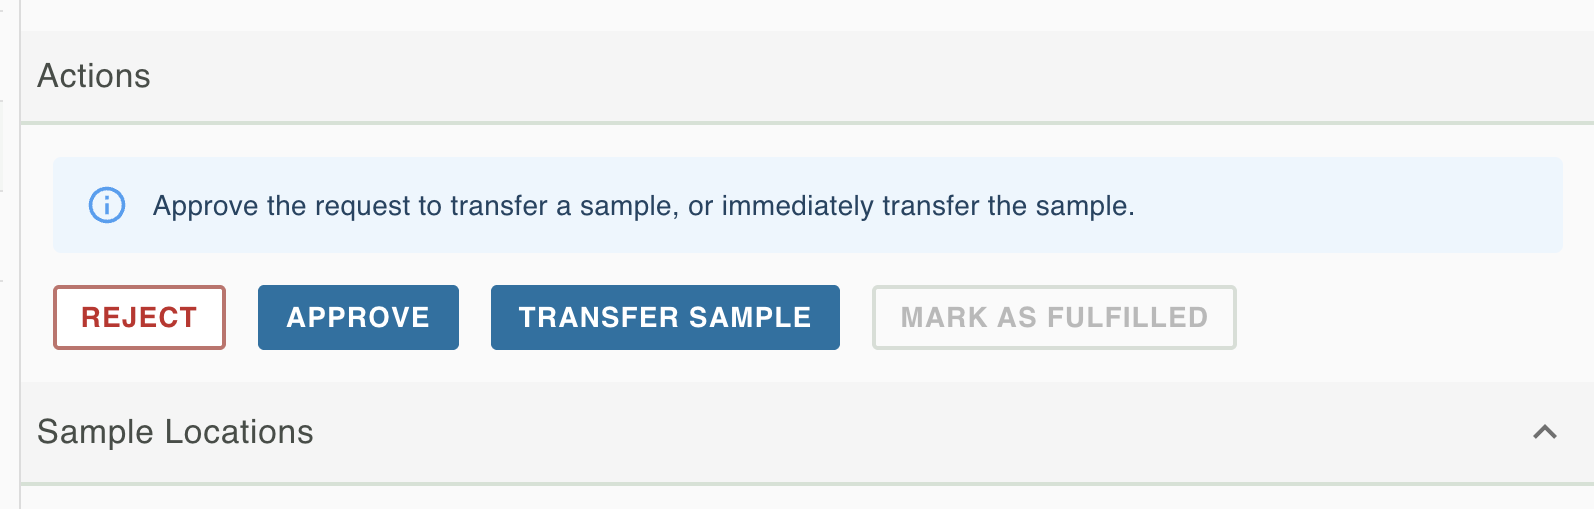
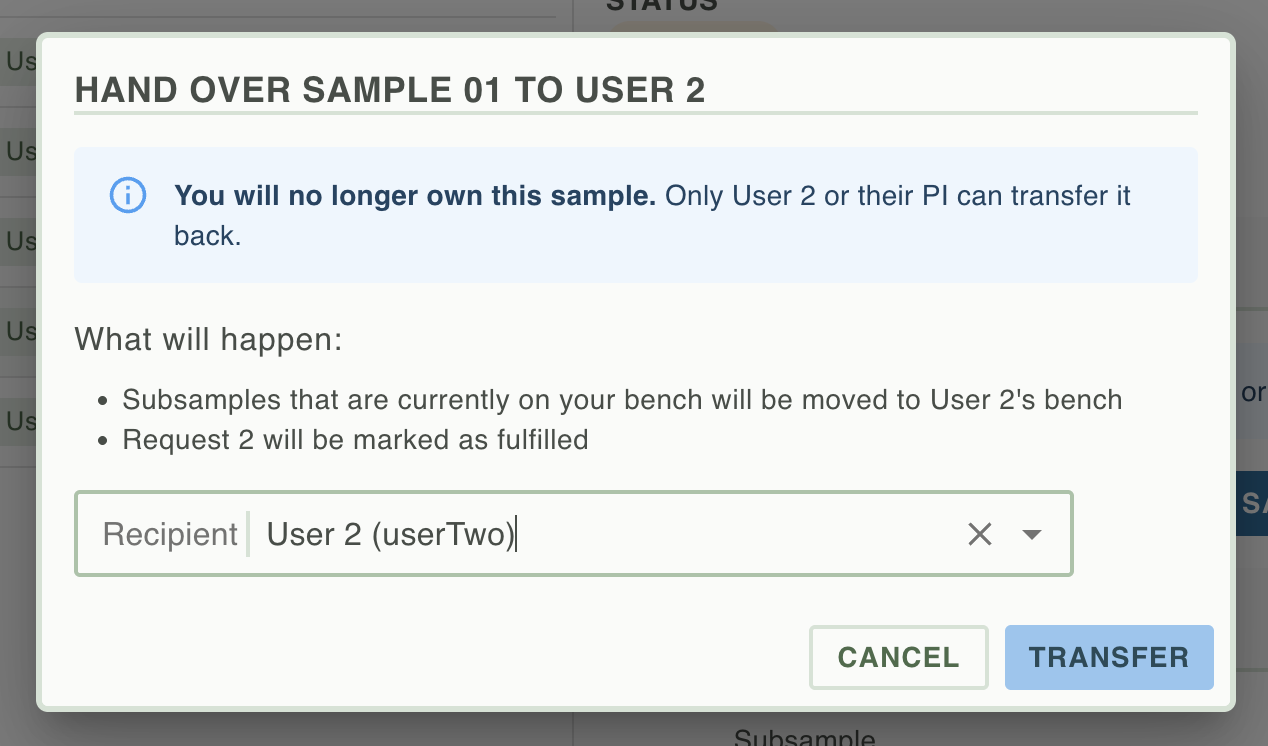
You can skip the Approve step above and go straight to transferring the sample if you do not need any additional time after notifying the user of your approval before transferring the sample.
Prepare Sample
This action will be shown if the Operations Wizard has been enabled. To enable this action you must first select a subsample from the list of subsamples in the Sample Locations section.
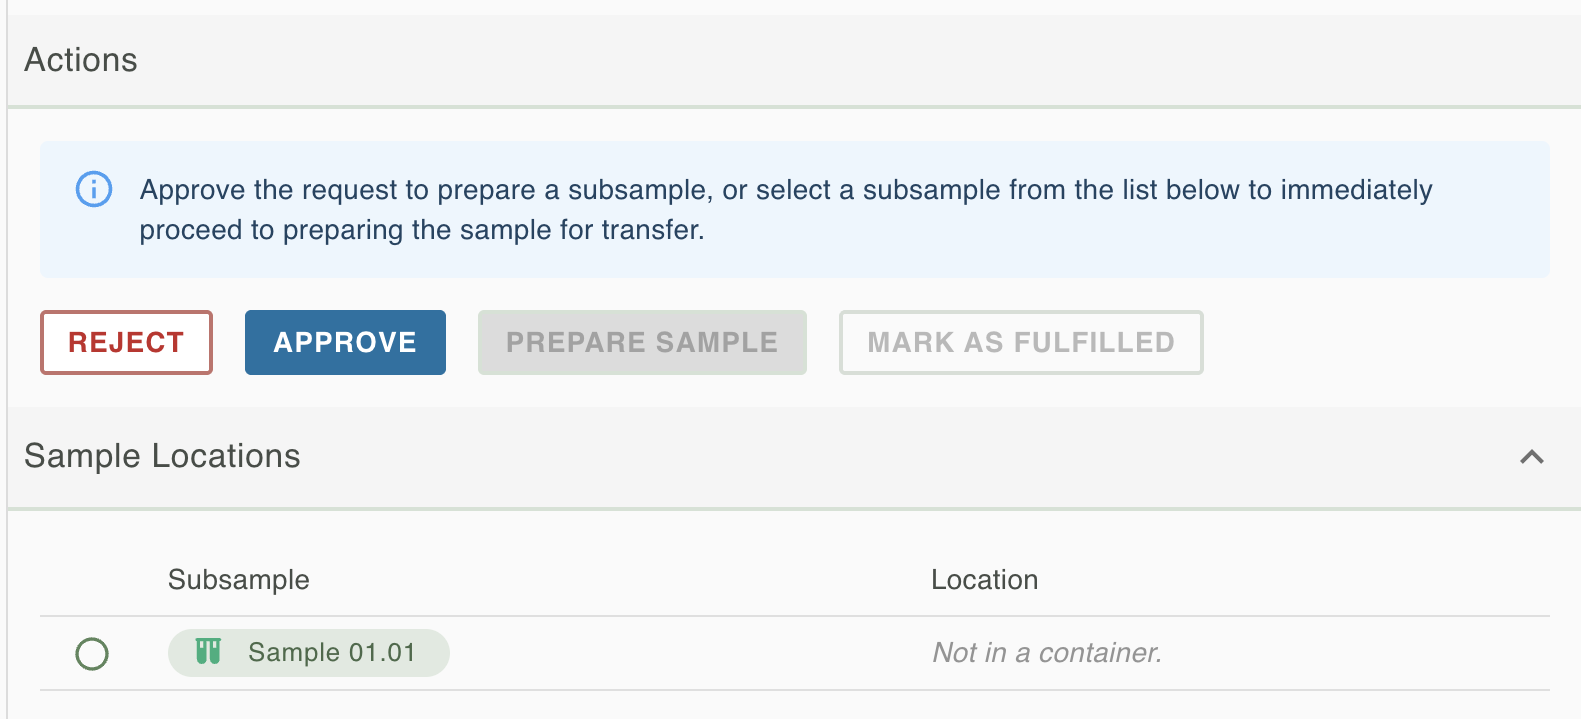
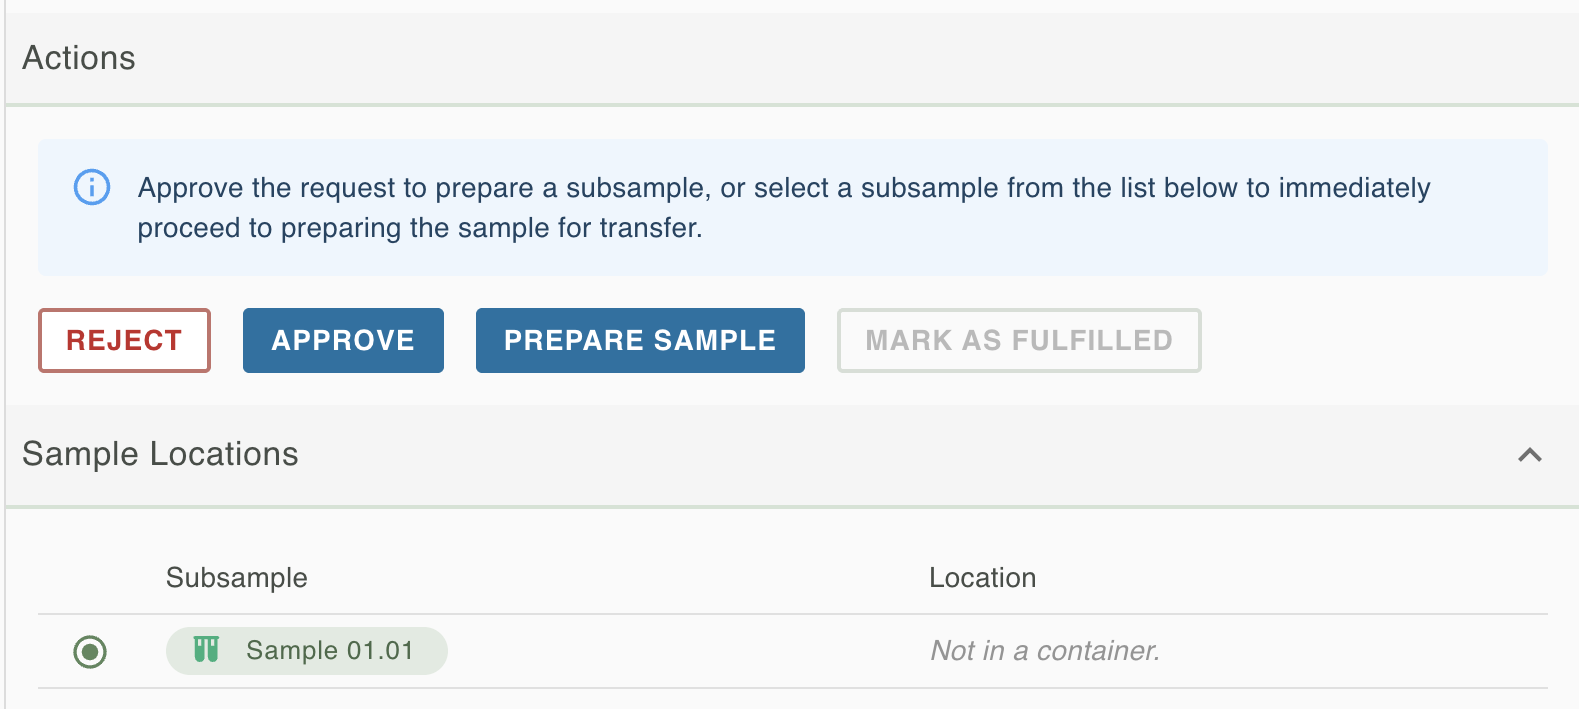
Pressing this Prepare Sample opens a dialog which allows you to choose one of two ways of fulfilling the request.
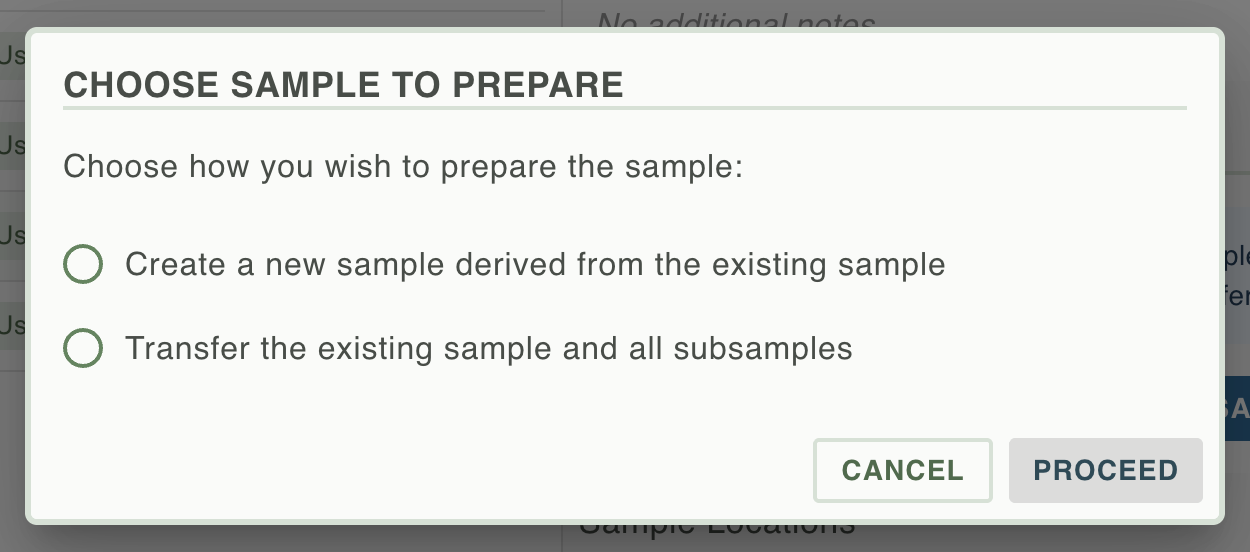
- Create a new sample derived from the existing sample - Choosing this option launches the Operations Wizard, providing a way to transform the selected subsample before passing it on to the requesting user. This wizard functions identically to the standalone Operations Wizard, so see the appropriate documentation for more information on using that wizard, here: Operations Wizard. The only difference with using the wizard through this route is that the Pool and Destroy operations are not available.
Once the Operations Wizard has completed you will be shown the transfer wizard, to confirm the final transfer of the newly-created sample to the requesting user.
- Transfer the existing sample and all subsamples - This behaves just as for Transfer Sample, above.
Mark as Fulfilled
Marks the request as having been fulfilled without having gone through the Transfer Sample or Prepare Sample steps, above. Use this if you have fulfilled the request by doing a transfer elsewhere in the RSpace UI, or if you have fulfilled the request by carrying out some process outside of RSpace. Note that by choosing this option no transfer of the sample to the requesting user will be performed - you can still use the standard transfer ownership functionality to do this later.
Cases to be Aware of when Transferring Samples
There are a couple of particular scenarios to be aware of when transferring samples to the requesting user:
Samples with Multiple Subsamples
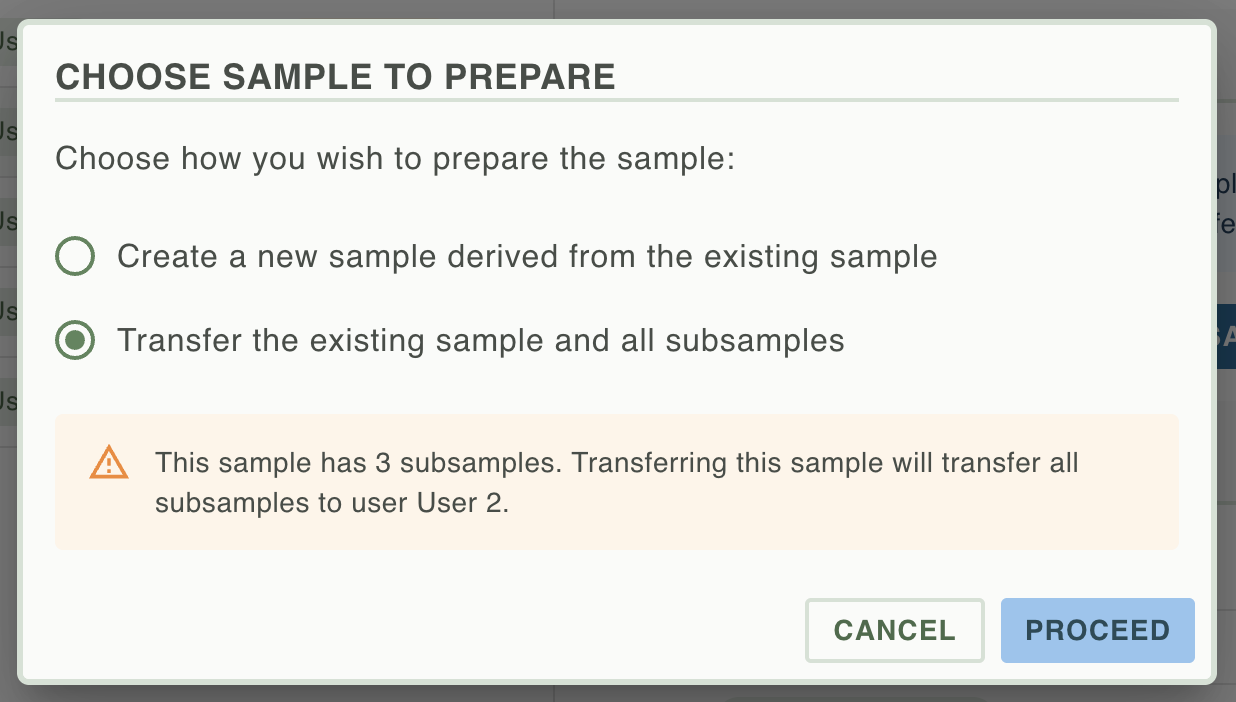
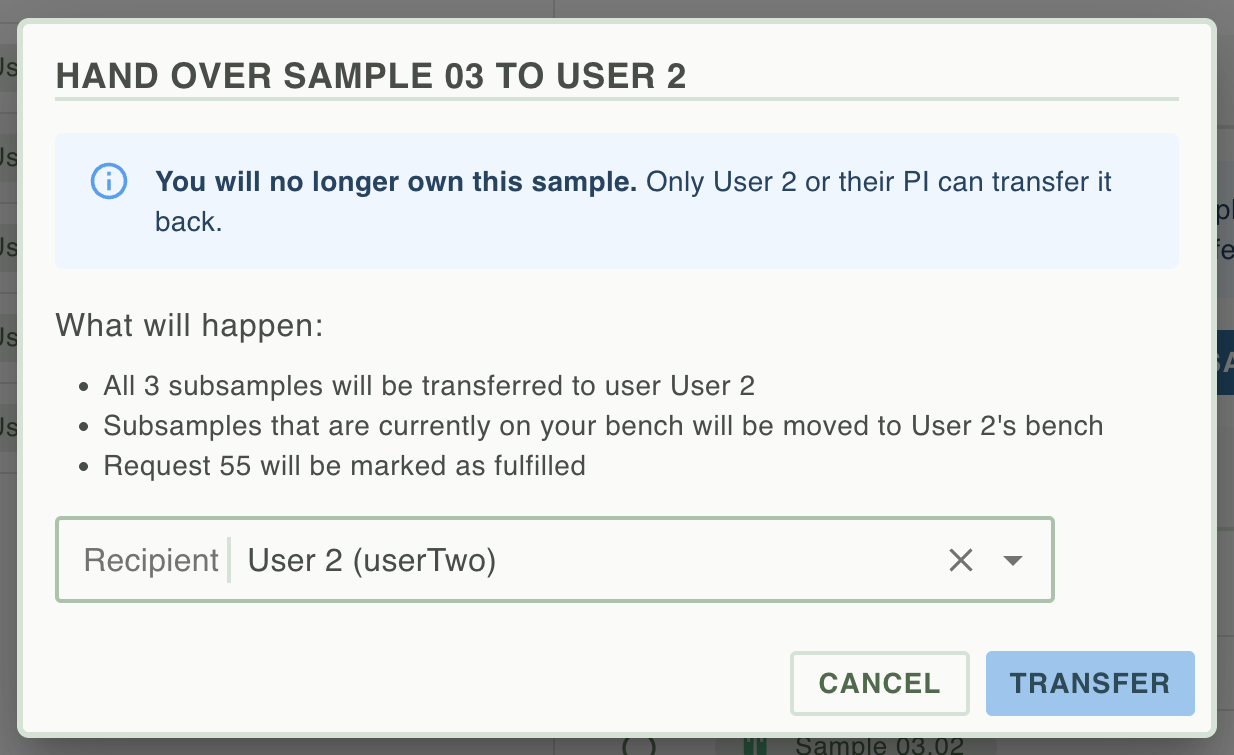
If a sample has multiple subsamples and you opt to fulfil the request via a simple transfer of the sample (using the Transfer the existing sample and all subsamples path, as above), then all subsamples attached to that sample will also be transferred to the requesting user.
You will be reminded that this will happen either in the dialog that launches when you press Prepare Sample:
Or in the actual dialog confirming the transfer, whichever route you take to fulfilling the request via transfer:
This scenario will not be an issue if you use the operations wizard via the Create a new sample derived from the existing sample path, as that wizard creates a new sample and (set of) subsample(s) when the operation is performed.
Samples that have been Requested by Multiple Users
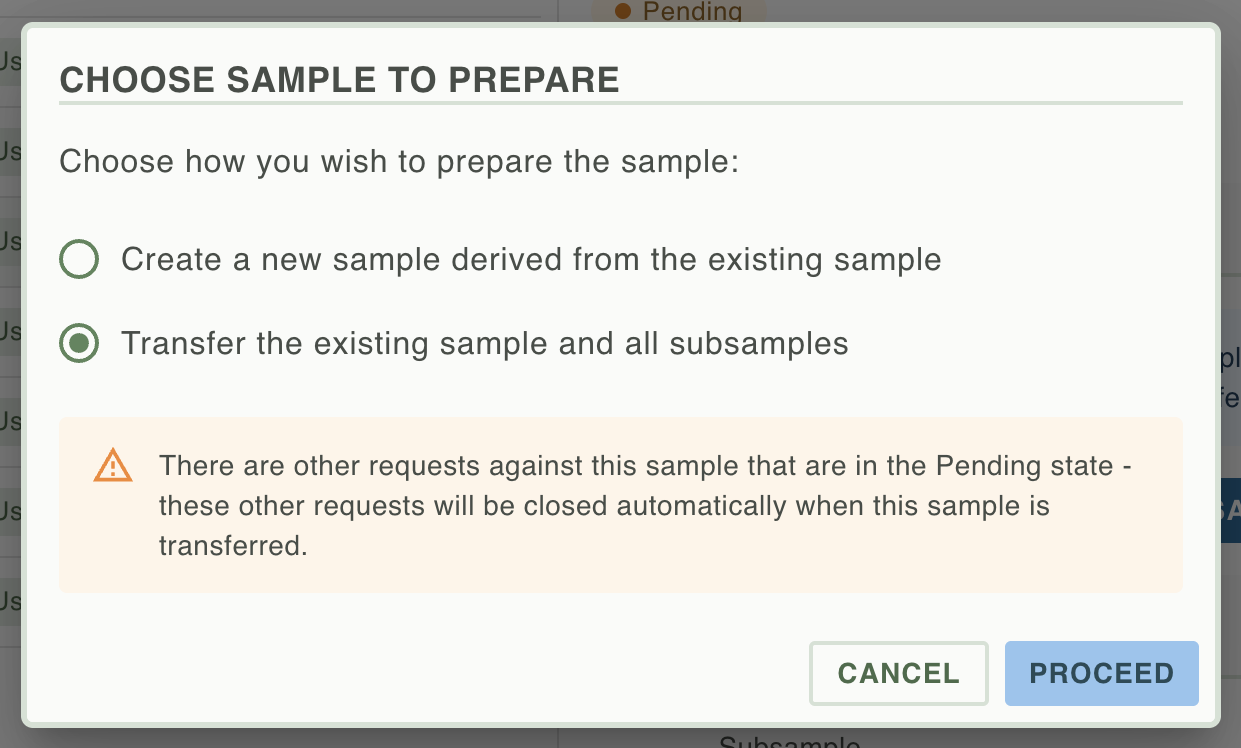
If a sample has been requested by multiple users you should manually check to see which user should take priority and which of the pending requests should be fulfilled, and reject those that do not take priority. If any additional requests are open against the same sample when you fulfill one of them then those additional requests will be automatically closed as Rejected. You will be informed of this in both the dialog that launches when you press Prepare Sample:
And in the actual dialog confirming the transfer, whichever route you take to fulfilling the request via transfer:
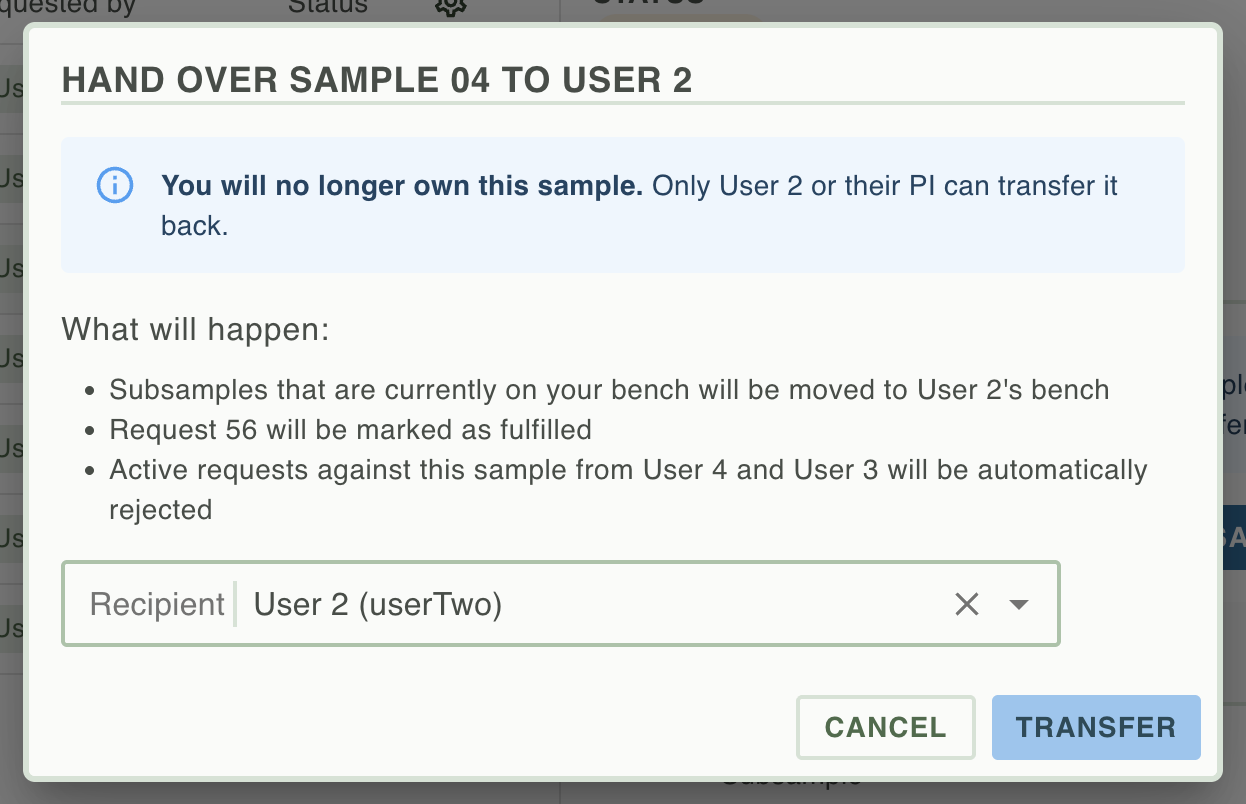
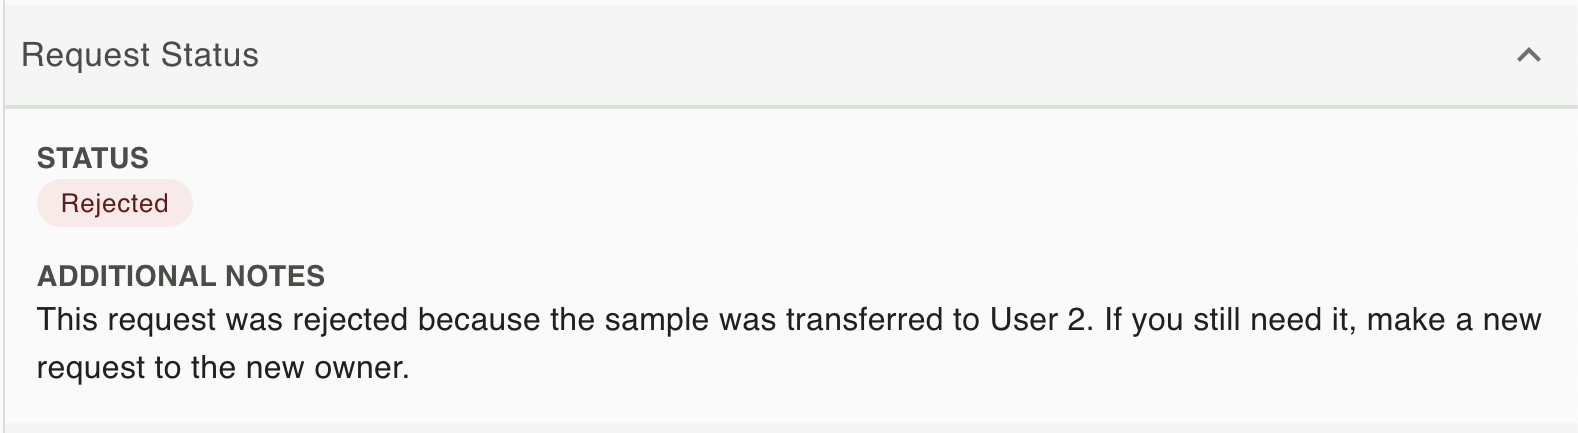
The users that made the other requests will see that their requests for that sample have been rejected, with a message explaining why the request was rejected.
Configuring your RSpace Instance to Allow Sample Requests
To allow samples to be requested on your RSpace instance you must enable the inventory.sampleRequests.available property.
To do this, log in as a system administrator, go to System > Configuration > System Settings and set the inventory.sampleRequests.available property to ALLOWED.
How did we do?
Search and Import PIDINST Instruments into your Inventory 🧪
Samples vs Subsamples 🧪