This section is for administrators - if you are looking for help on connecting to ORCID as an end-user of RSpace, please see ORCID Integration. Aim of this document. This section explains how, as an…
This section is for administrators - if you are looking for help on connecting to ORCID as an end-user of RSpace, please see ORCID Integration
Aim of this document
This section explains how, as an RSpace admin, you can set up RSpace to enable users to connect their ORCID accounts to their RSpace account.
This procedure is a one-off step - it does not need to be done for every RSpace user!
Pre-requisites
An account on ORCID (using a personal email address)
Access to RSpace server in order to set in clientId and secret you will acquire from ORCID
The RSpace server must allow 2-way HTTPS communication with ORCID
Steps in ORCID (public API)
The following procedure is for integrating RSpace with the public API of ORCID.
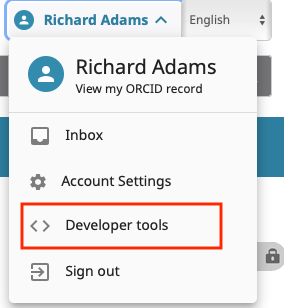
Log into ORCID. Now click on 'Developer Tools' in the dropdown at the top-right of the screen:
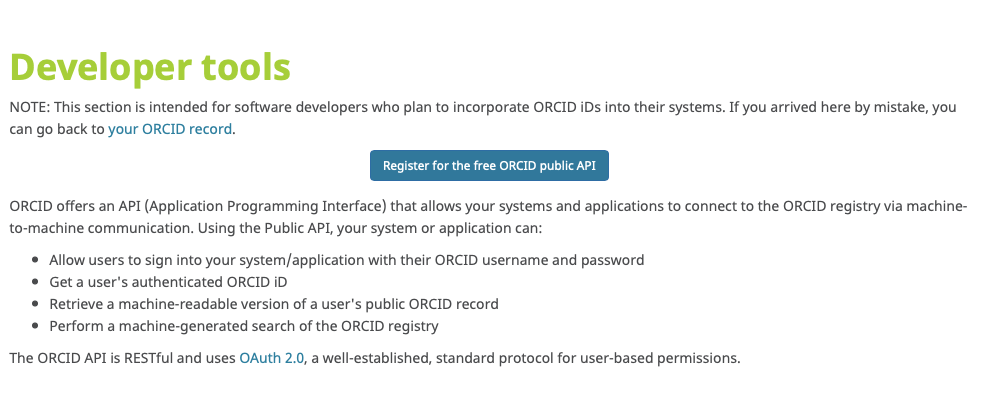
If this is the first time you have gone to the developer section, you will see an invitation to register for the public ORCID API. Click on the 'Register' button and agree to any Terms and Conditions
Now, you can define the RSpace-ORCID connector, for example:For the redirect URI, add a URL in the form <RSPACE_URL>/orcid/redirect_uri. For example if your RSpace is hosted at https://rspace.myuniversity.ac.uk then the callback URI will behttps://rspace.myuniversity.ac.uk/orcid/redirect_uri.
Save the App configuration.
You will now see a screen showing your clientId and clientSecret - make a note of these:
You have now successfully registered the ORCID - RSpace connector App.
Steps in RSpace
Connect to RSpace server terminal
Open file /etc/rspace/deployment.properties and add the following properties, using the values you just obtained from ORCID: orcid.client.id=<MY ORCID CLIENT ID> orcid.client.secret=<MY ORCID SECRET>
Save the file and restart RSpace
You may need to login as sysadmin user and activate the ORCID integration in Settings-> Configuration->System Settings
Testing the setup
Follow the steps explained for an RSpace end-user: ORCID Integration