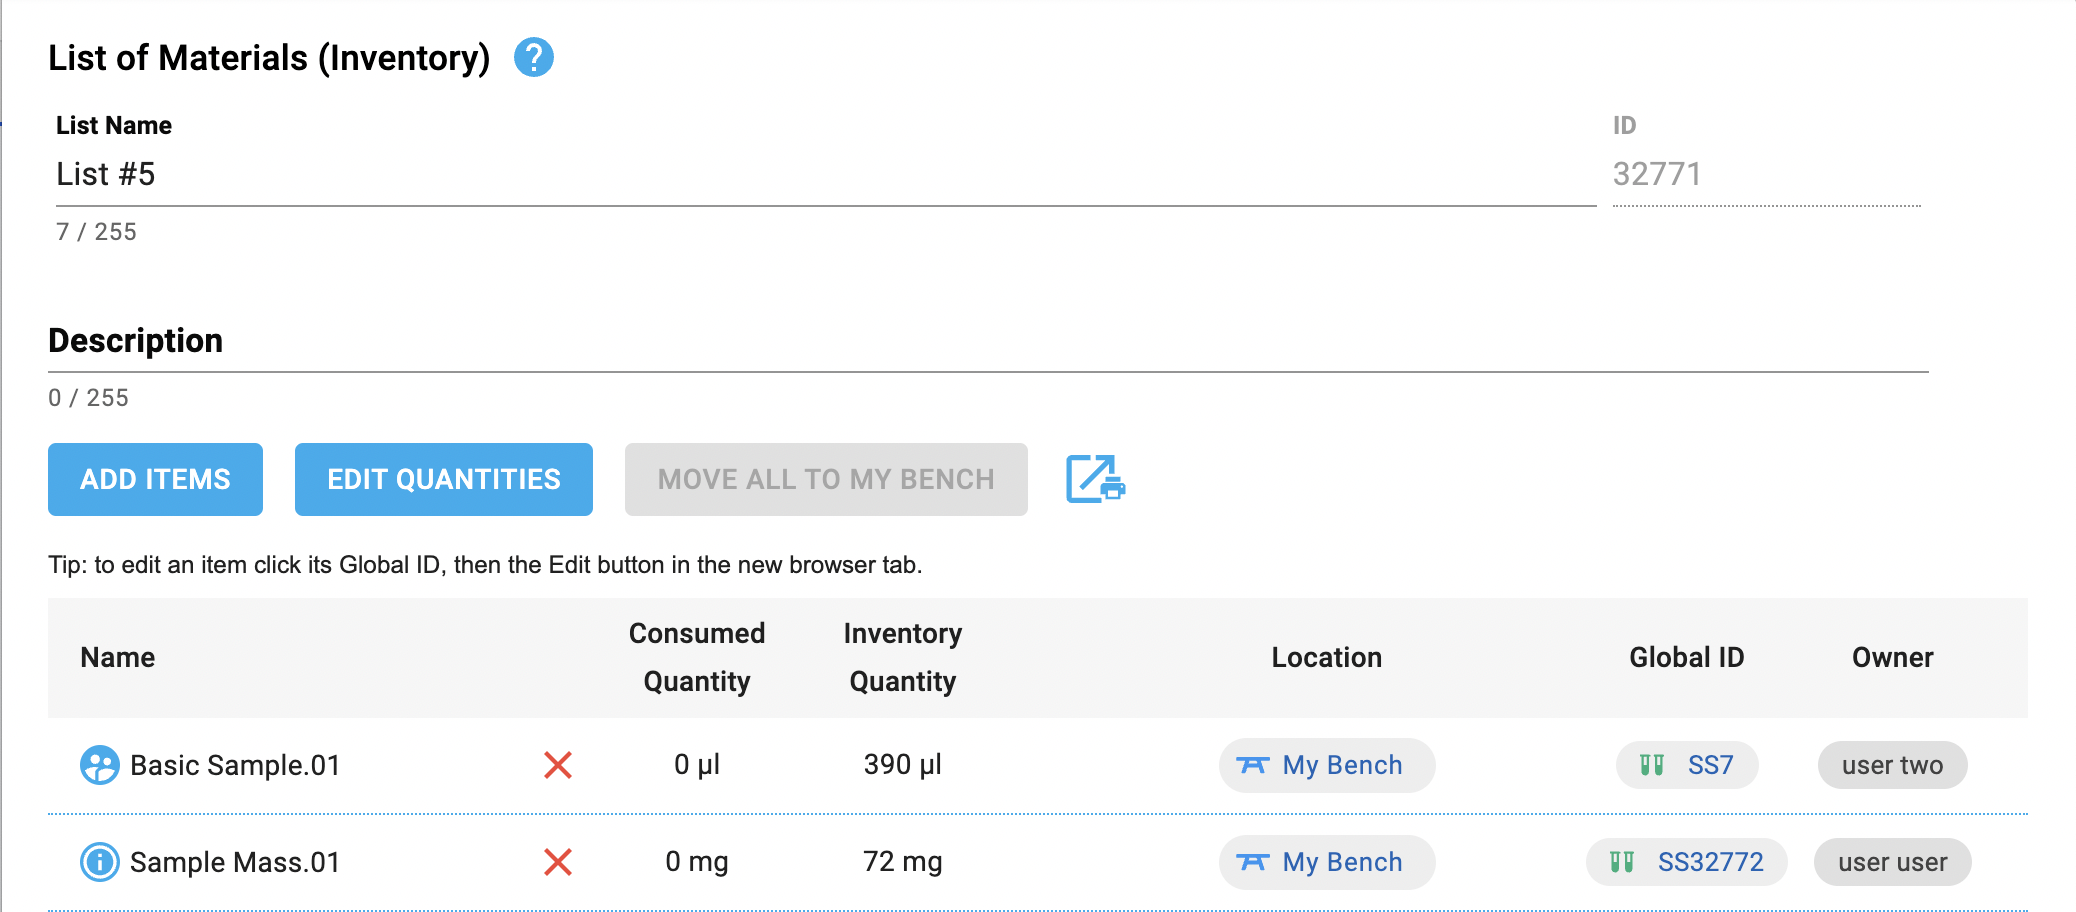
You can easily update quantities of Inventory items as you use them up during experiments while editing an ELN document. To start, click the "Edit Quantities" button at the top of the dialog: the table will display the quantity editor (ie some different columns).
Consumed Quantity: the cumulative quantity of the item used in this experiment
Inventory Quantity: the automatically calculated remaining quantity of the item, based on the quantity recorded in inventory, minus the consumed quantities of this item across all Lists of Materials (as long as "Update Inventory Quantity" is selected when updating consumed quantities). This is also the quantity shown when viewing the item in Inventory.
Updating quantities only works for subsamples.
Update the Consumed Quantity of one or more Items
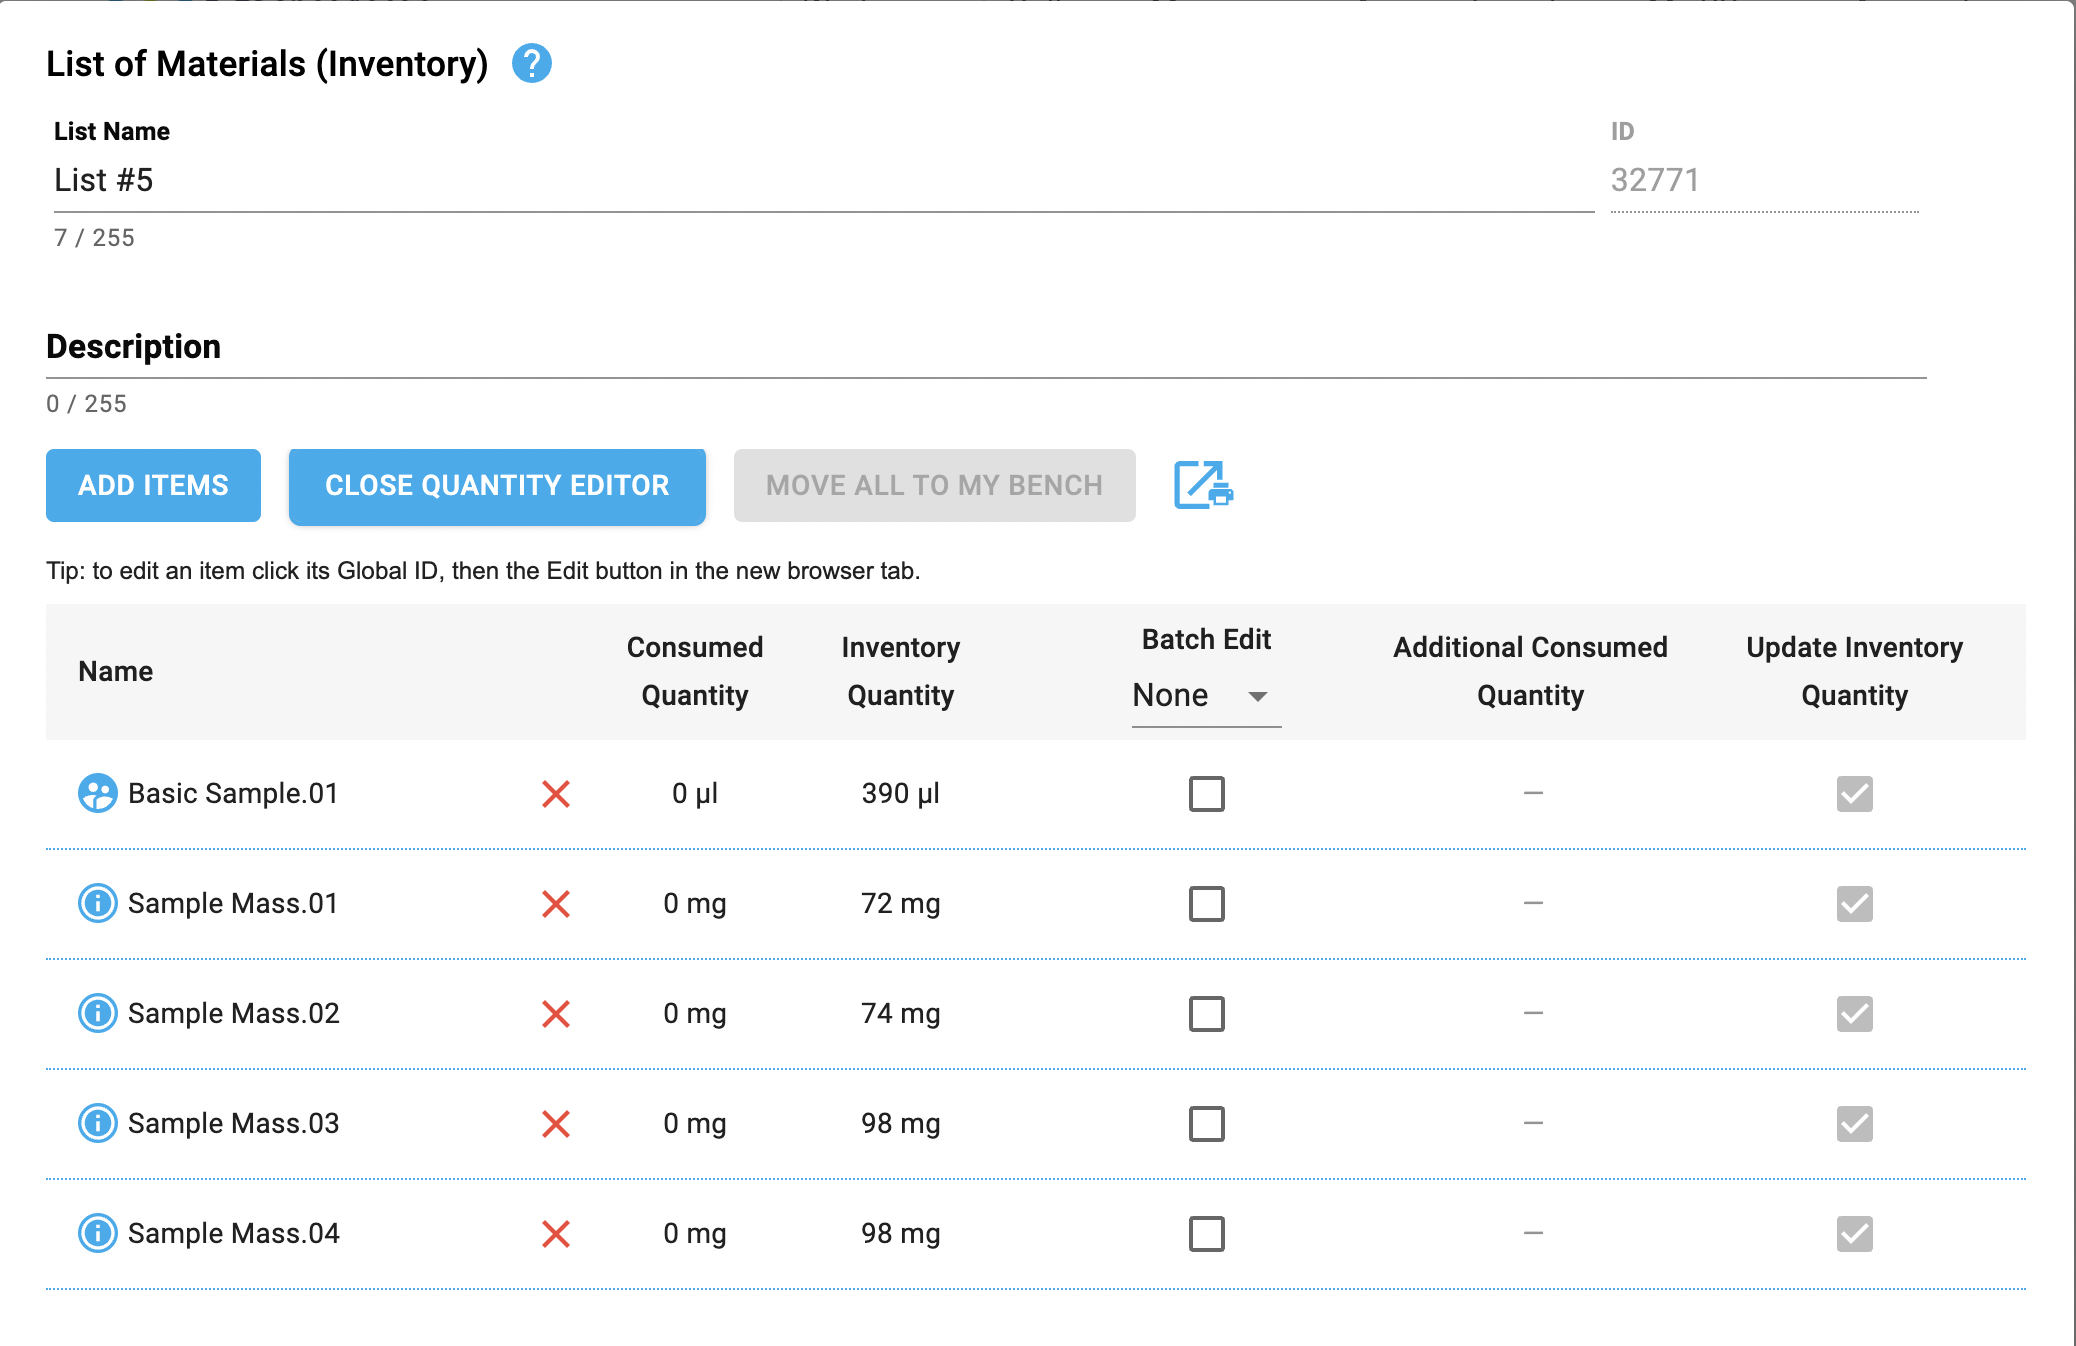
Inventory lets you update the Consumed Quantity of one, or more items at the same time. The same increment will be applied to all selected items, ie you can update one or more than one at the same time. Batch editing requires that all selected items share the same unit category (e.g. mass, volume, or unitless).
To select an item, click on the left checkbox (in the "Batch Edit" column). An input field will be displayed to enter the "Additional Consumed Quantity".
Adjust the additional consumed quantity in the input field. Note that you can change the unit used as well (only within the same category).
Decide whether you want the Inventory Quantity to be updated as well (default) via the checkbox on the right. The Inventory Quantity will be calculated based on the new Consumed Quantity, and update the item's quantity in Inventory. However, you cannot fill in a consumed quantity greater than the inventory quantity if "Update Inventory Quantity" is checked. In such case, an error message will be displayed.In the case where there is a mistake in the Inventory Quantity value, and you wish to fill in the correct and larger value for Consumed Quantity, leave "Update Inventory Quantity" unchecked. This will enable you to increase the Consumed Quantity as much as desired, withut restrictions, and you can then manually edit the subsample's Inventory Quantity inside of Inventory later (see below).
Your changes will be reflected in the table immediately. Remember to Save your List to confirm these changes (or Cancel to revert all unsaved changes).
Update the Inventory Quantity of an Item
If there is a mistake in the amount of inventory quantity recorded, you can correct this by manually editing the subsample's quantity within Inventory. To do so:
Click on the item's Global ID in the List of Materials.
This will open the item in Inventory. Click on Edit.
Scroll down to Quantity, which displays the inventory quantity, and edit it to reflect the actual remaining quantity. Finally, Save the item.
After refreshing the ELN document, you will be able to see the updated Inventory Quantity in the List of Materials. The consumed quantity will not be affected.
Example of Editing Quantities
This explains a worked example to edit quantities in a List Of Materials.
We start off with two subsamples in our List of Materials. Initially, the list displays how much is remaining (100µl for both samples) and that this experiment has used 0µl.
We use 5µl and choose to update the remaining inventory quantity, by clicking on the 'Edit Quantities' button, typing in 5 in the input box, and checking "Update Inventory Quantity" (this box is checked by default). Note that multiple items with the same unit category can be selected and batch edited at the same time.
Multiple items can be selected and their quantities edited at once (batch editing), but only if their unit categories match, e.g. you cannot batch edit an item quantity in 'mg' (mass) with one in 'ml' (volume). In that case, saving would be disabled and a warning message displayed. Also, different units can be selected for increments but only within the same category (e.g. for a quantity in 'ml' you can pick 'µl' , but not 'mg' or 'µg').
Remember to click 'Save' to persist the changes when you are done editing the List Of Materials.
Now, we use another 5µl, setting the consumed quantity to 10µl - the cumulative total of what we have used so far. Again, we choose to update the inventory quantity. After clicking 'Save' again, 90µl is shown as remaining in inventory:
Now let's imagine a scenario where there is a discrepancy in quantity between the Inventory software and real-life. For example, we are in the middle of an experiment and we have used 100mg of a subsample but the software says only 72mg is remaining, showing a discrepancy of -28mg (a negative value meaning the difference between used and available) and an error message.In this case, we can still go ahead and record what was used (100mg), by choosing not to update the Inventory Quantity. We can resolve the discrepancy later, by editing the subsample's quantity inside of Inventory (see above). To unlink the two and proceed, just uncheck the box on the right.
Color coding: note that quantities were displayed in red to indicate an error, but are now green, meaning the update can proceed.
Initially 'Save' is disabled, because the 'Update remaining' button is checked, and we are trying to use more than is remaining, but after unchecking 'Update Inventory Quantity' we can apply the change.
So the experimental record is accurate when it comes to Consumed Quantity, even if there is a discrepancy in Inventory when it comes to Inventory Quantity.
We can then open Inventory and manually edit the sample's remaining quantity to the correct value (0mg).
Whenever no changes to a list or to item quantities have been applied, or an operation is not allowed, the 'Save' button is automatically disabled.


 Color coding: note that quantities were displayed in red to indicate an error, but are now green, meaning the update can proceed.