Edit Locations in Visual Containers 🧪
To use and place items into visual containers, you first have to add locations to the container.
To edit locations in visual containers:
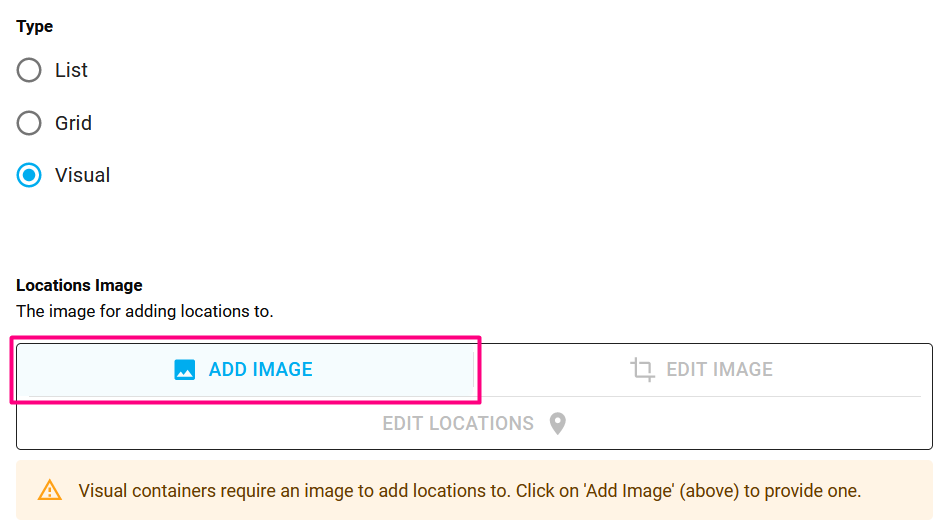
- First, make sure you have uploaded a locations image to your visual container. This can be done during or after creation.
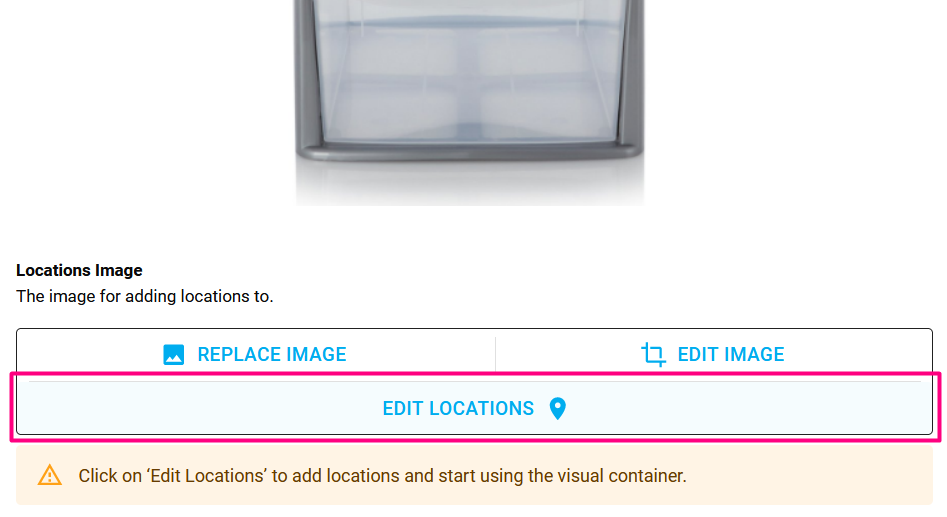
- Click on Edit Locations.
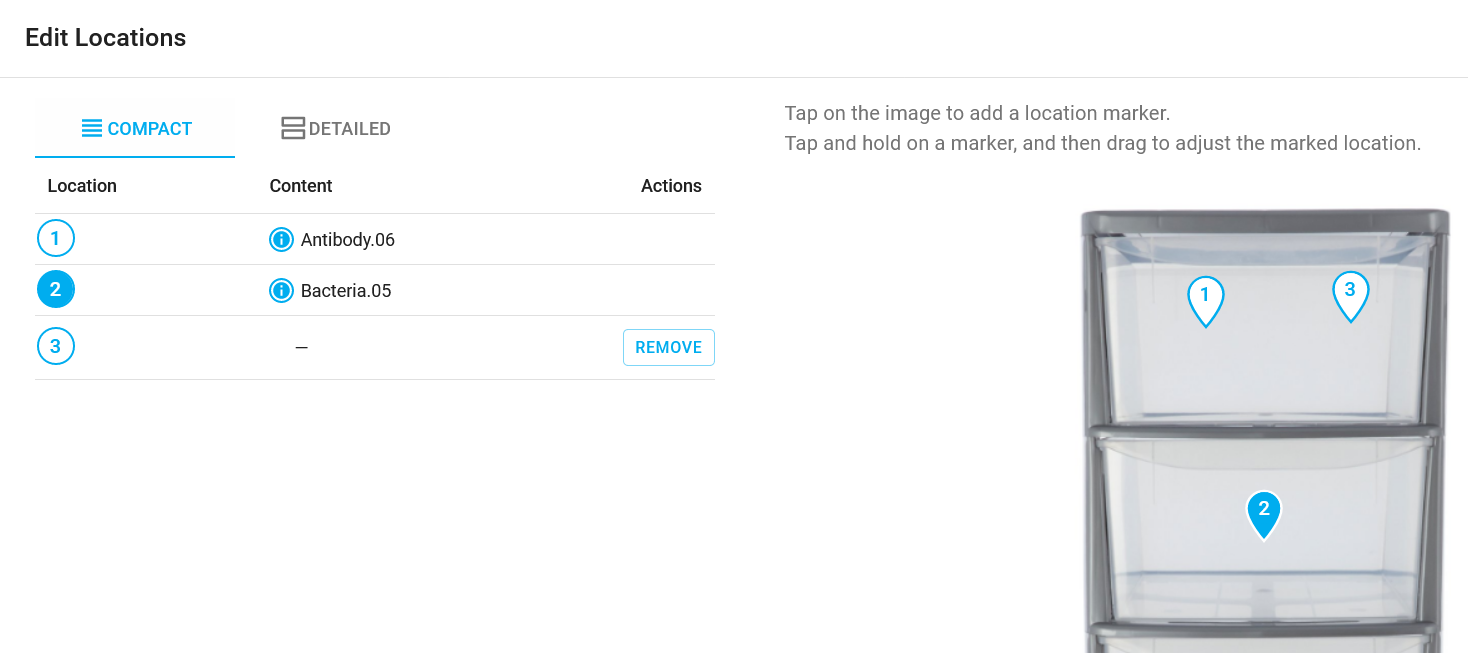
- Click on the image to add a location; click and drag to adjust the location. Click on Remove on the left panel to delete the location. Click on Close to exit the location editor.

The left-hand panel will also display the content of a location once items have been moved into it (see Move Samples and Containers). You can click on the circle in the location column to highlight that location in the right-hand panel.
- Scroll down and click on Save.
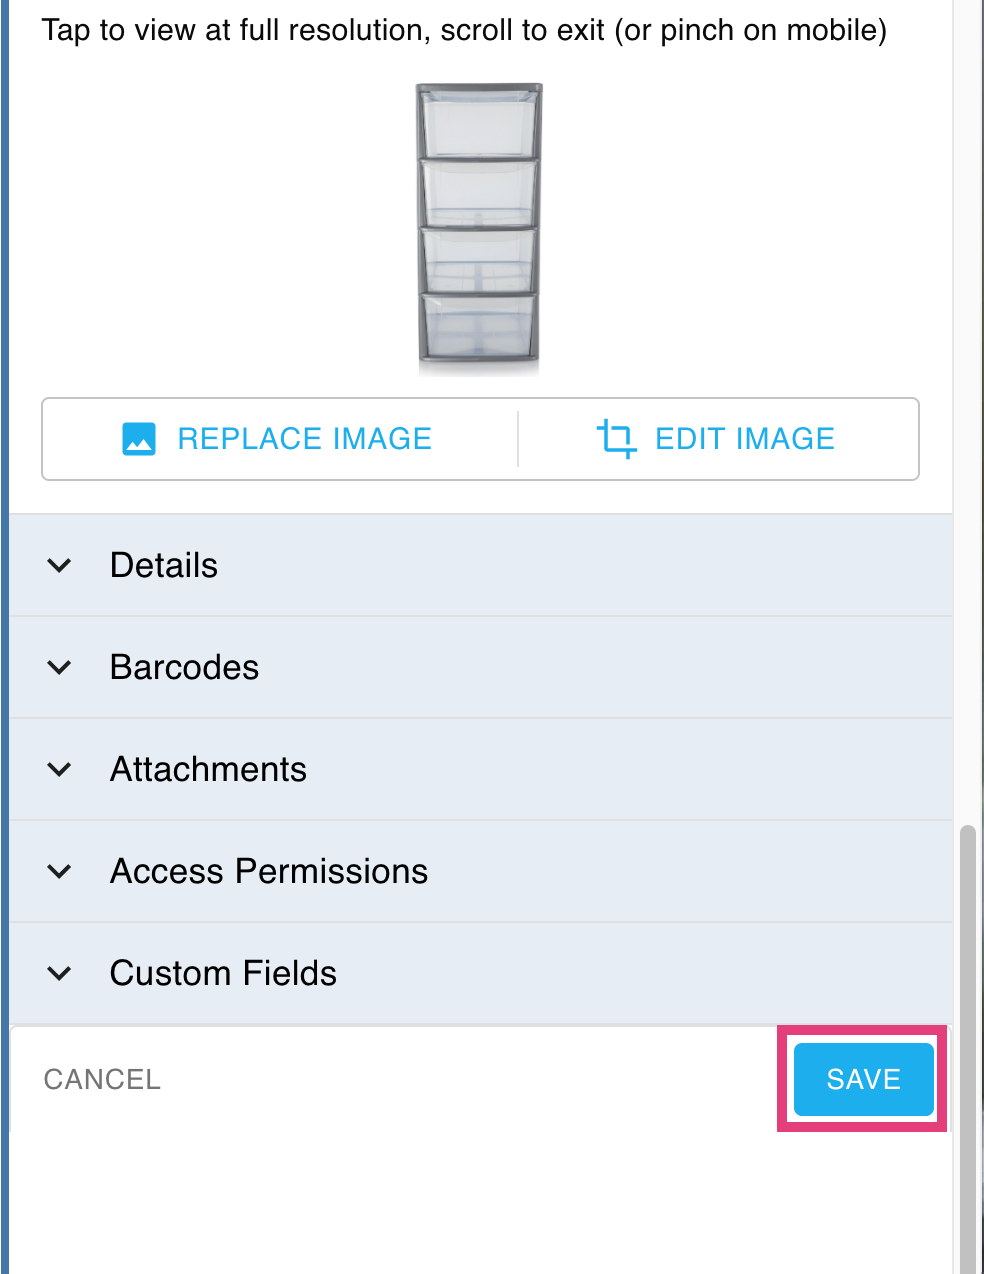
- The container preview will show the locations you've added.

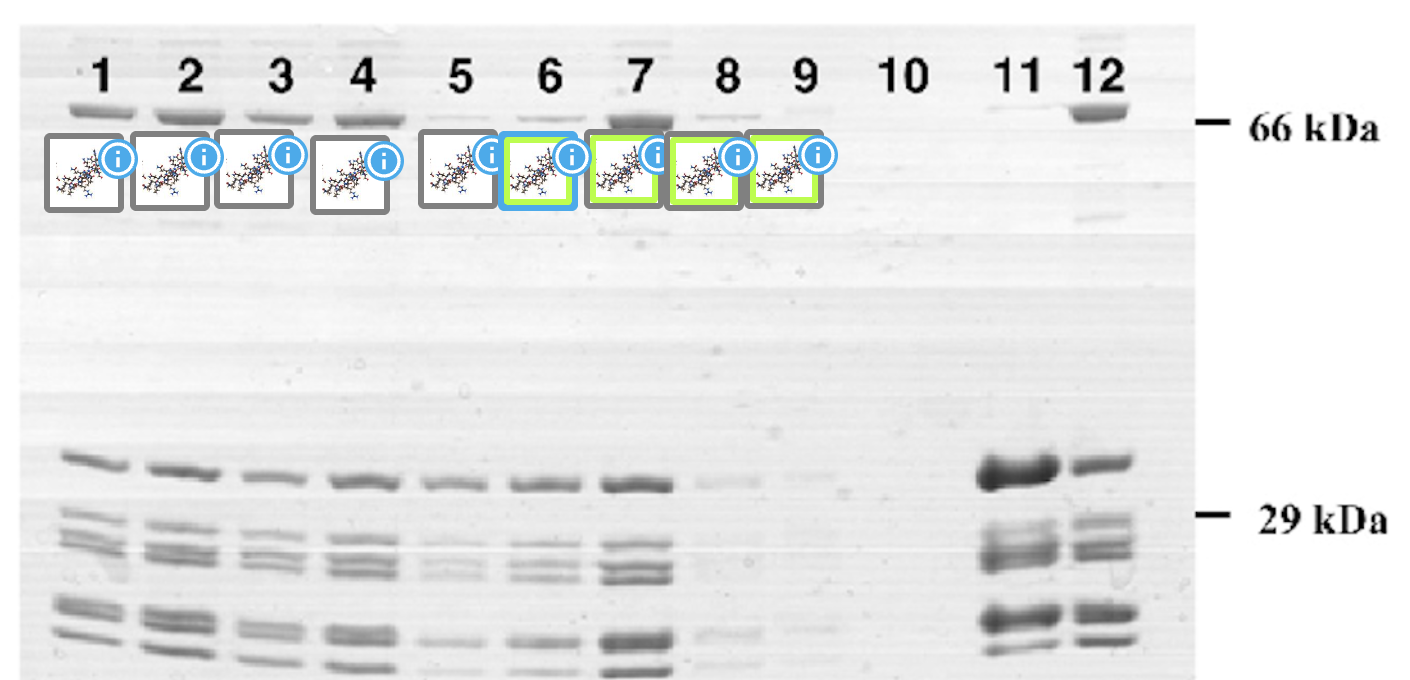
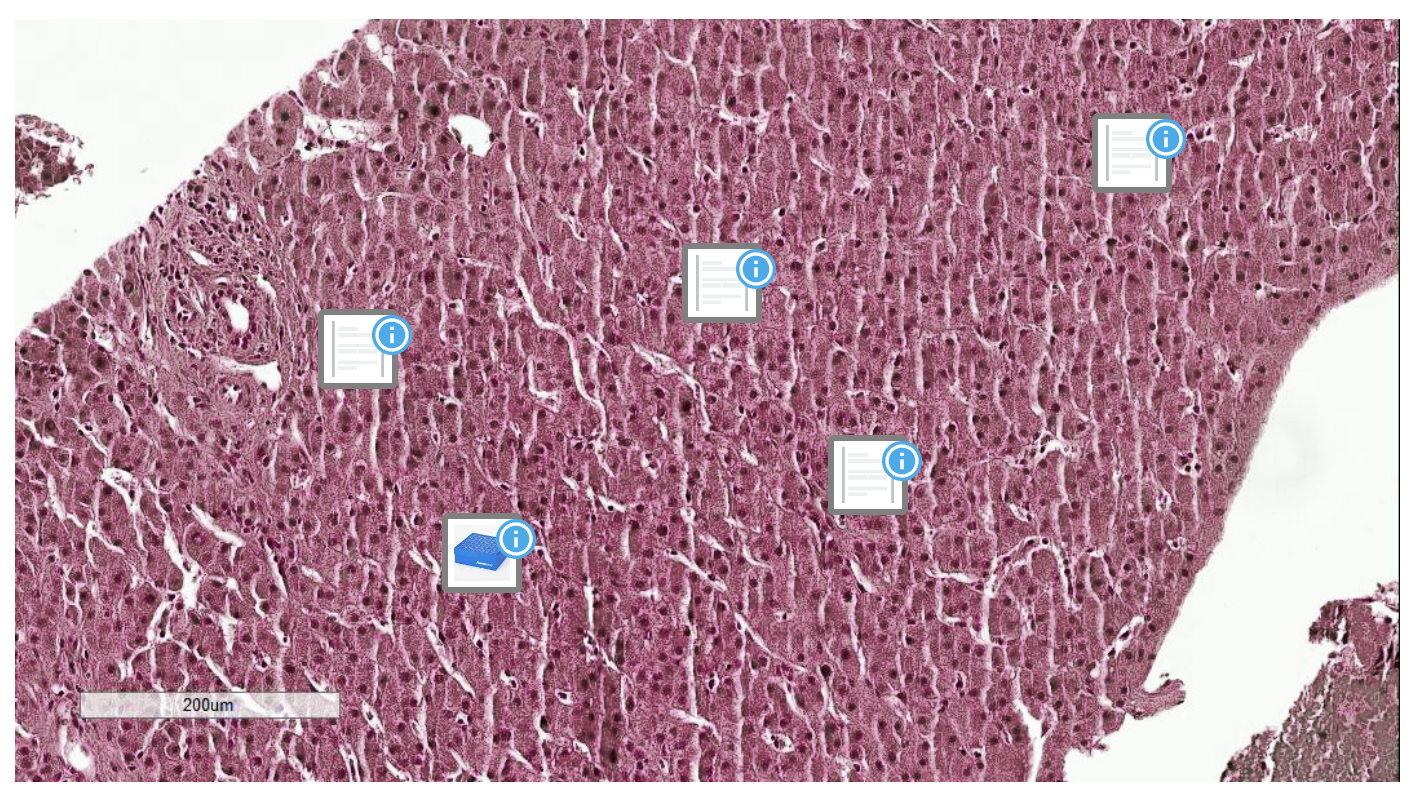
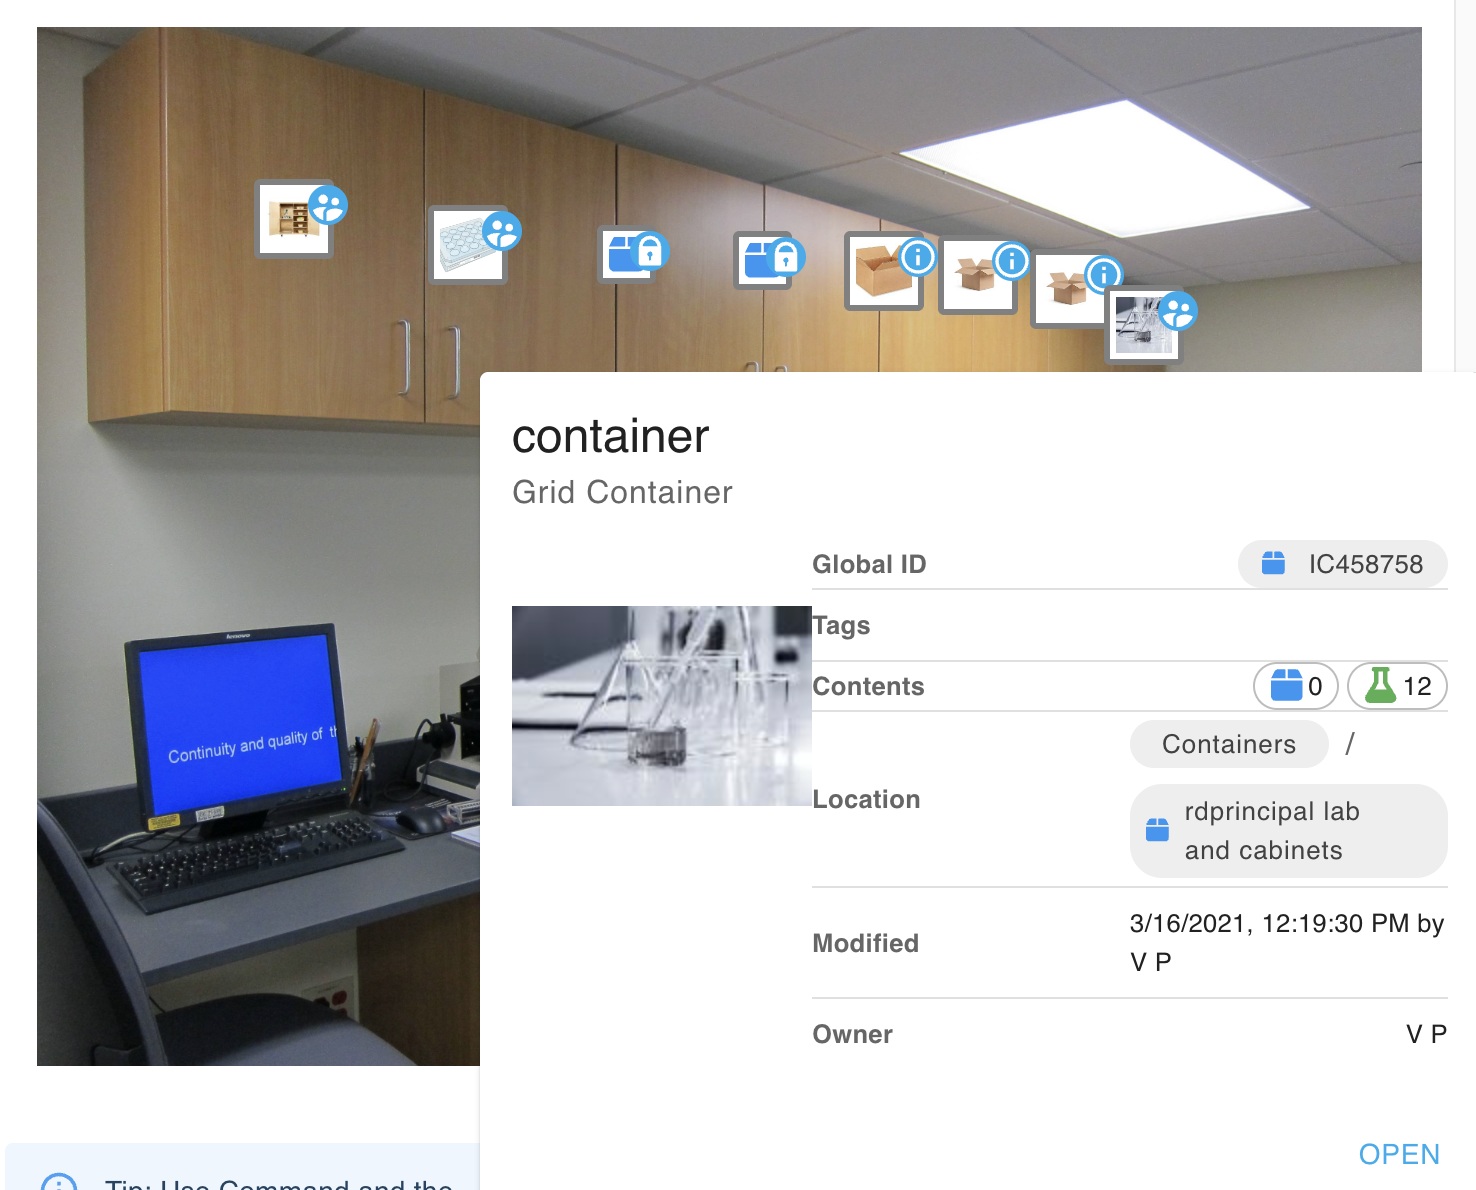
- When you move items into the container (see Move Samples and Containers), the preview will update with the preview images of the items.
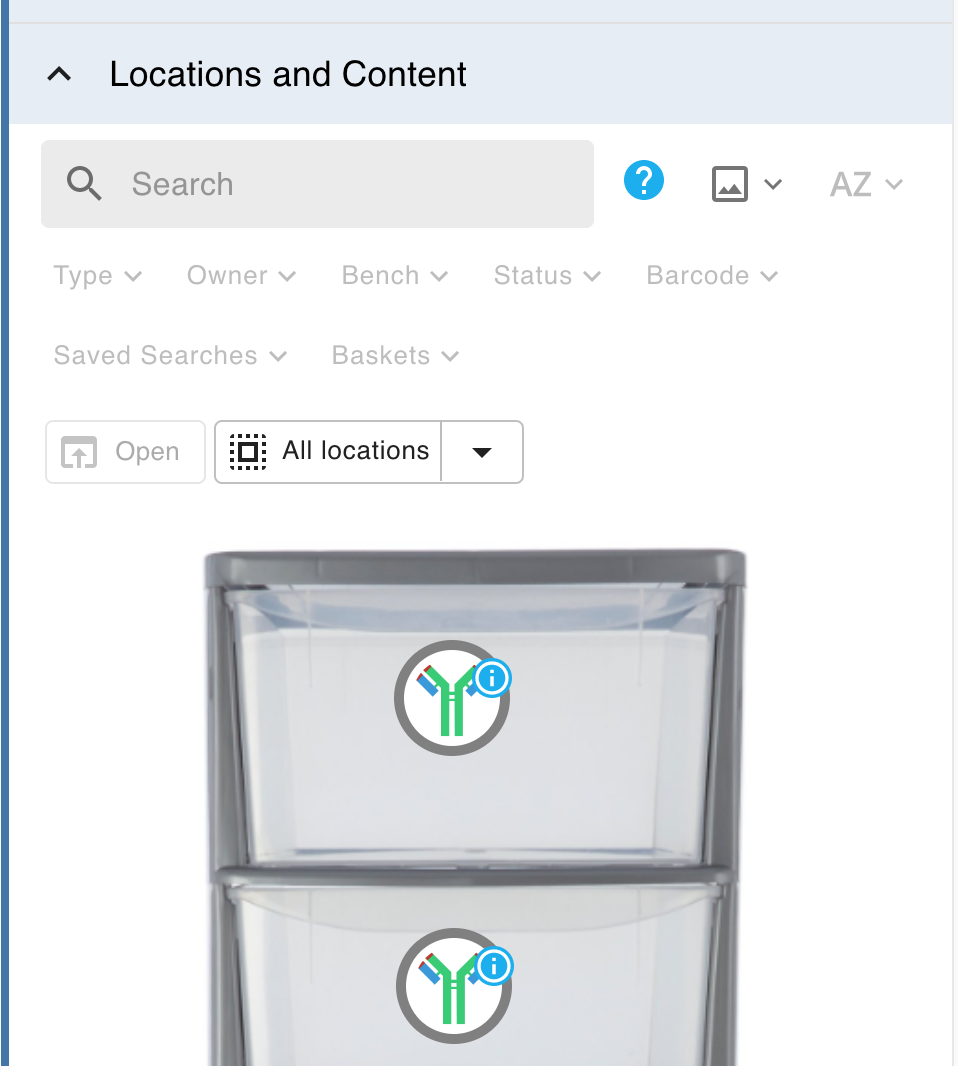
Mouseover the small badge top right of the item preview icon to reveal a popup showing information about that item. See lab cabinet example image below.
Examples of application:
Visual containers are idea for showing the precise location of items within irregular shaped containers or when the user needs map-like clues to precisew subsample location. Examples might include:
Location of bacterial colonies on a petri dish
Location of collection areas in a field site
Location of components on a circuit board
Location of samples loaded in specific electrophoresis gels
Location of instruments in a laboratory or storage room
Location of anomalous cells visible in a micrograph
A map showing cabinet contents in a lab or location of major equipment in a building
How did we do?
Select Items in Inventory 🧪
Permissions and Sharing in Inventory 🧪