Open Lab Autosharing
- Introduction
- How to enable autosharing for lab members
- How to enable autosharing of your own work
- How to disable autosharing of your own work
- How to set edit permissions for a specific document
- How to unshare a specific document
- How to see who is autosharing in your labgroup
- How to view your lab members work
Introduction
The autosharing function, when enabled, results in documents created by a lab member to be automatically shared with all other lab members. This enables streamlined collaboration for groups that want to operate as open labs. Group-wide autosharing, and autoshare management by PIs/Lab Admins with "view all" permissions is available for Team and Enterprise customers. On Community, each user in a group has to enable autosharing of their work themselves.
Autosharing works as follows:
- When you enable autoshare for a specific group, all your current and future documents and notebooks will be shared with that group, with the "read" permission.
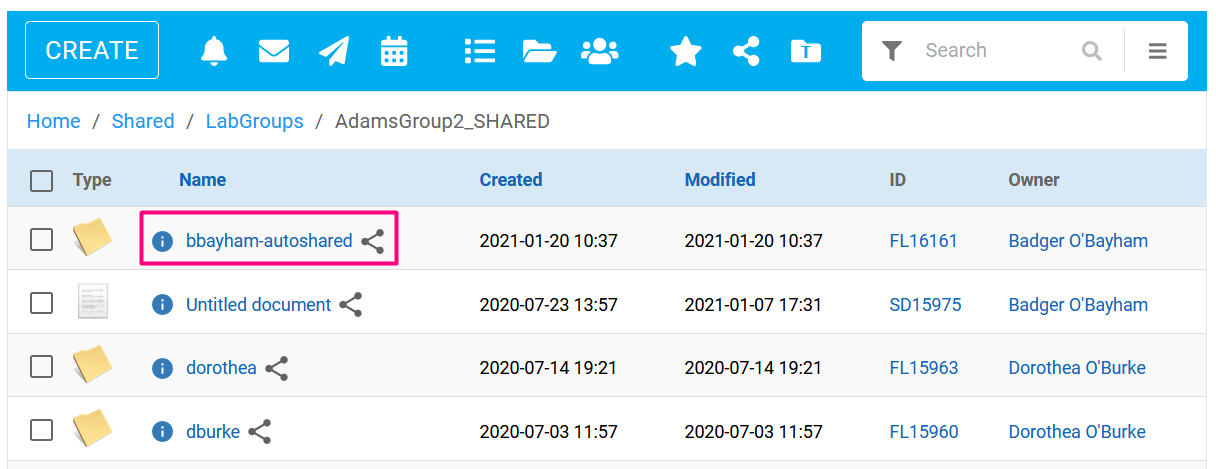
- Your documents will appear in your lab members' Workspaces under Shared > LabGroups > GroupName_SHARED > Folder name you chose when enabling autoshare.
- As with all RSpace sharing, autosharing creates links to your documents in the Shared folder, where your lab members can access them. They can be thought of as aliases or shortcuts.
- Sharing does not modify the structure of the original documents in your Workspace. The document links in the Shared folder are organised as a flat list, and PIs/LabAdmins have permissions to re-organise the documents within the Shared folder. This doesn't affect the location of the document in your Workspace.
- You still can give other lab members the "edit" permissions or unshare items, as described below.
- Collaboration groups do not allow for any form of autosharing.
This article describes autosharing of your own work, and the autosharing management available on RSpace Team and Enterprise. You can read more about sharing at Sharing Content.
How to enable autosharing for lab members
If these features are disabled on your Team or Enterprise server, please check with your SysAdmin that the
group_autosharing.available property is enabled under System > Configuration > System Settings. It does not affect the ability to individually autoshare your own work.On RSpace Team and Enterprise, PIs and LabAdmins with "view all" permissions can:
- enable autoshare for other non-PI lab members
- enable a group wide autoshare status
Instructions on how to enable or disable autosharing for other users and group-wide autosharing, as well as a table summarising autosharing permissions, are included below.
Enable or disable autosharing for a user as a PI
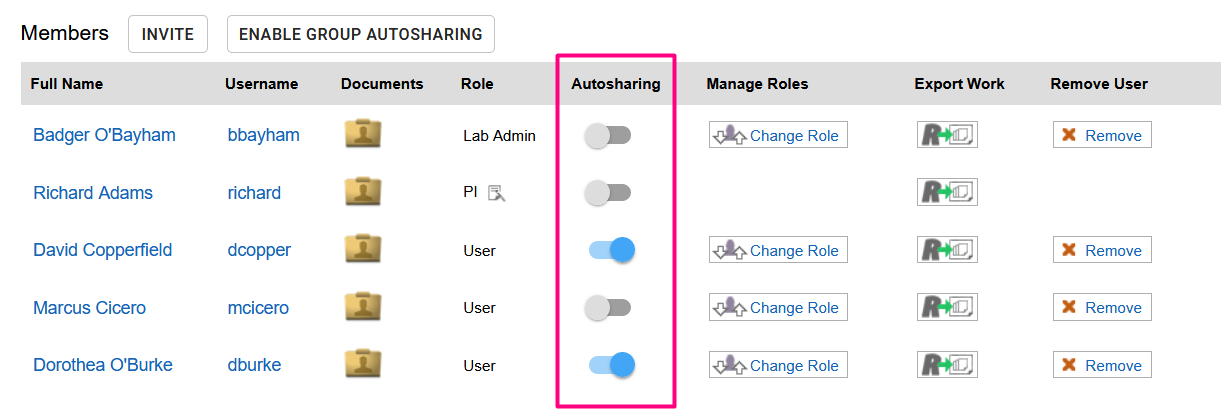
PIs and LabAdmins with "view all" permissions can manage non-PI members' autoshare status from the LabGroup page, in the Members section of My RSpace > LabGroups. Only the PI themselves can manage their own autoshare status.
The toggle indicates the autoshare status of a user: blue if it is enabled, grey if it is disabled. Simply click the toggle to change the autoshare status of a specific user.

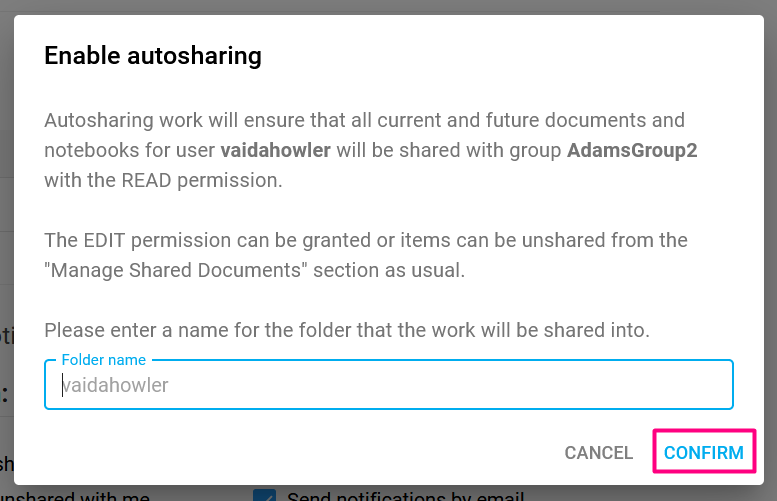
When enabling, you will have the option to choose a name for the folder the user's work will be shared into. By default, this will be their username. Click on Confirm to enable autosharing.

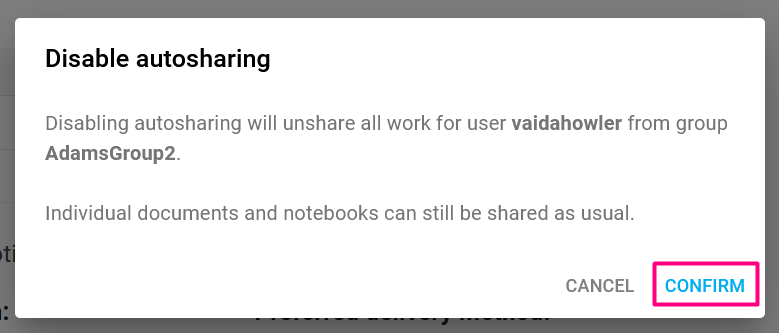
When disabling, you will be asked to Confirm as well.

Group-wide autosharing
Pis and LabAdmins with "view all" permissions can also enable and disable group-wide autosharing for all non-PI members of a LabGroup. When group-wide autosharing is enabled, all new non-PI members joining the lab will have their work autoshared with the group automatically. Individual users' autoshare status can still be modified using the individual toggles, without affecting the group-wide autoshare status.
To enable group-wide autosharing, click on Enable Group Autosharing:

Then click on Confirm.

Autosharing permissions table
User Role | Can toggle group-wide autosharing? | Can toggle autoshare for other group members? | Can their work be autoshared by others? |
User | No | No | Yes |
Lab Admin | No | No | Yes |
Lab Admin with "view all" permissions | Yes | Yes | Yes |
PI | Yes | Yes | No |
Community Admin | No | No | N/A |
SysAdmin | No | No | N/A |
How to enable autosharing of your own work
Everyone can manage their own autoshare status, including on RSpace Community. However, this feature does not apply to Collaboration groups.
- Navigate to My RSpace > Profile

- Under the LabGroups section, you will find information on the groups you are in, and whether you have autoshare enabled for them. To turn on autosharing, first click on Enable Autosharing.

- You can optionally provide a name for the folder your work will be shared into, instead of using the default username. For example, you could use your name as a folder name to make it easier for other lab members to identify who the folder belongs to. Then click Confirm to enable autoshare. Note that if you have a large number of documents, you will receive a notification when the process is complete.

How to disable autosharing of your own work
You can disable autosharing for groups in the same place, under My RSpace > Profile > LabGroups:
- Click on Disable Autosharing for the relevant group

- Click on Confirm. Note that disabling autosharing will unshare all your work from the group. You will still be able to share individual items with the group using the default sharing mechanism.

How to set edit permissions for a specific document
- Navigate to My RSpace > Shared Documents

- You will be presented with a full list of all of your shared documents, and who they are shared with. You can use the searchbar on the top-right to find the relevant document, then change the Permission column from READ to EDIT.

How to unshare a specific document
- Navigate to My RSpace > Shared Documents

- Search for the relevant item using the top-right searchbar, and click on Unshare in the Options column to unshare it.

How to see who is autosharing in your labgroup
- Under My RSpace > Profile > LabGroups, click on the labgroup name

- In the members table, you will be able to see who has autosharing enabled and who has not. You can also enable or disable your own autosharing status on this page.

How to view your lab members work
In the Workspace, click on the Shared folder, then LabGroups, then the name of your group. You will find folders for each lab member that has enabled autoshare. These folders contain all the contents of their Workspace. Note that shared files will be returned in normal search results, so you can use the searchbar to look for specific files.

