Configure PIDINST IDs in Inventory (for System Administrators) 🧪
This article is for System Administrators. For guidance on using PIDINST IDs in Inventory, see Add PIDINST IDs to your Inventory Items. Overview. RSpace supports two PIDINST providers: DataCite and B…
This article is for System Administrators. For guidance on using PIDINST IDs in Inventory, see Add PIDINST IDs to your Inventory Items.
Overview
RSpace supports two PIDINST providers: DataCite and B2INST. Refer to the instructions below regarding differences in configuration.
DataCite Membership
Preliminary steps have to be completed before the integration can be enabled:
- Your institution will need to become a DataCite Member. If you have any DataCite-specific questions related to membership or PIDINST IDs, it is best to contact DataCite directly.Your institution does not need to become a DataCite Service Provider, as RSpace fulfills this role.
- You will need to create a PIDINST ID Catalog Repository in DataCite. Note that PIDINST IDs require a separate repository to be created, so you cannot reuse any current DataCite repositories that are used for DOIs.
- (Optional) If desired, you can request credentials for registration test servers from DataCite, if you wish to try the integration out on your own RSpace server without minting actual PIDINST IDs. Alternatively, you can use the shared Inventory Test Server to preview the functionality provided.
B2INST Membership
Preliminary steps have to be completed before the integration can be enabled:
- You will need your credentials from the B2INST service provider: https://b2inst.gwdg.de. If you have any B2INST-specific questions related to membership, it is best to contact B2INST directly.
Setup PIDINST
After the specific Membership steps listed above are completed, a System Administrator can setup the integration within RSpace:
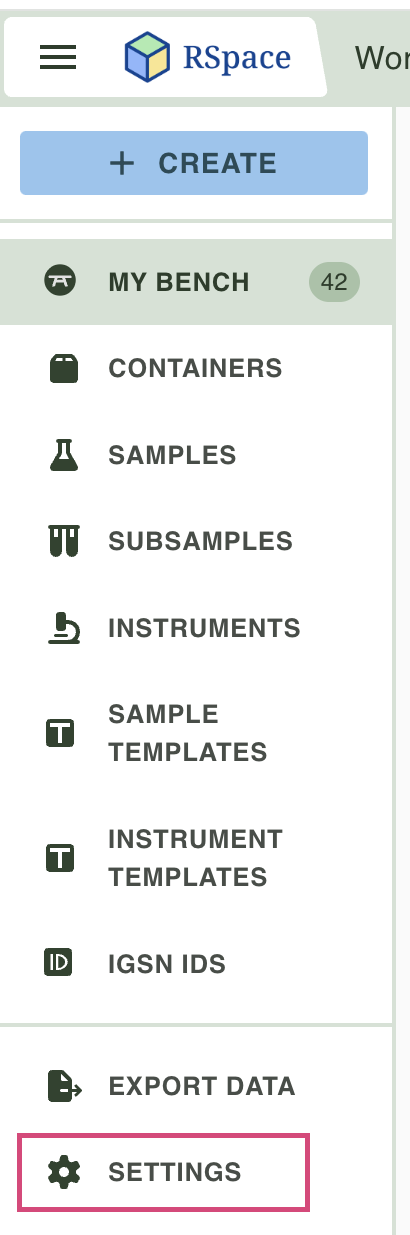
- Navigate to Inventory.

- In the sidebar, select Settings. If you do not see this option, please ensure you are logged in as a system administrator.
- A settings panel will open. Select the PIDINST tab at the top of the panel. At this point you can select DataCite or B2INST as a provider. These are mutually exclusive-- you can only have one provider setup at a time.
Enabling a PIDINST registry also lets users search it and import Instruments from its published records (Create > From PIDINST registry). Only the enabled registry is searched, and RSpace uses the credentials configured here for these read-only searches. If the registry cannot be reached, or the credentials stop working, searching and importing stop working as well as registration. See Search and Import PIDINST Instruments into your Inventory 🧪.
DataCite option
Fill in the following fields:
- Repository Account ID (in the format "ABCD.EFGHIJ". Repository must only be used for PIDINST IDs)
- Repository Password
- Repository Prefix (in the format "10.12345")
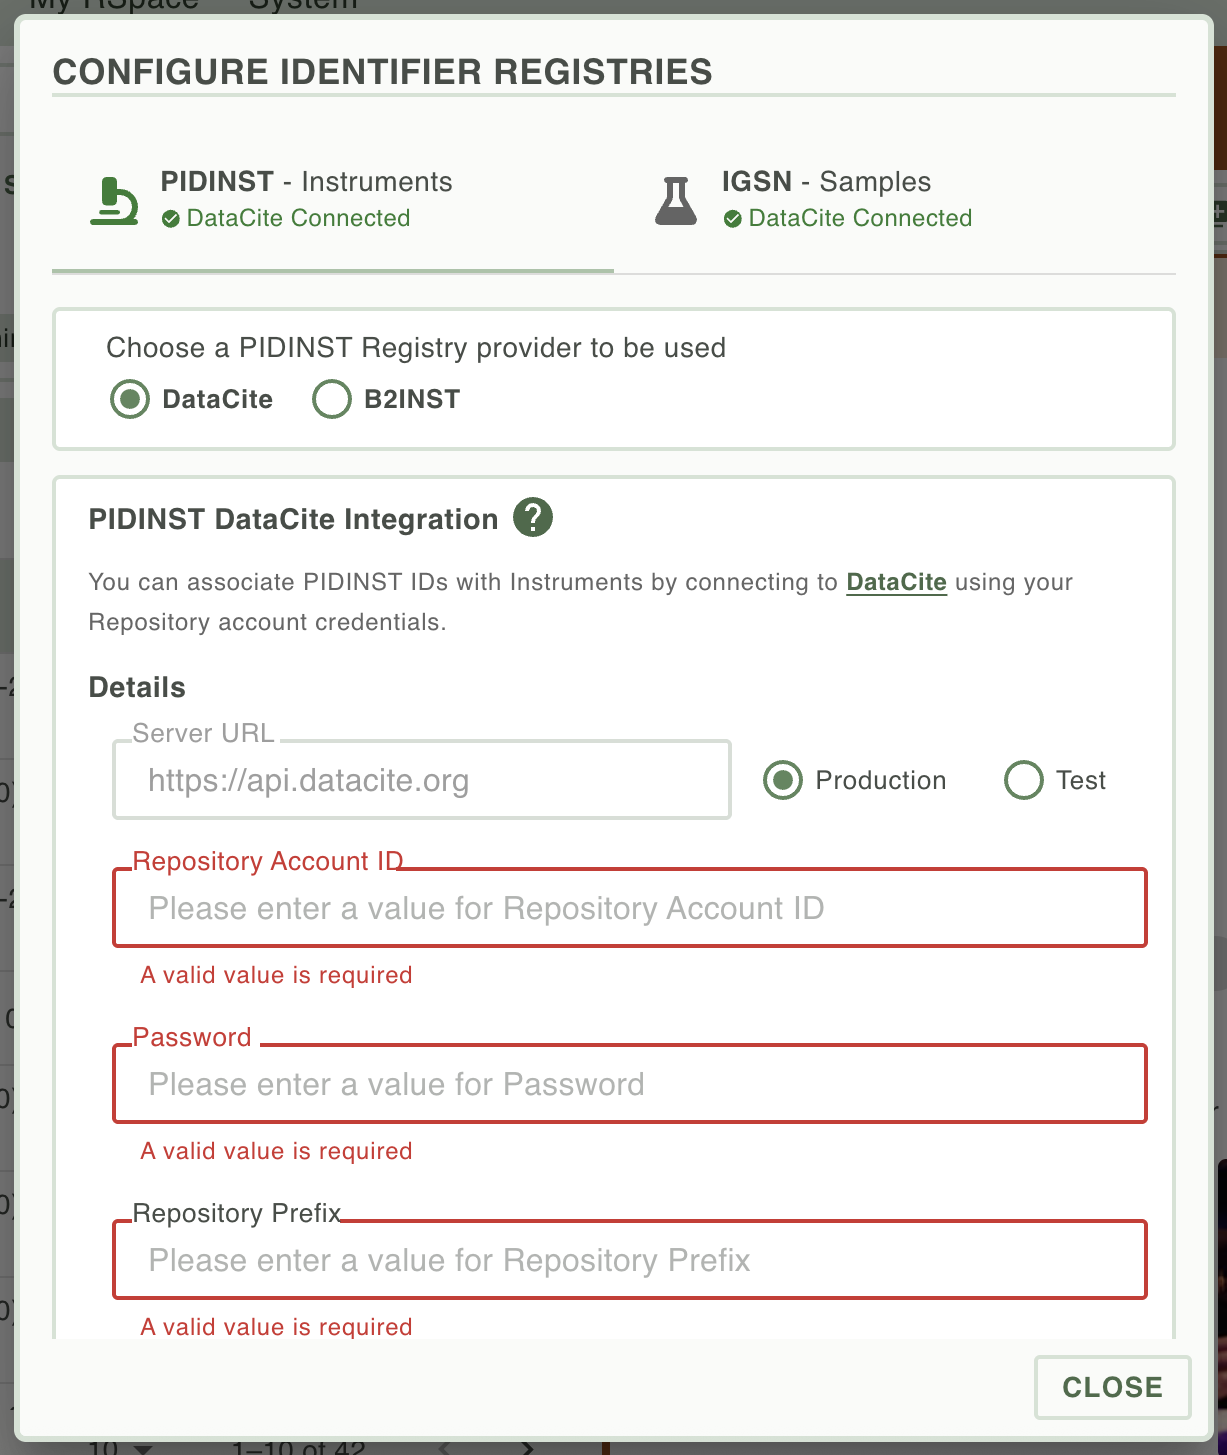
- If you have credentials for the test DataCite servers, you can connect to them by changing the Server URL to "Test". Otherwise, keep the "Production" option.
- You can also choose whether you wish to Enable the integration right away once you save, or keep it Disabled.
- Click on Save to save the credentials. (Depending on your screen resolution you may need to scroll down to find the Save button.) You will get a notification that the settings have been successfully updated.
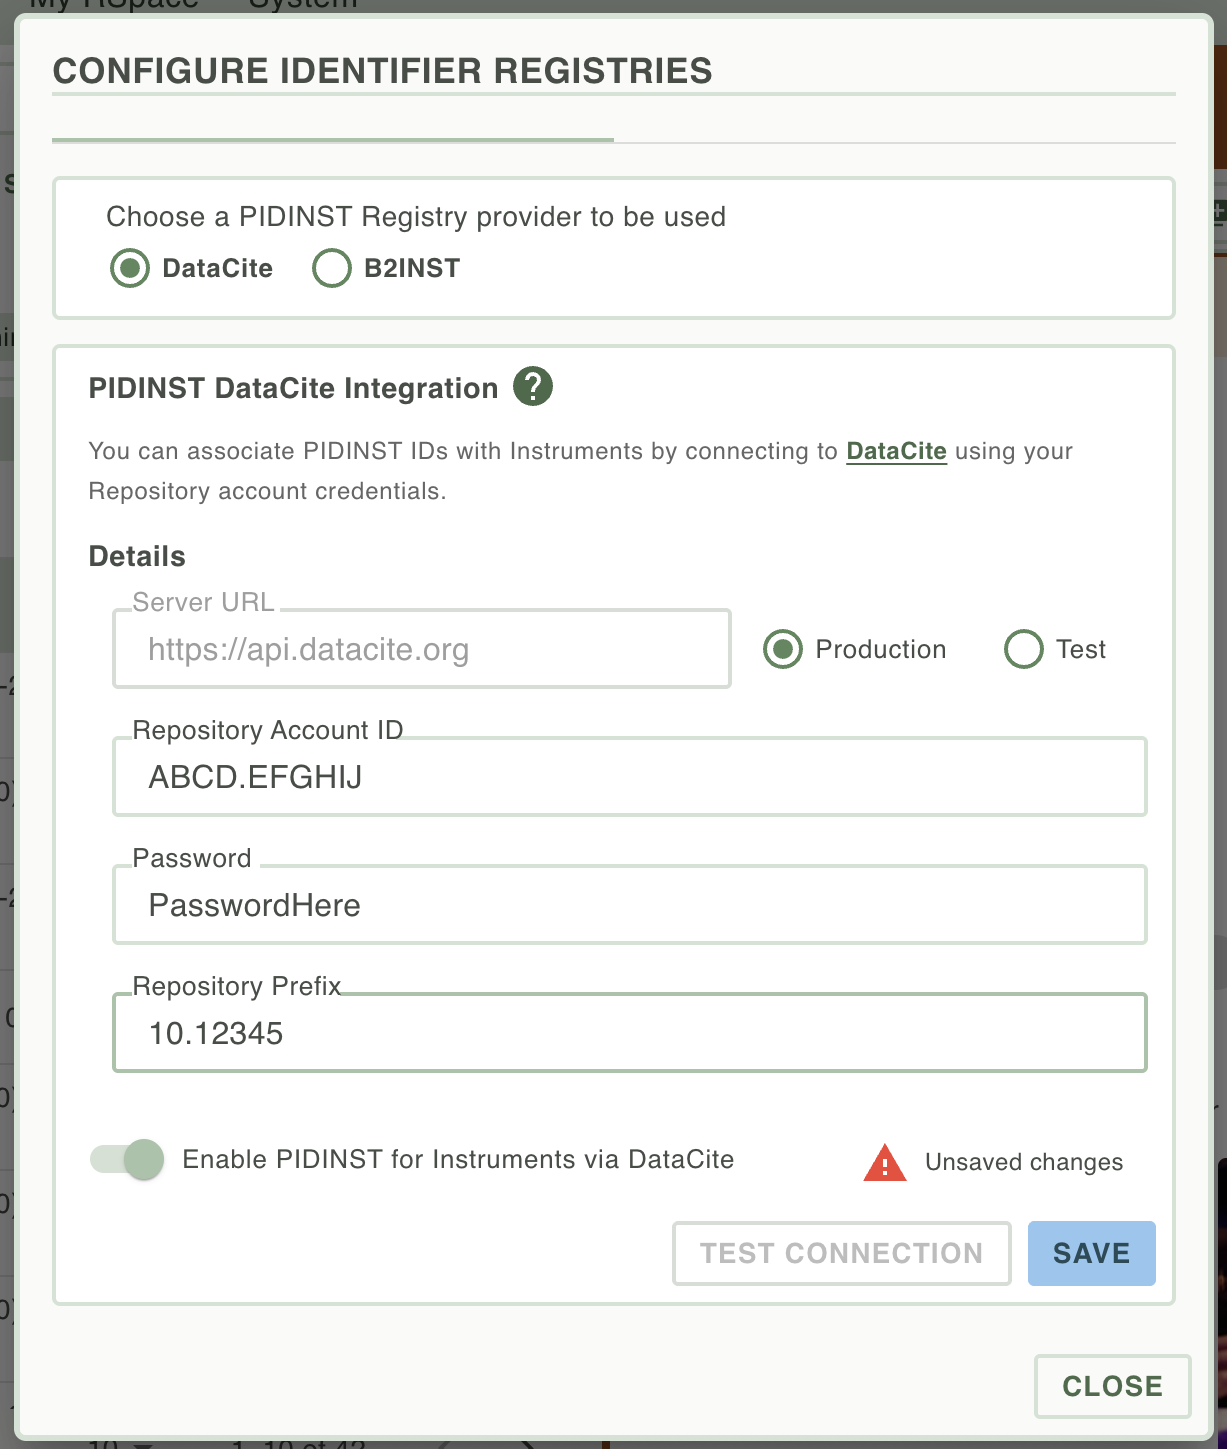
- You can then use Test Connection to check that your credentials are correct.

- When you are ready to enable the integration for your institution, select Enabled and Save.
- You can disable the integration at any time by setting it to Disabled, then clicking Save.
B2INST option
Fill in the following fields:
- Server URL
- Community ID
- Repository Password
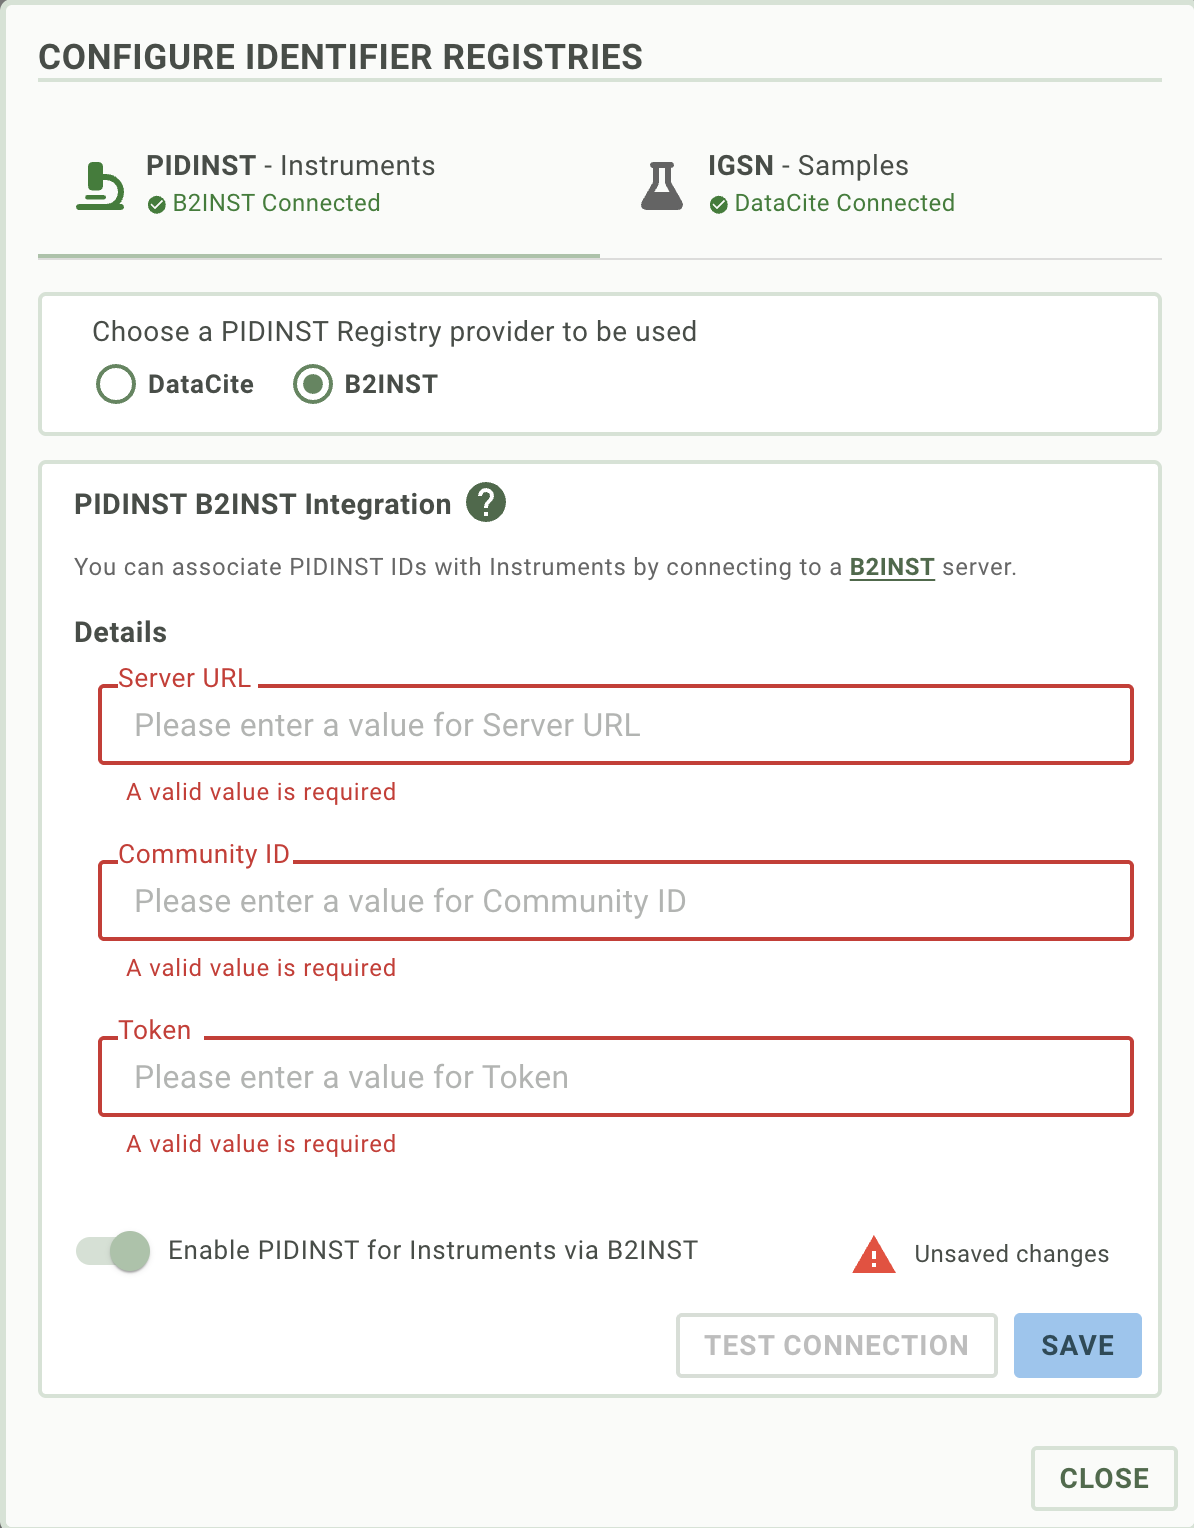
- You can also choose whether you wish to Enable the integration right away once you save, or keep it Disabled.
- Click on Save to save the credentials. (Depending on your screen resolution you may need to scroll down to find the Save button.) You will get a notification that the settings have been successfully updated.
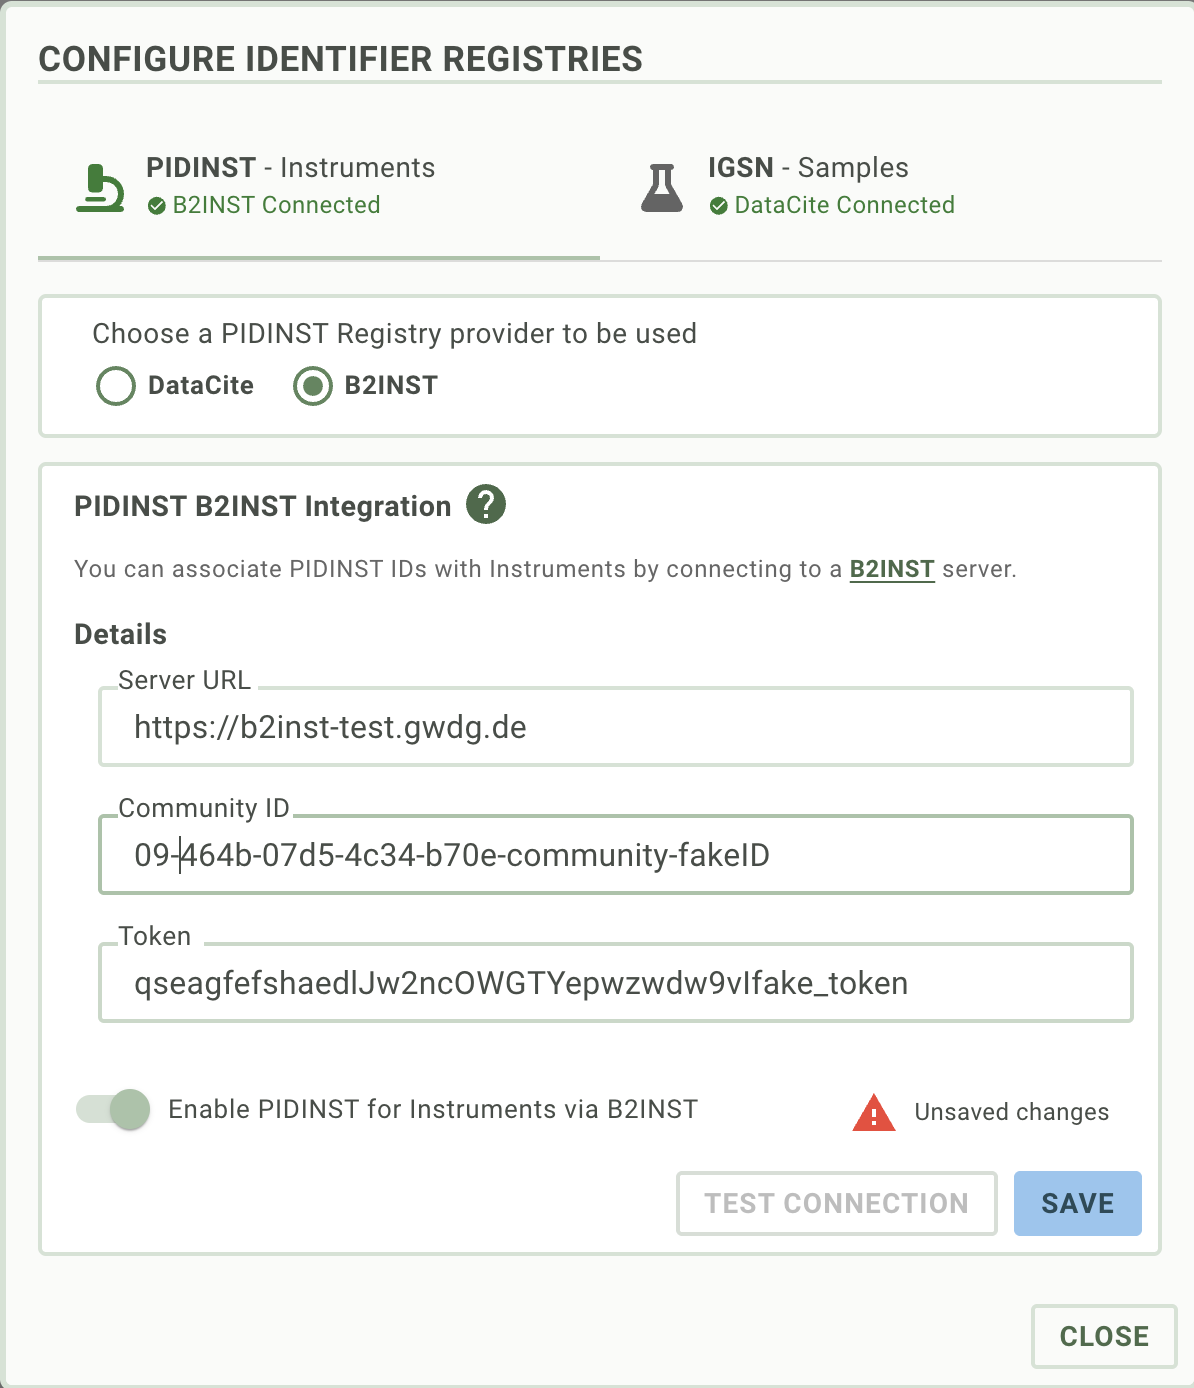
- You can then use Test Connection to check that your credentials are correct.
- When you are ready to enable the integration for your institution, select Enabled and Save.
- You can disable the integration at any time by setting it to Disabled, then clicking Save.
How did we do?
Configure DataCite IGSN IDs in Inventory (for System Administrators) 🧪
Setting up Protocols.io integration