Import New Documents from Word
Microsoft Word or Open Office text documents can be imported directly into RSpace and used to create new RSpace documents. This may be done in batches (for example if you are a new labgroup setting up with RSpace for the first time) or with individual documents. Images and tables within the Word document are preserved within the RSpace document and images are also uploaded into the Image Gallery. The original Word document remains unchanged.
Word documents may be imported into the Workspace or a Notebook.
if you wish to import an updated version of a document that you've already imported into RSpace, check out Importing Updated Documents from Word
This import path also works with .txt .rtf and .odt formats, but note that this import method does not support direct ingestion of anything other than documents; It cannot be used to convert excel or other spreadsheets or non-text file types into RSpace. Learn more about supported file types.
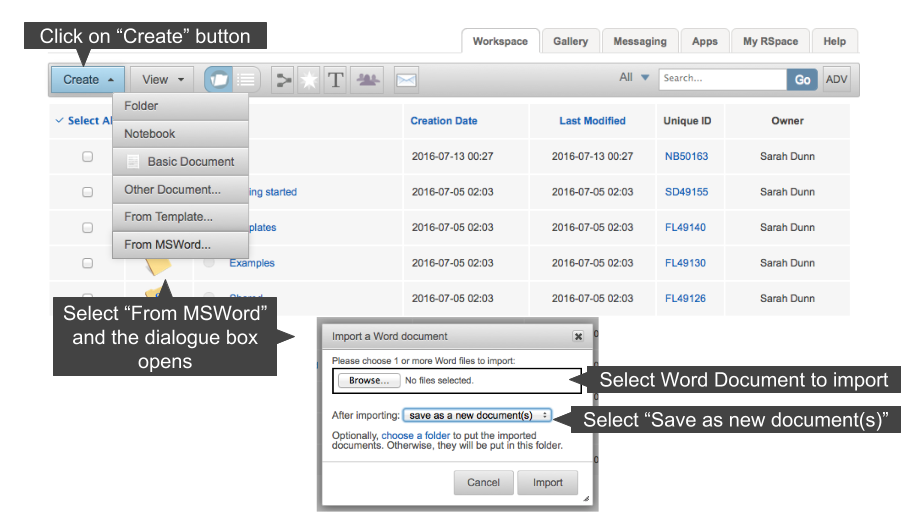
Importing Word Documents into the Workspace
To import Word documents into the Workspace:
- Select the Workspace tab on the homepage
- Click “Create” -> “from MSWord”
- A dialogue box will appear asking you to select Word files or folders to upload
- Choose 1 or more Word files to upload. Note that this import method will also work with .txt and .rtf documents.
- You may choose a folder to place the newly created documents in. If no folder is selected the documents will be uploaded into the Workspace.
- Click “Import”
- Each uploaded Word document is converted into a single RSpace document with the same name as the original Word document
- Images within the Word document are now present in the Image Gallery

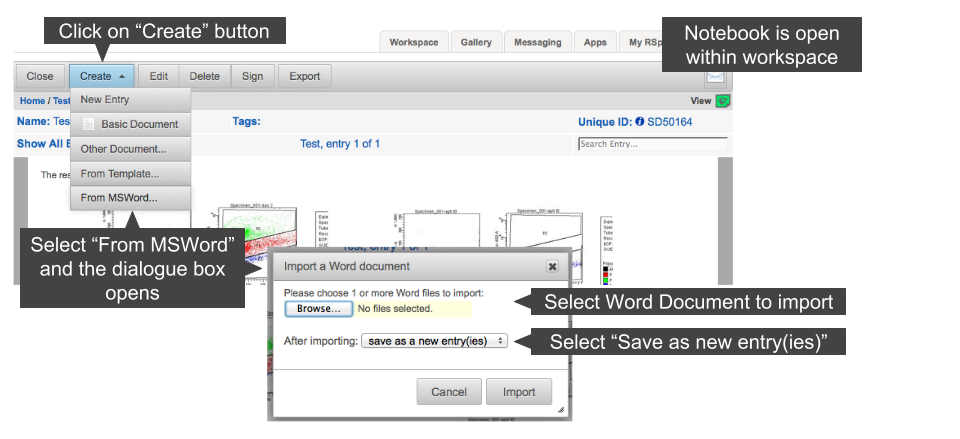
Importing Word Documents into a Notebook
To import Word documents into a Notebook:
- Select a Notebook from the Workspace tab and open it in the Folder view or the Notebook view
- Click “Create” -> “from MSWord”
- A dialogue box will appear asking you to upload a file
- Click “Import”
- The file will appear as the latest entry in the Notebook

