Working with Notebooks
Overview
Notebooks contain RSpace documents arranged in a chronological sequence. In the context of a Notebook, RSpace documents are often referred to as Entries. RSpace Notebooks are designed to reproduce the structure of a traditional lab notebook and tell the story of your research by recording a linear sequence of events in such a way as to preserve the historical order of actions performed by one or more users. In order represent your story clearly and accurately, certain restrictions and rules apply to Notebooks. For example, since linear time cannot be broken into subfolders, your Notebook entries can only be arranged in a linear sequence. You can read about how to share or edit permissions of a shared Notebook in Sharing Content.
Creating a Notebook
To create a Notebook:
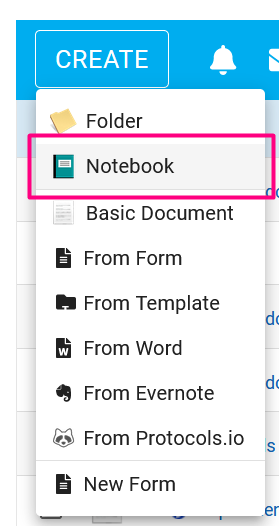
- On the Workspace, click on Create

- Select Notebook
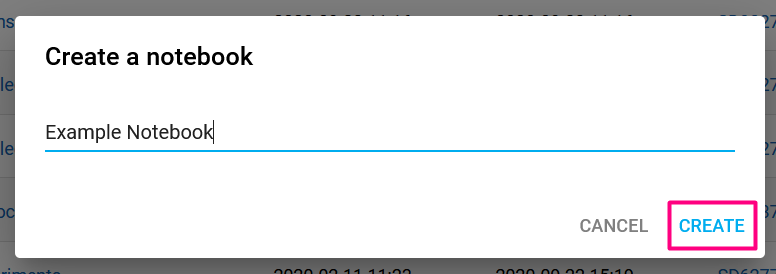
- Give the notebook a name, and click on Create.
Adding a New Entry
To add a new entry to a notebook:
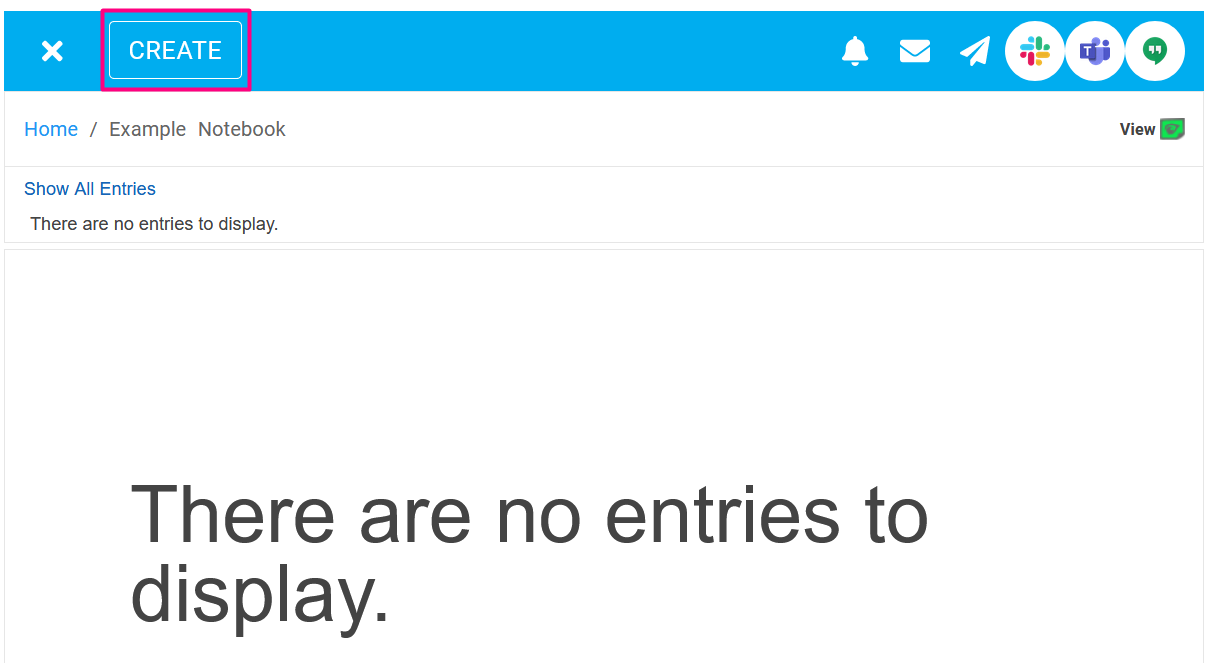
- Click on Create when viewing the Notebook.
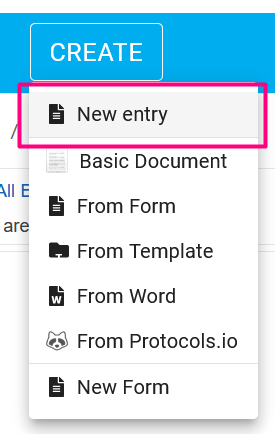
- Select whether you want to create a New Basic Document entry, or use a Template, Form, or import from Protocols.io or Word.
- You can then edit and save the document as you normally would; entries can be as long as you like. You can change the entry Name and Tags using the edit icons.

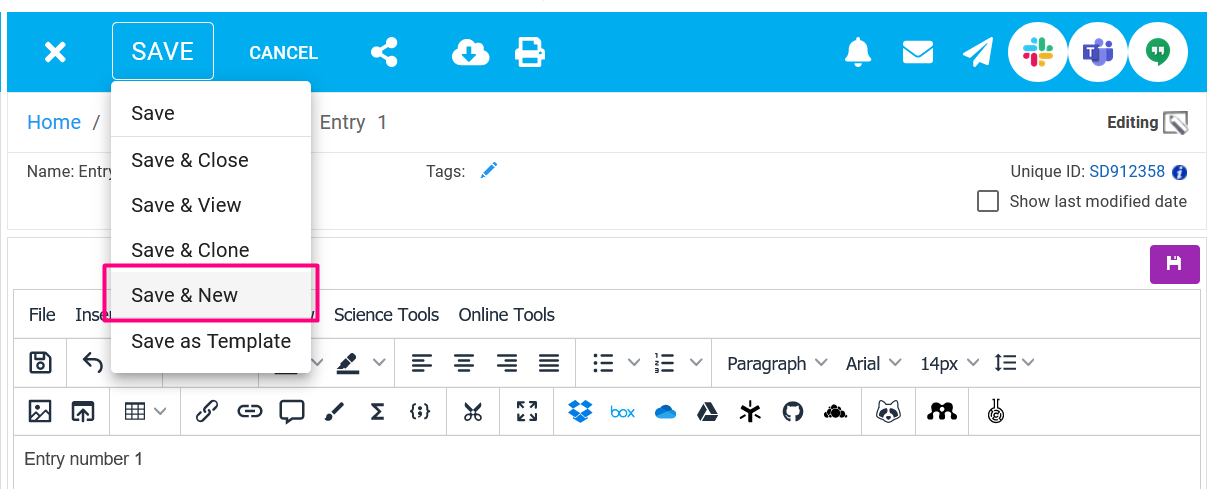
- You also have the Save & New option, which will save your current entry and directly open up a new one.
Moving Documents into Notebooks
- You can only MOVE documents into a Notebook if you are the owner of the BOTH Notebook and the document you want to move. In the Workspace, select the checkbox of the Document

- Select the Move in the context menu

- Select the desired destination Notebook, then click on Move.

- When you open the Notebook, the moved Document is there.
Sharing Documents into a Shared Notebook
There are two ways to add a shared document to a shared notebook:
- Follow the basic sharing instructions in Sharing Content. After selecting a group to share with, select a Notebook as the destination to share into by clicking Change in the Location column.

You might need to tunnel down your folder hierarchy by expanding your folders to find the destination Notebook. Click on it to select it, then click Select to confirm.

- Another way to share a document into a shared notebook is to navigate inside the Notebook and then click the Create button. This will create your new document in the shared Notebook context. This will also create a link to the new document in the owner's Workspace.
You will still be able to access your document in its original location in your own Workspace, as you still own it. Sharing into the Notebook merely creates a reference to it in the Notebook.
Note that the two methods are equivalent; Regardless of whether you create a document in your workspace THEN share it into to a shared notebook, or whether you navigate to a shared notebook and create a new shared page there, the result is the same (i.e. links to the same document will appear in both locations). All shared documents in RSpace have a corresponding link in the owner's Workspace. This means that if the shared document is unshared or deleted in it's shared location, or if the collaboration or group is disbanded, then the original owner can still access the document in their own Workspace.
Unsharing a Document from a Notebook
Unsharing can be done by:
- selecting the Document in the Workspace, opening its share dialog, and unsharing
- under My RSpace > Shared Documents (read more at Sharing Content).
Moving Documents out of a Notebook, or to a different Notebook
To move a Document between (or out of) unshared Notebooks use the Move command. You can only MOVE documents between Notebooks if you are the owner of both Notebooks and of the document you want to move.
You can also move own document out of your own Notebook back to your Workspace. That'll make the document a standalone record, no longer connected to the Notebook.

To move a Document between shared Notebooks, or to move a Document out of a shared Notebook, you will first need to unshare it, then share it into the desired new location.
Sharing a Notebook
The steps to share and unshare a Notebook are the same as for a Document, see Sharing Content. However, permissions work slightly differently with Notebooks.
Another way to share a Notebook directly with EDIT permissions is to navigate inside a Group Shared Folder and then click the CREATE button, and then select Notebook.
Permissions Within Shared Notebooks
Notebooks created within RSpace are owned first and foremost by their creator. It is possible to share your Documents into other people's Notebooks, but this causes you to lose some control over the Document.
The sharing behaviour is as follows:
- All entries within a Notebook are shared with the same read/write permissions as the Notebook, and the Notebook owner can re-share the Notebook with read/write permissions with other users. The Notebook owner can edit any of the entries in the Notebook, both their own and those shared into the Notebook.
- Both the shared Notebook owner and Document owner can delete and unshare individual entries within the Notebook.
- The Document owner can unshare to remove the Document from the Notebook.
- PIs and LabAdmins can unshare the entire Notebook, but not individual Documents within the Notebook.
- The Document cannot be moved to another Notebook or Folder from within the shared Notebook; it will need to be unshared first. When sharing, the Document metadata and history remains intact.
Viewing and Navigating Notebooks
Notebook View
In the Workspace, click on the Notebook icon to open the Notebook view.

You can then navigate the chronological entries using the arrows, swiping on a tablet, or using the entries bar.
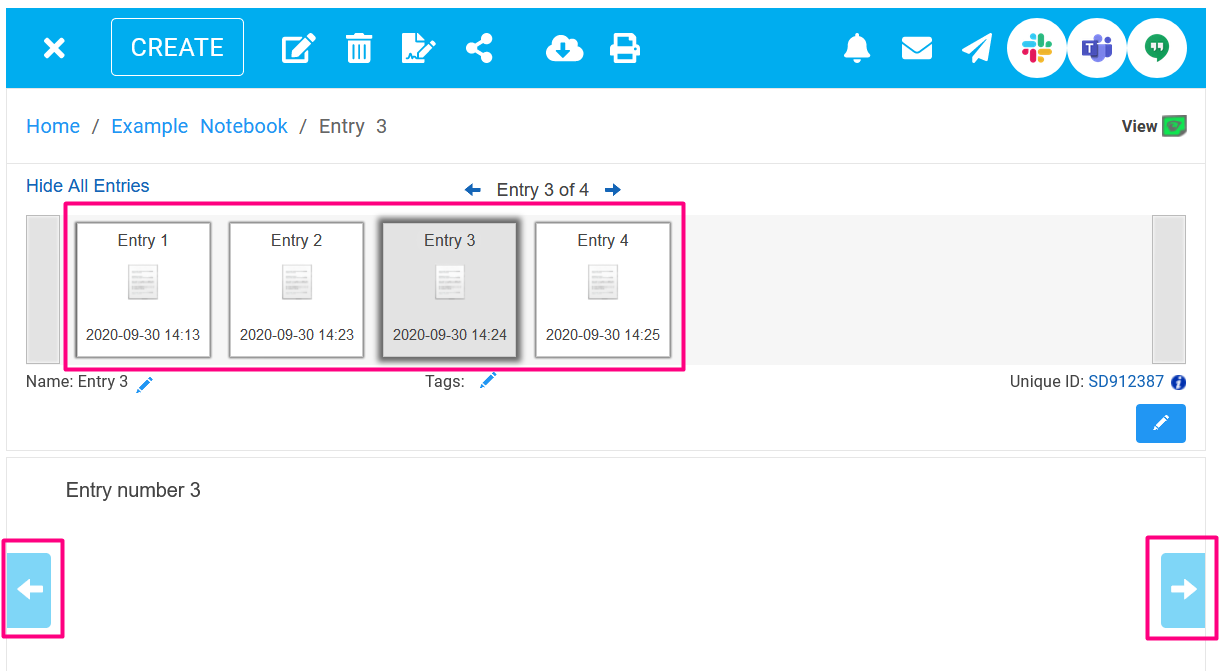
You can show/hide the entries bar using Show All Entries/Hide All Entries.

You can also see the Notebook in Folder view by clicking on the breadcrumb.

Folder View
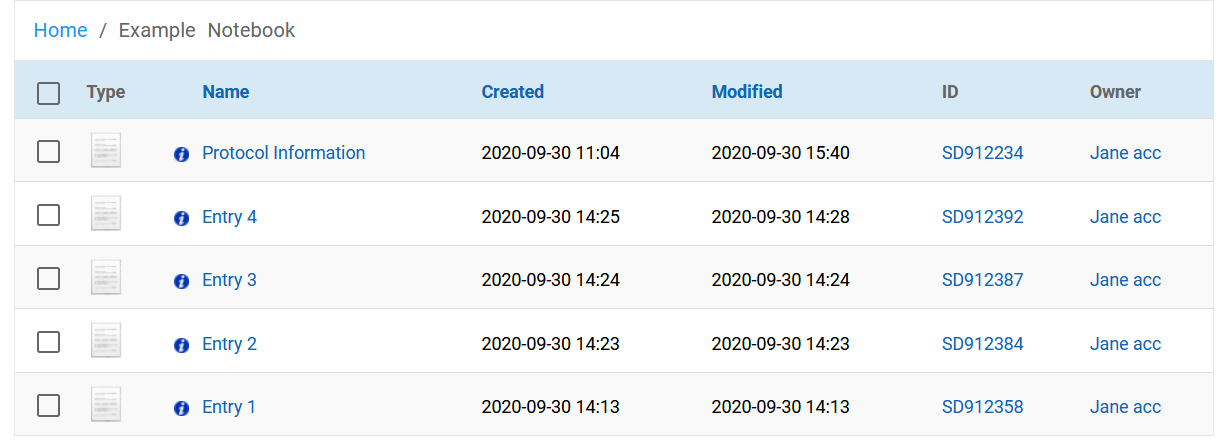
If you want to perform a bulk operation such as sharing (see Adding, Moving and Sharing Documents into Notebooks), deleting, exporting several entries (see Export Options), or want to view all entries at once, you can click on the Notebook name in the Workspace.

This will open your Notebook as if it was a folder. Clicking on an entry will open it in Notebook view.

Searching a Notebook
When viewing entries, you can use the search bar on the top-right, which supports full-text search of the content of entries, searching by name, and by tags.

