Table of Contents
- Introduction
- Video Overview
- Creating and Using Templates
- Create a brand-new template
- Create a Template from a Sample
- Create a Sample from a Template
- View a Sample's Template
- Browse Templates
- Search Templates
- Edit a Template
- Add a new Field to a Template
- Delete an existing Field from a Template
- View all Samples created from a Template
- Update a specific Sample to latest Template Version
- Update all of your Samples to latest Template Version
- Rules for applying template changes to existing Samples
Create and Use Sample and Instrument Templates 🧪
By creating templates from existing samples, reuse the structure of a sample for consistency.
- Introduction
- Video Overview
- Creating and Using Templates
- Create a brand-new template
- Create a Template from a Sample
- Create a Sample from a Template
- View a Sample's Template
- Browse Templates
- Search Templates
- Edit a Template
- Add a new Field to a Template
- Delete an existing Field from a Template
- View all Samples created from a Template
- Update a specific Sample to latest Template Version
- Update all of your Samples to latest Template Version
- Rules for applying template changes to existing Samples
Introduction
Both Samples and Instruments can be created from templates, which provide a uniform and consistent way of creating representations of sets of physical items.
Sample Templates
You can make individual samples based on sample templates, or bulk import samples and create a new sample templates using a .csv file (see Import Samples into Inventory). A sample is a type of item, or a description of the common characteristics of some related family of subsamples. A sample is always made up of one or more similar or identical subsamples. In RSpace, "sample" is a term that can be applied to ANY family or category of similar or identical physical or conceptual entities. For example, a sample may be:
• A collection of paper reprints you keep in a file cabinet, with each individual document being a subsample
• A set of identical aliquots drawn from a stock solution of reagent. The small aliquots and the remaining flask of reagent are all subsamples.
• A cohort of de-identified students being studied in a longitudinal pedagogic study. Each student is a subsample.
The subsample is the physical item itself. Subsamples have a physical location (e.g. a container), while samples are a conceptual category, and do NOT have physical locations, since each sample might be made up of multiple subsamples, and each subsample could have a different location. For each sample template, you can change the name "subsample" to some custom label such as "unit", "portion", "aliquot" or whatever term you use in your research. Metadata can be applied to a whole family of items using the sample page, but each subsample can also have its own more specific metadata that applies only to that single item.
Instrument Templates
You can make individual Instruments on their own, or you can create them based on Instrument Templates. (Unlike samples, instruments cannot currently be created via bulk import.) An instrument is a type of item, or a description of the common characteristics of some related family of items used or referenced in experiments or protocols. For example, an instrument may be:
• One of a set of similar microscopes in your microscopy facility
• One of your university-owned vehicles used to run errands around campus. You may, for example, have a single template representing cars, and a separate template representing trucks.
Template Principles
When working with samples and instruments, you might want to add custom template fields to help users include relevant information and improve reproducibility and consistency by making sure that all samples or instruments of a specific type use the same custom fields. This is where using templates comes in handy.
Sample and instrument templates can be created from scratch, created from existing samples and instruments, or for samples created using a properly formatted .csv file. By creating a template and editing it to your liking, you are able to reuse the structure of a specific sample or instrument for future samples or instruments. This enables you to create samples and instruments with a consistent format, as well as ensuring that fields that are required for safety or regulatory purposes are included for each sample or instrument of that type.
After editing the template, existing samples or instruments based on this template can be updated to latest template version, which will propagate changes to the structure of the sample or instrument (e.g. add new template fields), but won't modify any data already saved in the existing samples or instruments.
You can always edit or add more metadata to samples, subsamples and instruments after you have created them, or add custom fields for ad-hoc metadata.
Each RSpace deployment has a number of default templates, visible to everyone. You can make a copy of these templates, which makes you an owner of the copy, and allows further editing to your needs.
Video Overview
The following video goes over the template features described in this article:
Creating and Using Templates
Create a brand-new template
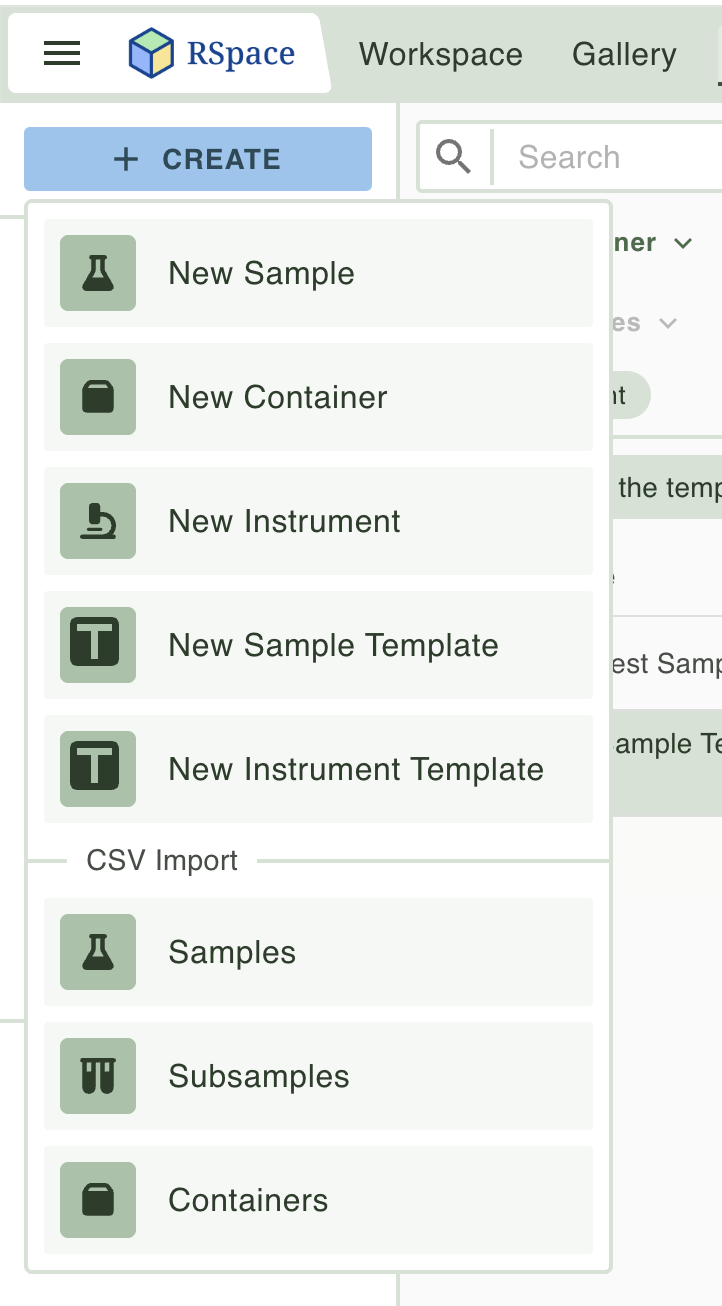
Click on 'Create' on the left-hand navigation bar, and choose either Sample Template or Instrument Template:
You now see the template editor appear. You can set the units of measurement, subsample name and default values, as well as add new fields (see the section 'Editing Templates' below for details).
Create a Template from a Sample
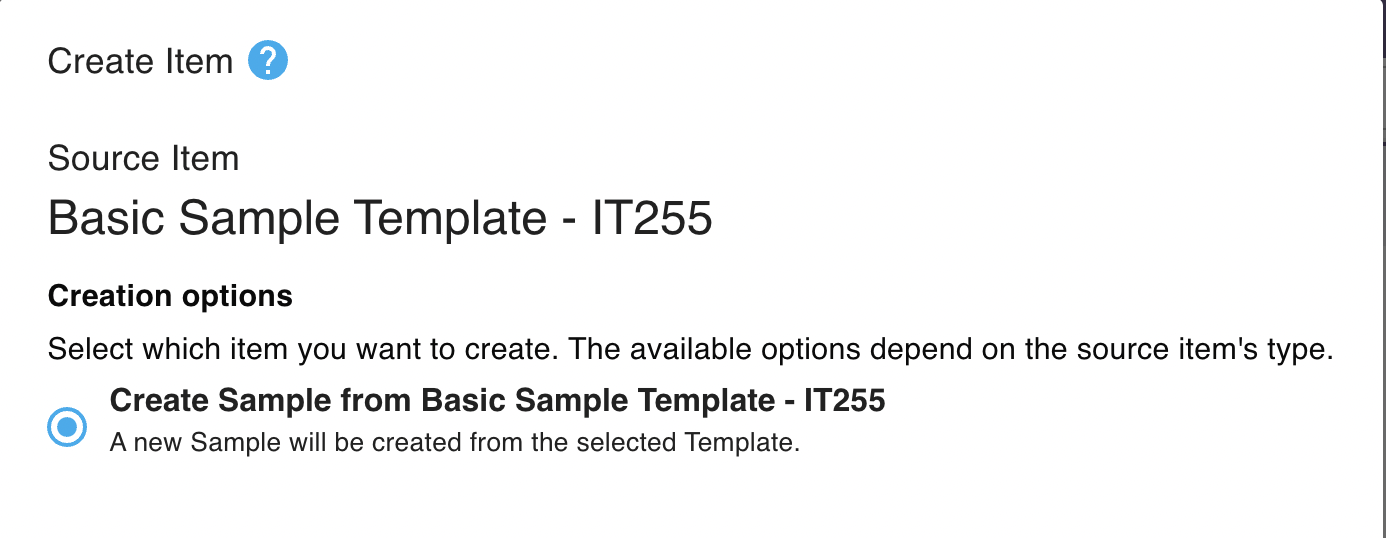
- When viewing a sample, click on Create from the context menu.

- The create dialog will open. Click the Create button at the bottom of the dialog.

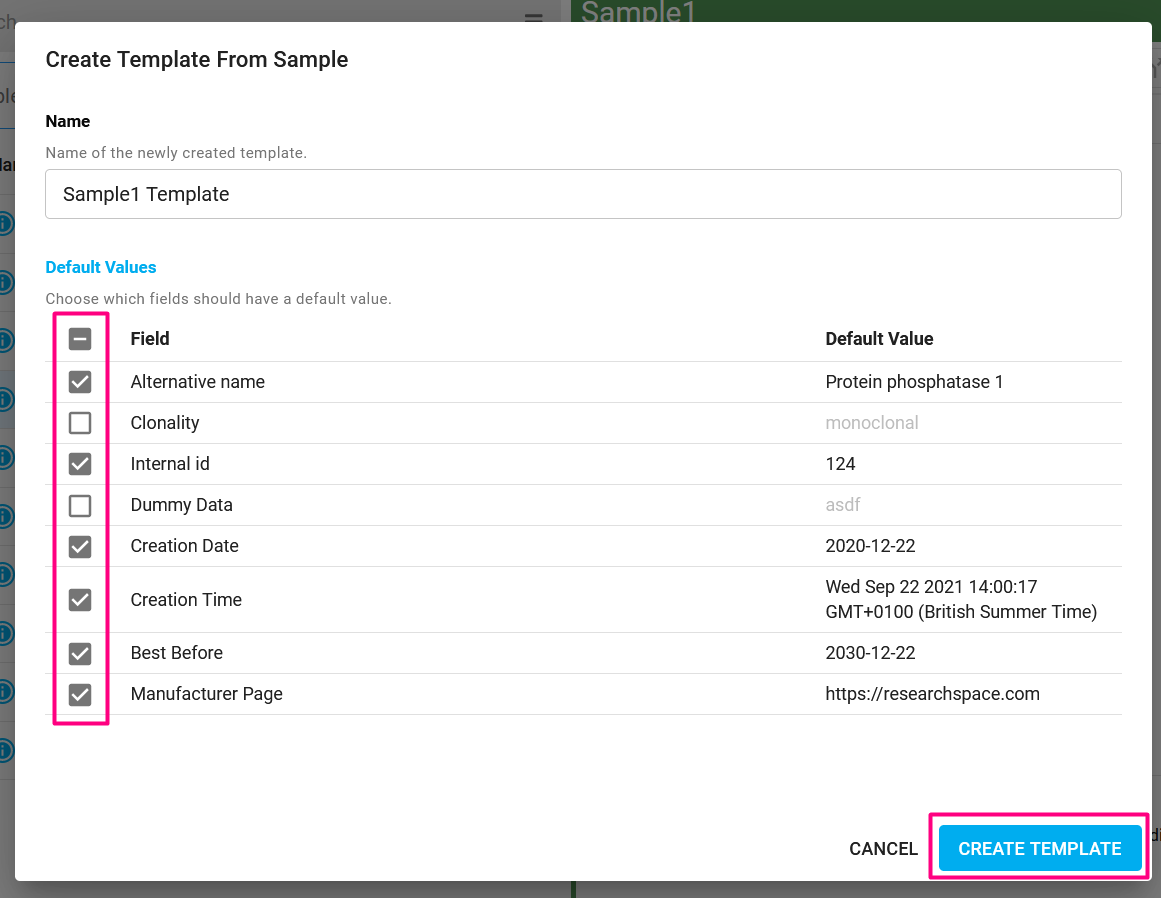
- You can now give your template a name. The template will contain all of the fields of the sample. You can use the checkboxes to select which template fields should have default values taken from the sample; unchecked fields will be left blank on the new template. Once created, the default values for template fields can be edited at any time.
Click on Create Template once you are happy. - Your template will be created, and you can now use it when creating samples.
Create a Sample from a Template
Now you've created the template, it can be used to create Samples from it.
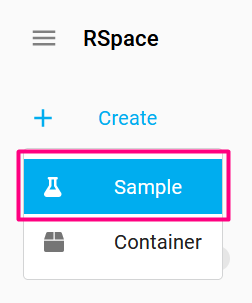
- In the sidebar, select Create > Sample.
- Select the sample template you want from the template list. The arrows at the bottom-right of the table let you browse through templates. You can also search the list of templates for the one you want.
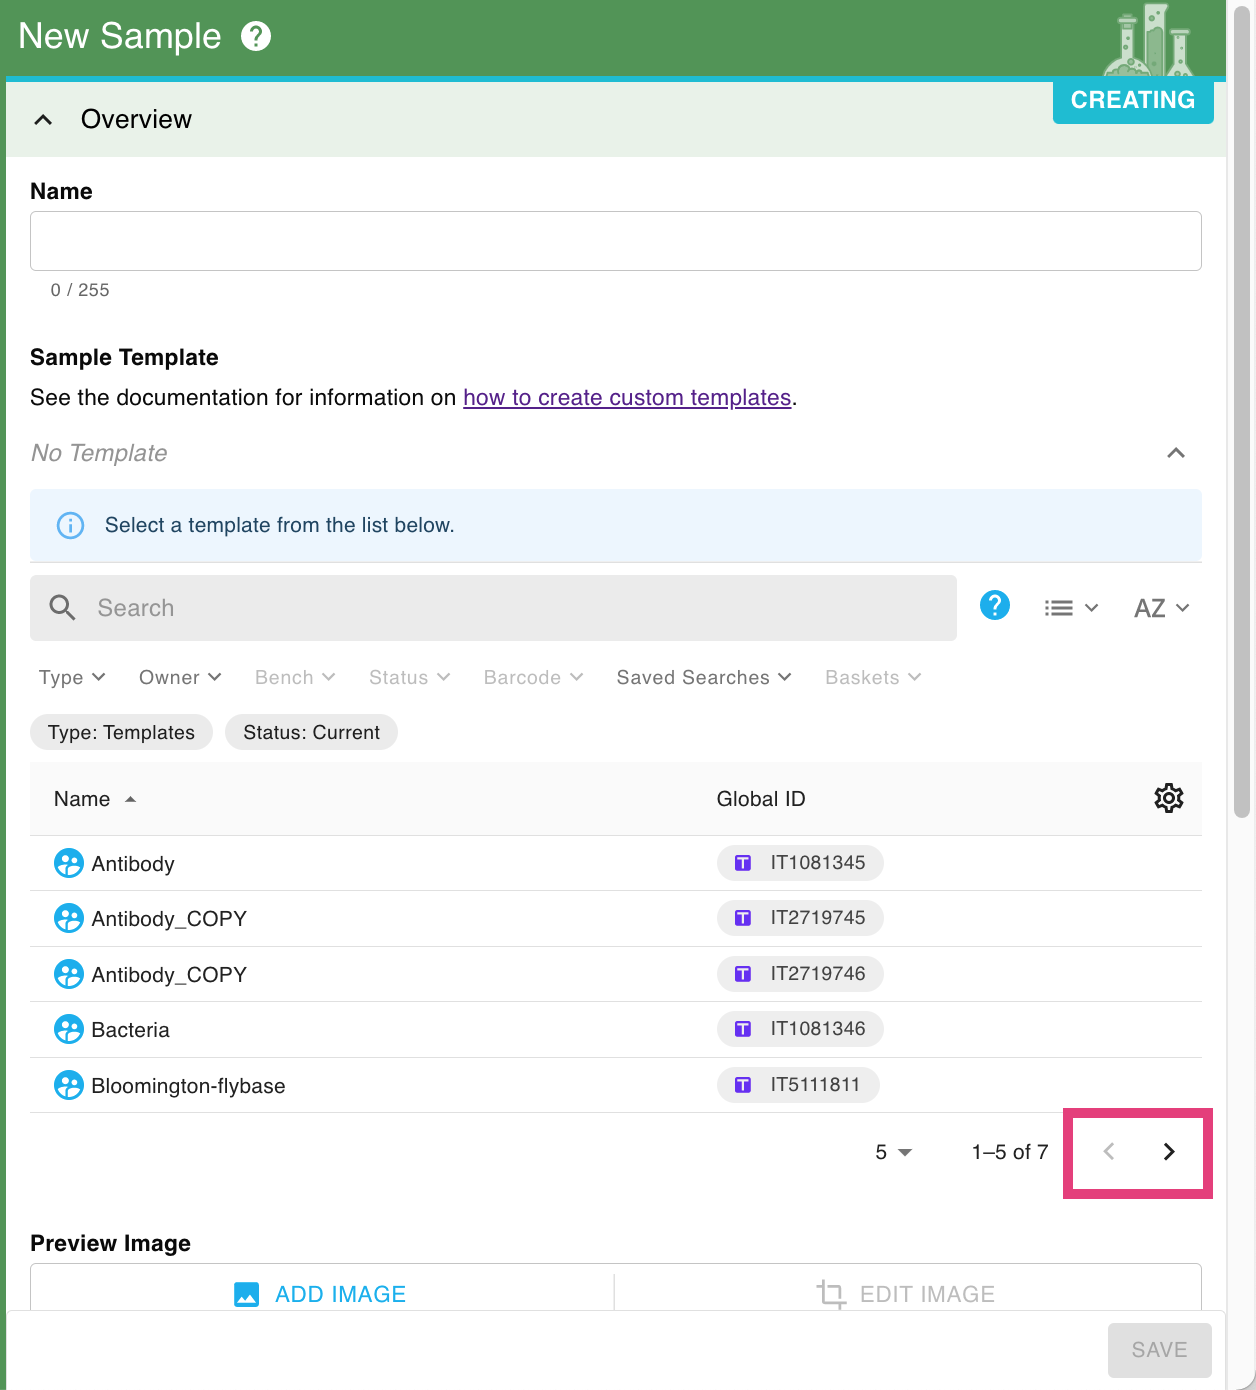
- The template fields will now be available for you to fill in.
View a Sample's Template
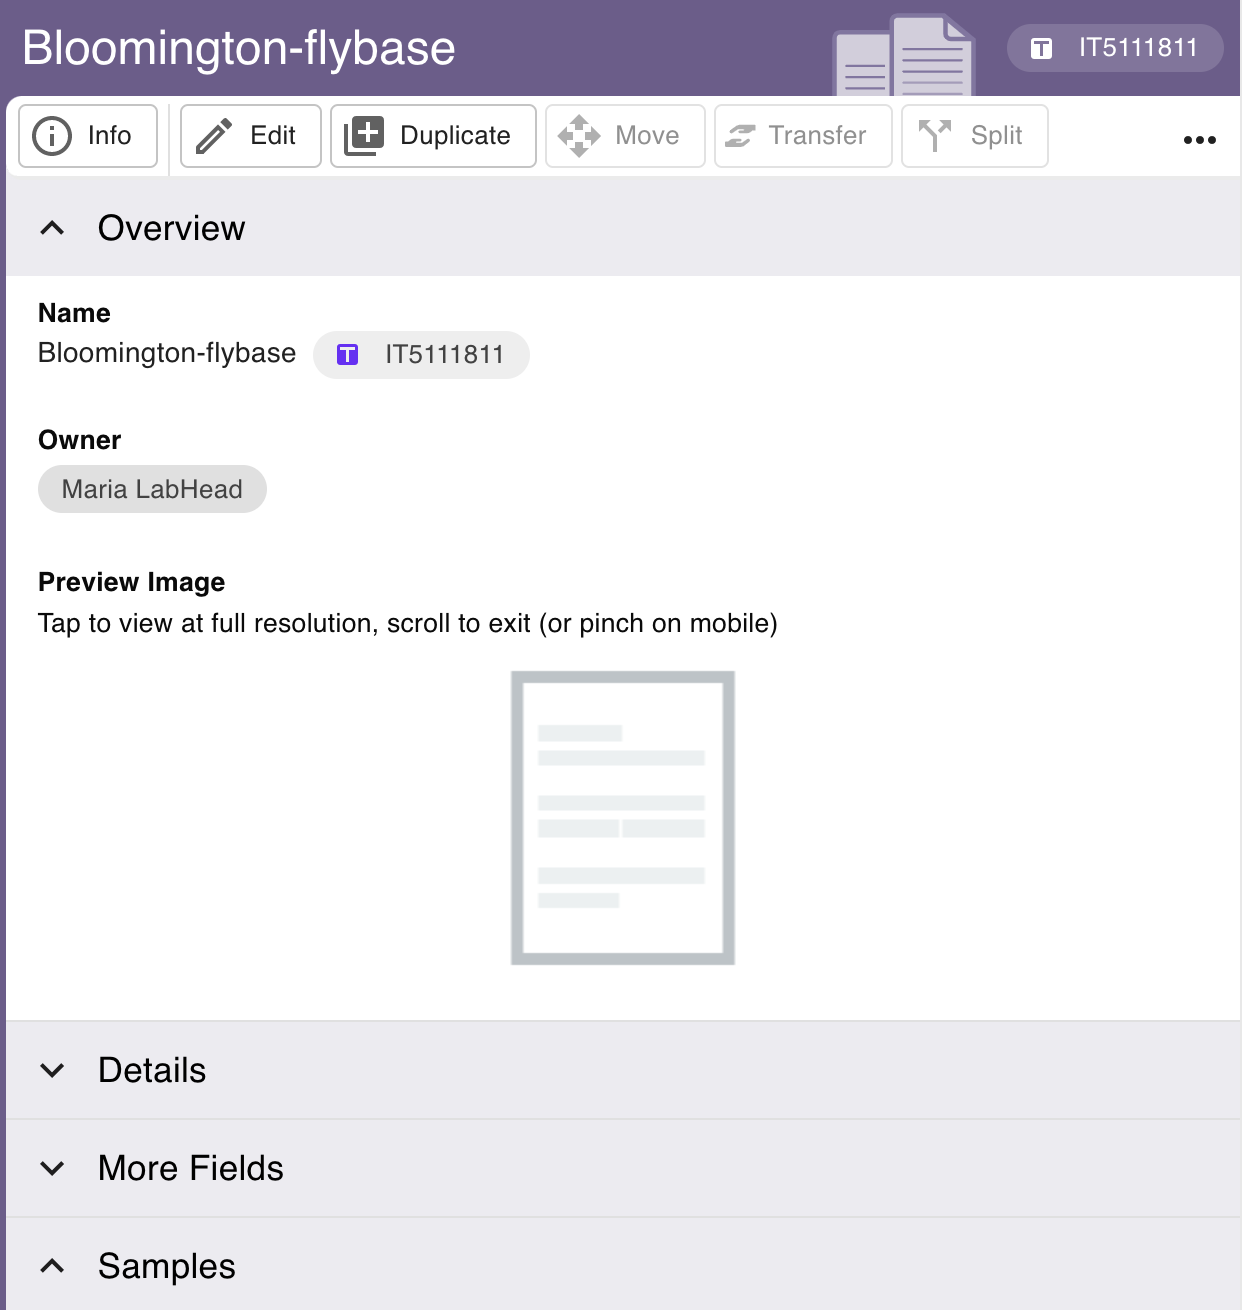
- When viewing a sample, click on the Template's Global ID link under Sample Template.

- This will open the template the sample is based on.
Browse Templates
Click on Sample Templates or Instrument Templates in the sidebar to browse a list of all templates that you have access to.
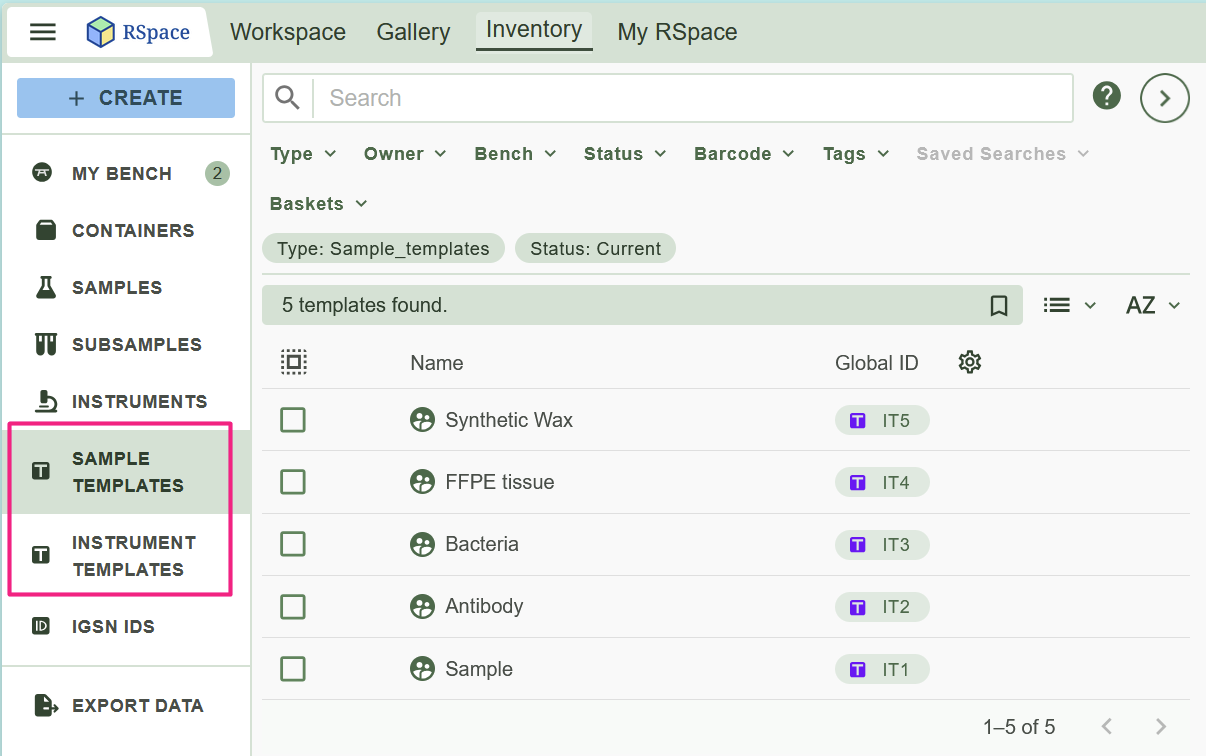
Search Templates
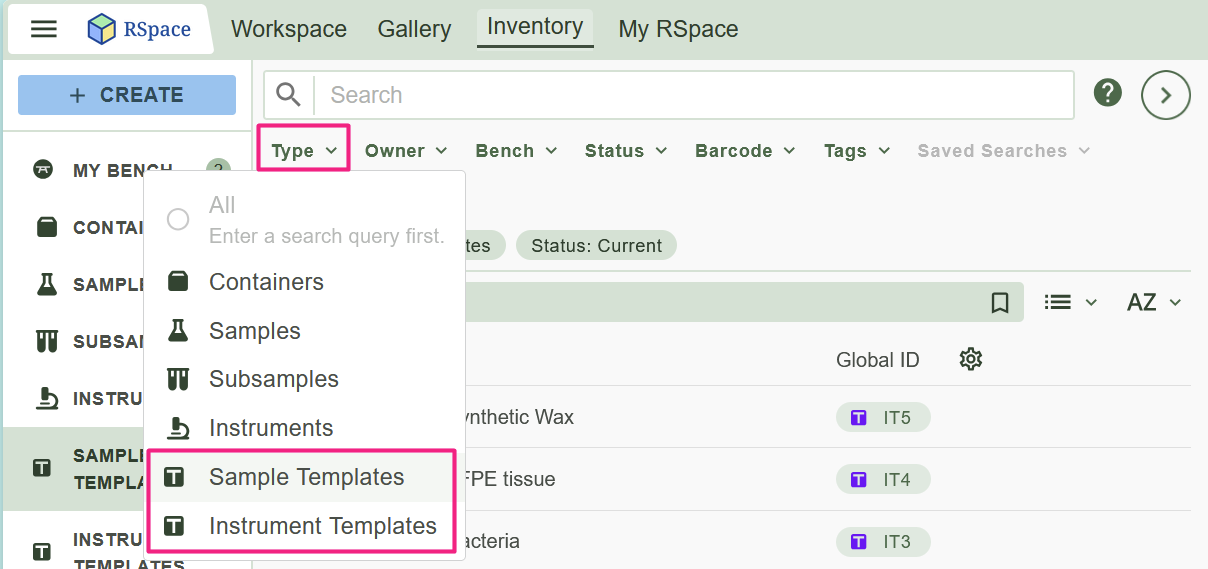
To restrict a global search to only show sample or instrument templates, click on the "Type" filter, and select Sample Templates or Instrument Templates.
Edit a Template
- When viewing a template, click on Edit:

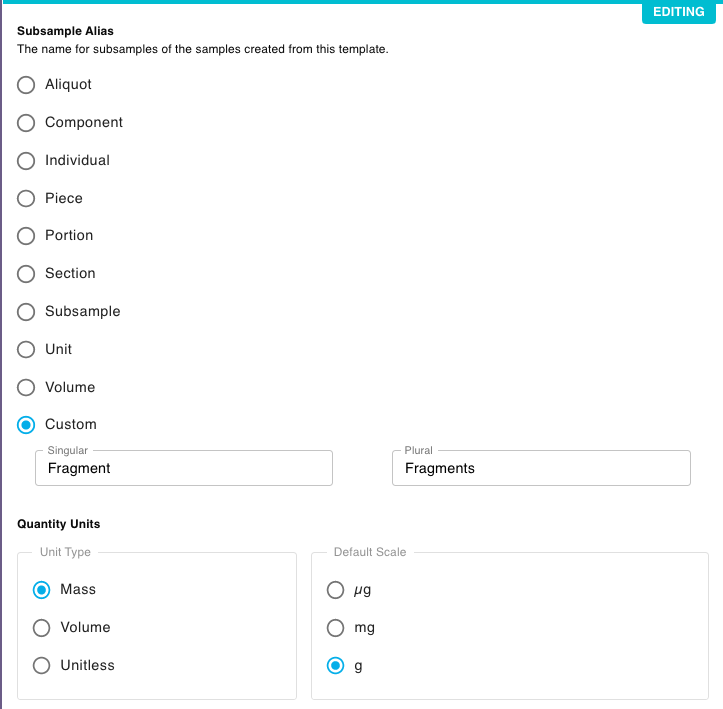
- You can specify a Subsample Alias, which indicates how you want to refer to subsamples that originate from the sample created using this template (instruments cannot be broken down into subsets, so this option is not available for instruments). Remember that in RSpace a sample is a set of related or identical subsamples. The subsample is the physical item, the sample is just a description of the item(s). You should also specify what Unit Type and Default Scale the samples should use. If none of the available options are suitable, you can specify your own custom value: in that case, make sure you enter both the singular and plural forms for it.
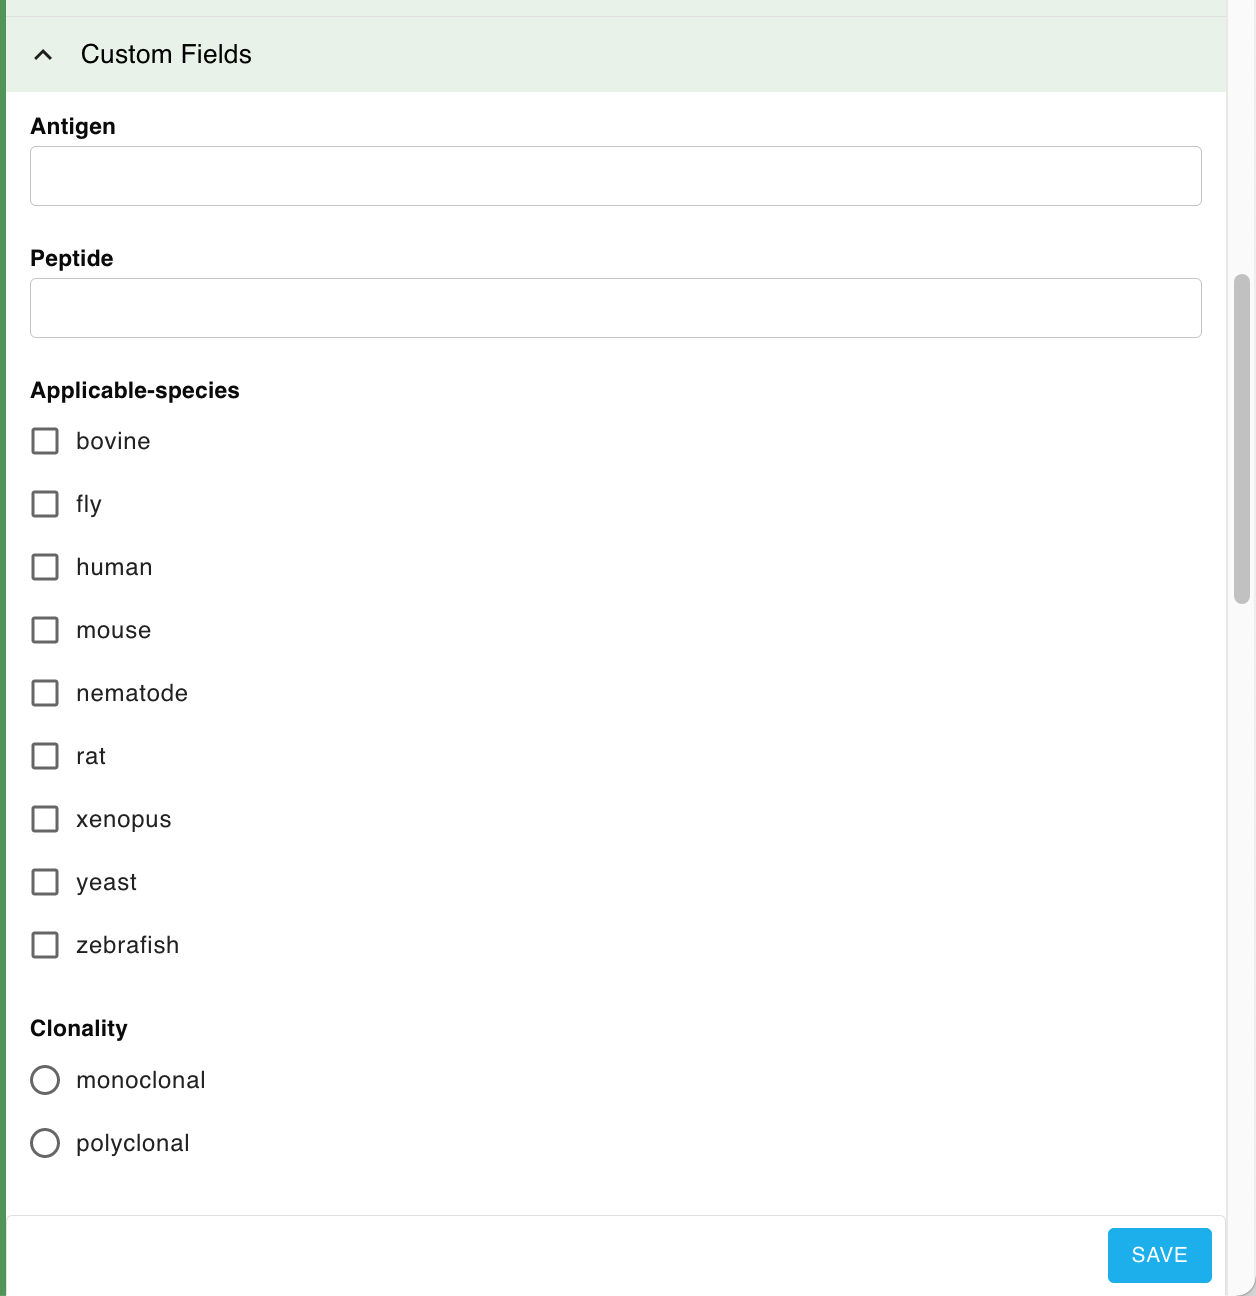
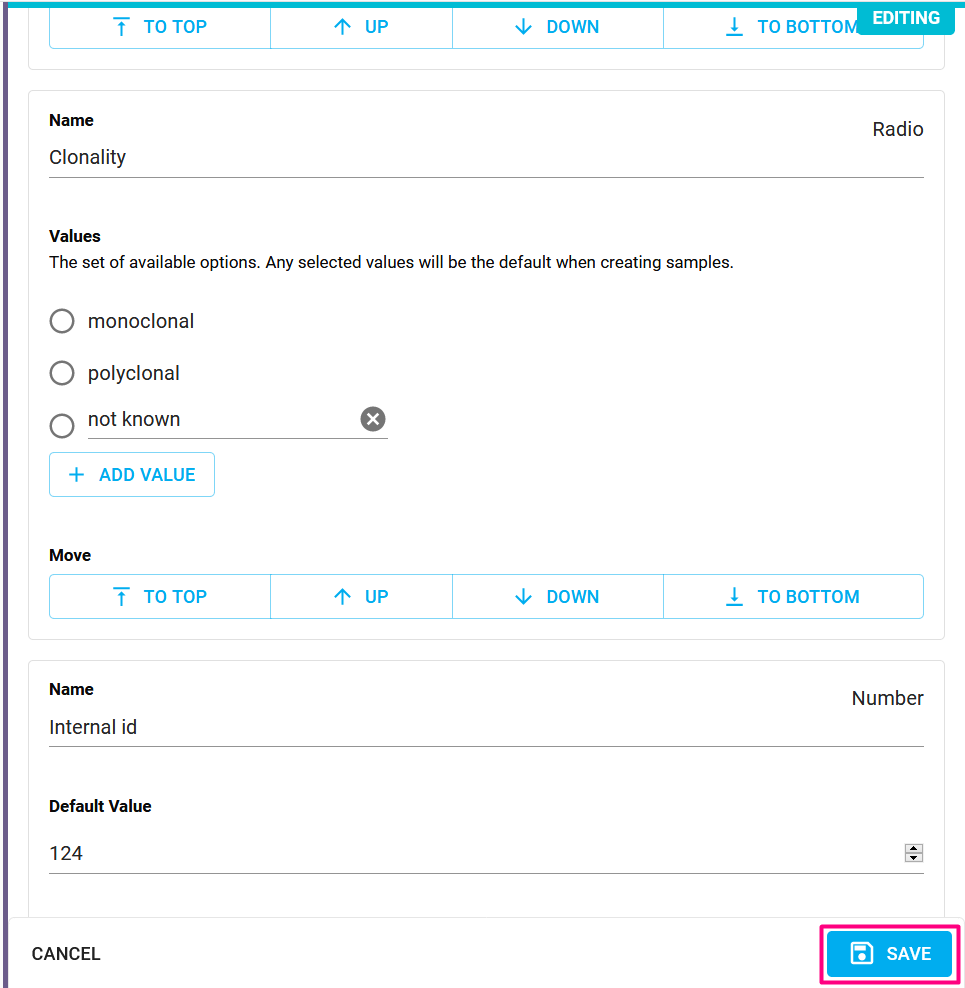
- Under Custom Fields, you can change the name and default value for a field, as well as move the field up or down in the list. You can also add a new field, or delete pre-existing one, as described lower down on this page.
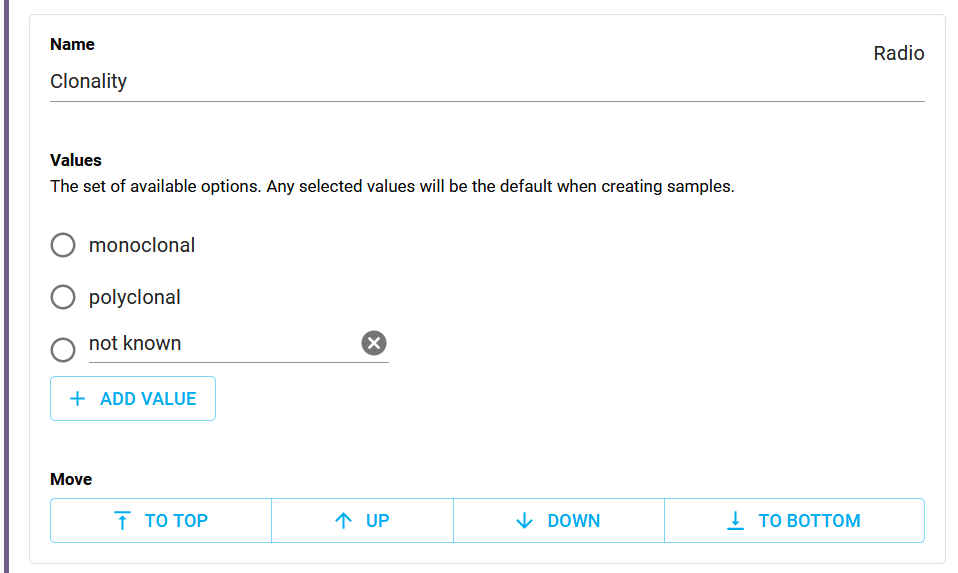
- For choice or radio fields, you can also add or remove possible values.
- Once you are done editing, click on Save.
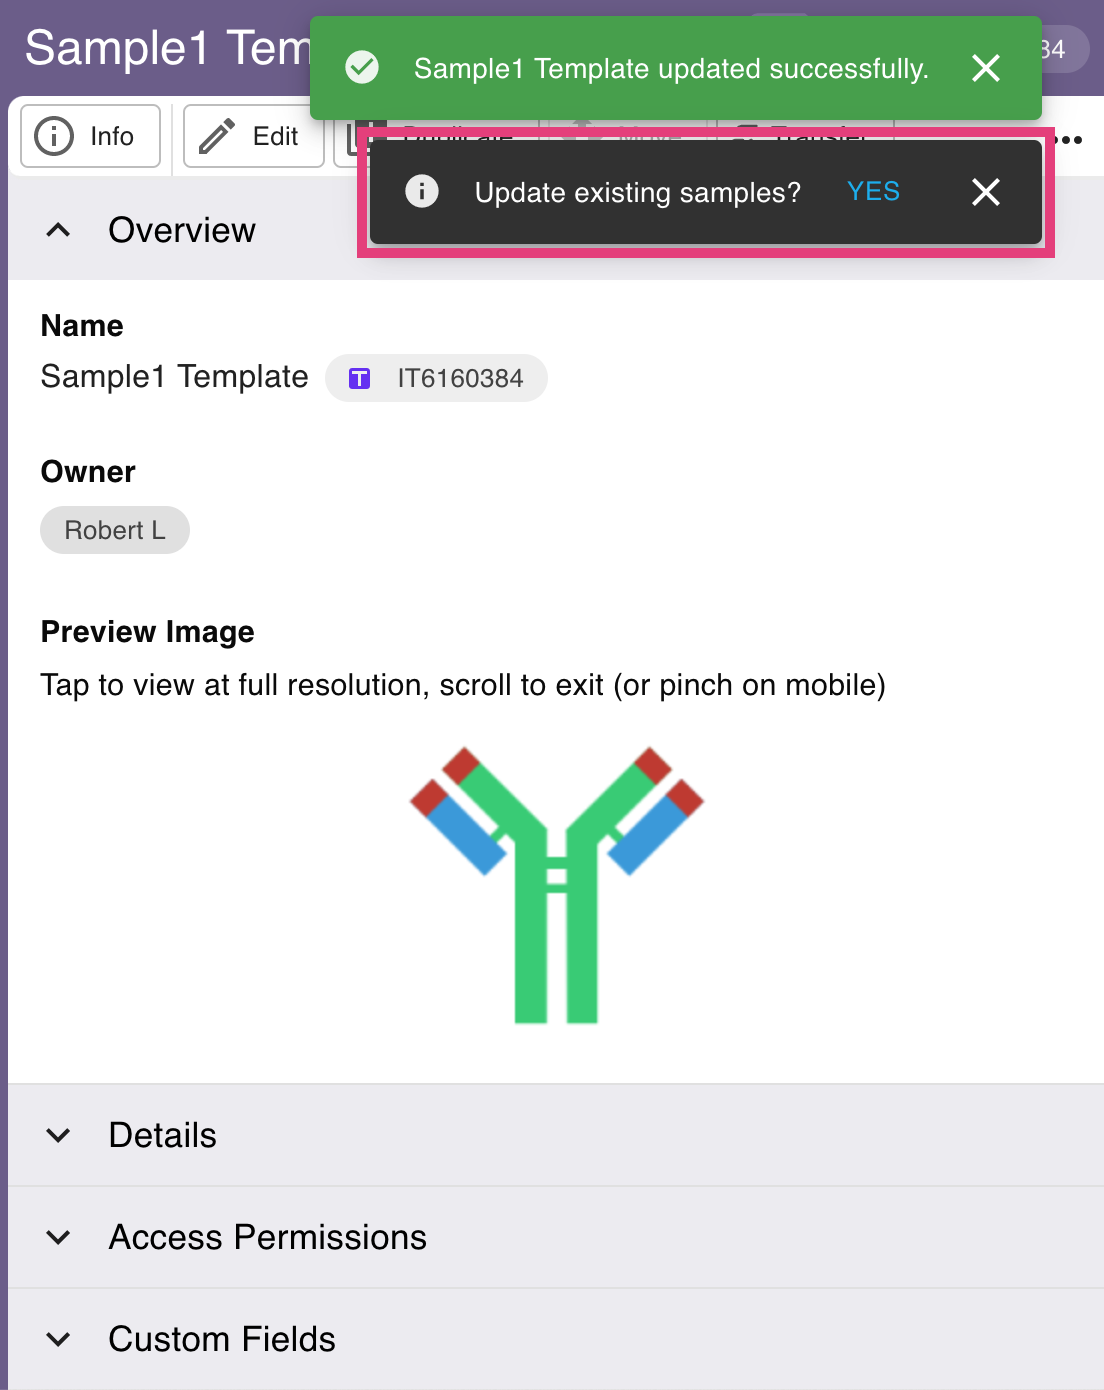
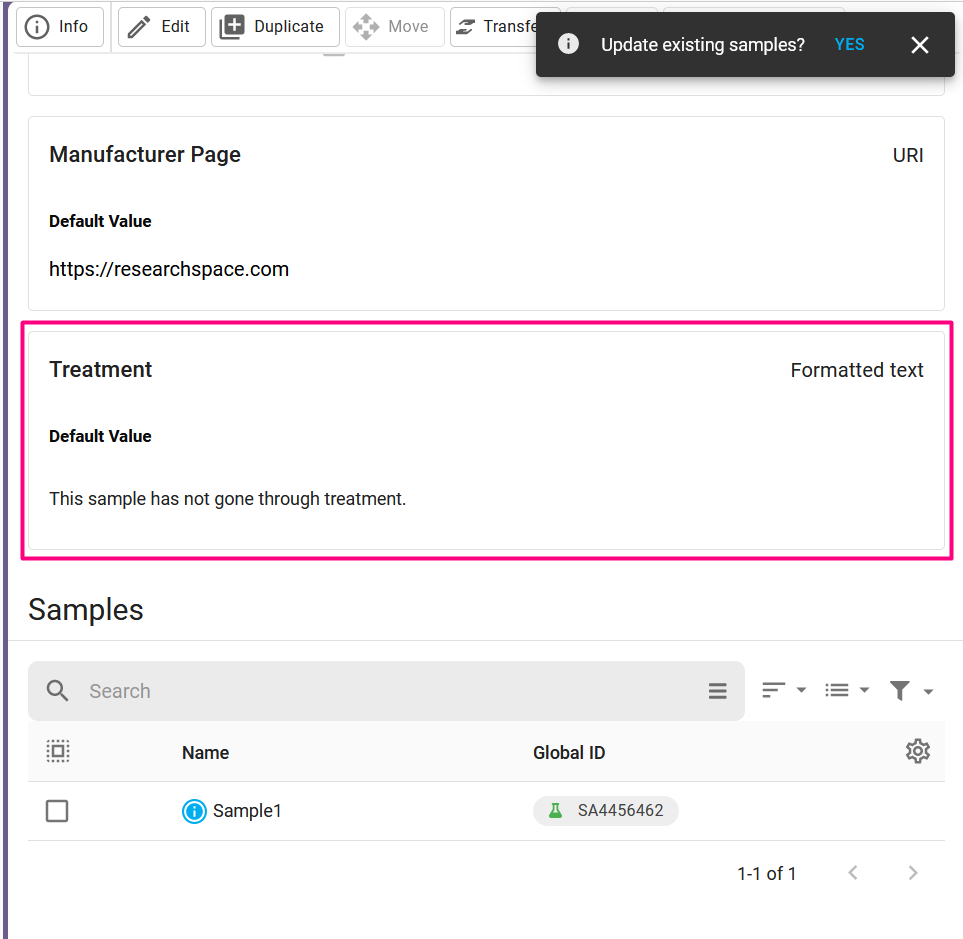
- Your template will be updated. Note that existing samples that were created from this template will not be automatically updated. You can update the samples by clicking "Yes" on the "Update existing samples?" popup; you can also update all samples or specific samples later, as described lower down on this page.
Add a new Field to a Template
- When editing a template, scroll to the bottom of the Fields section and select Add new field.
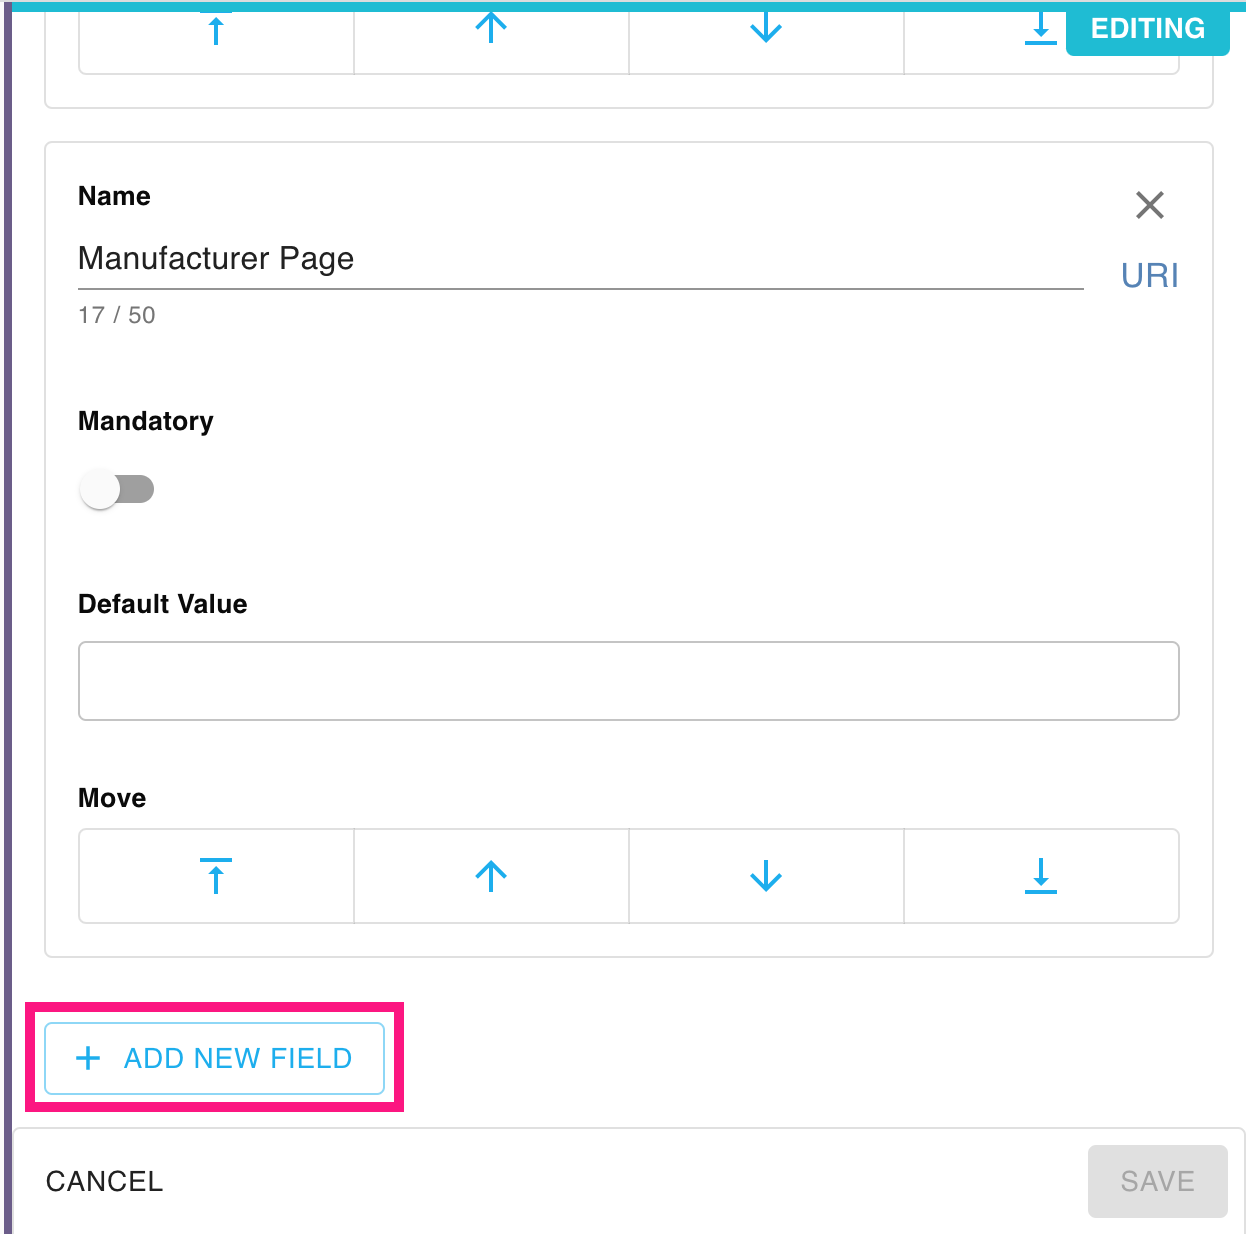
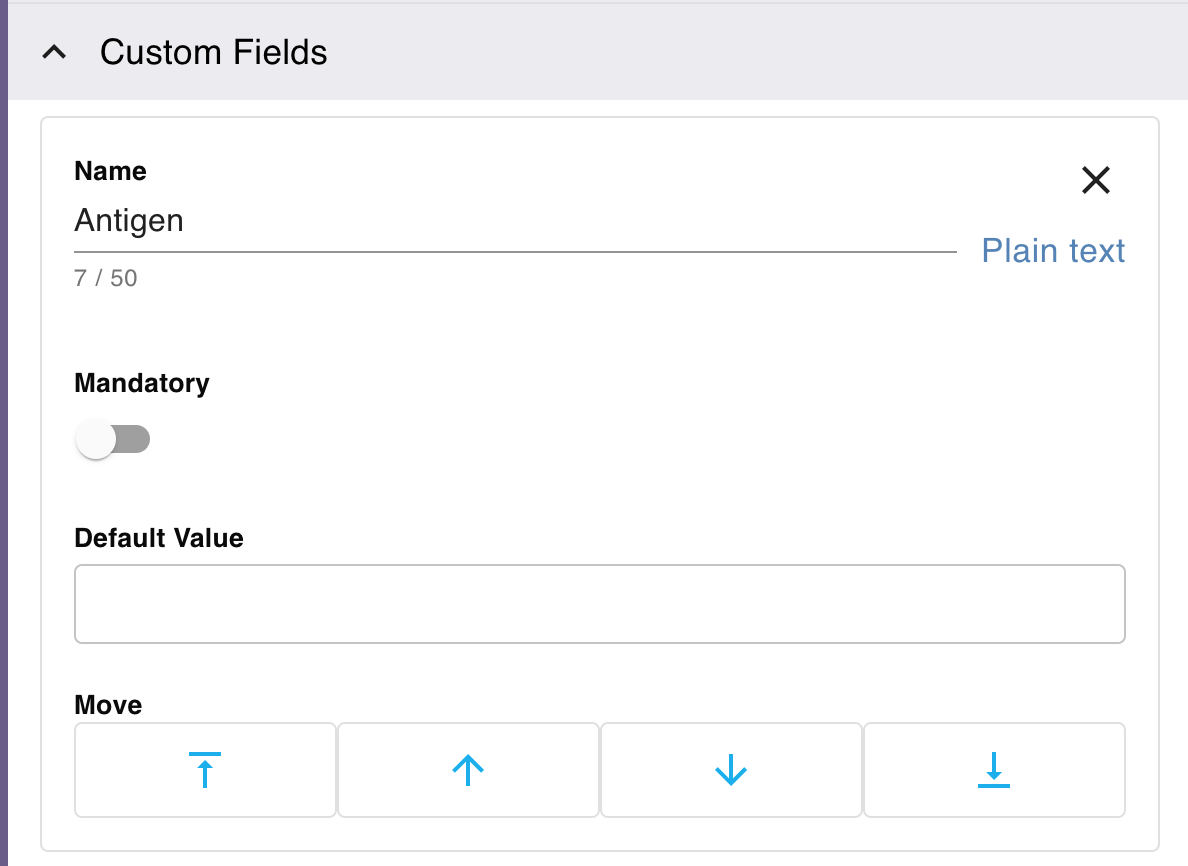
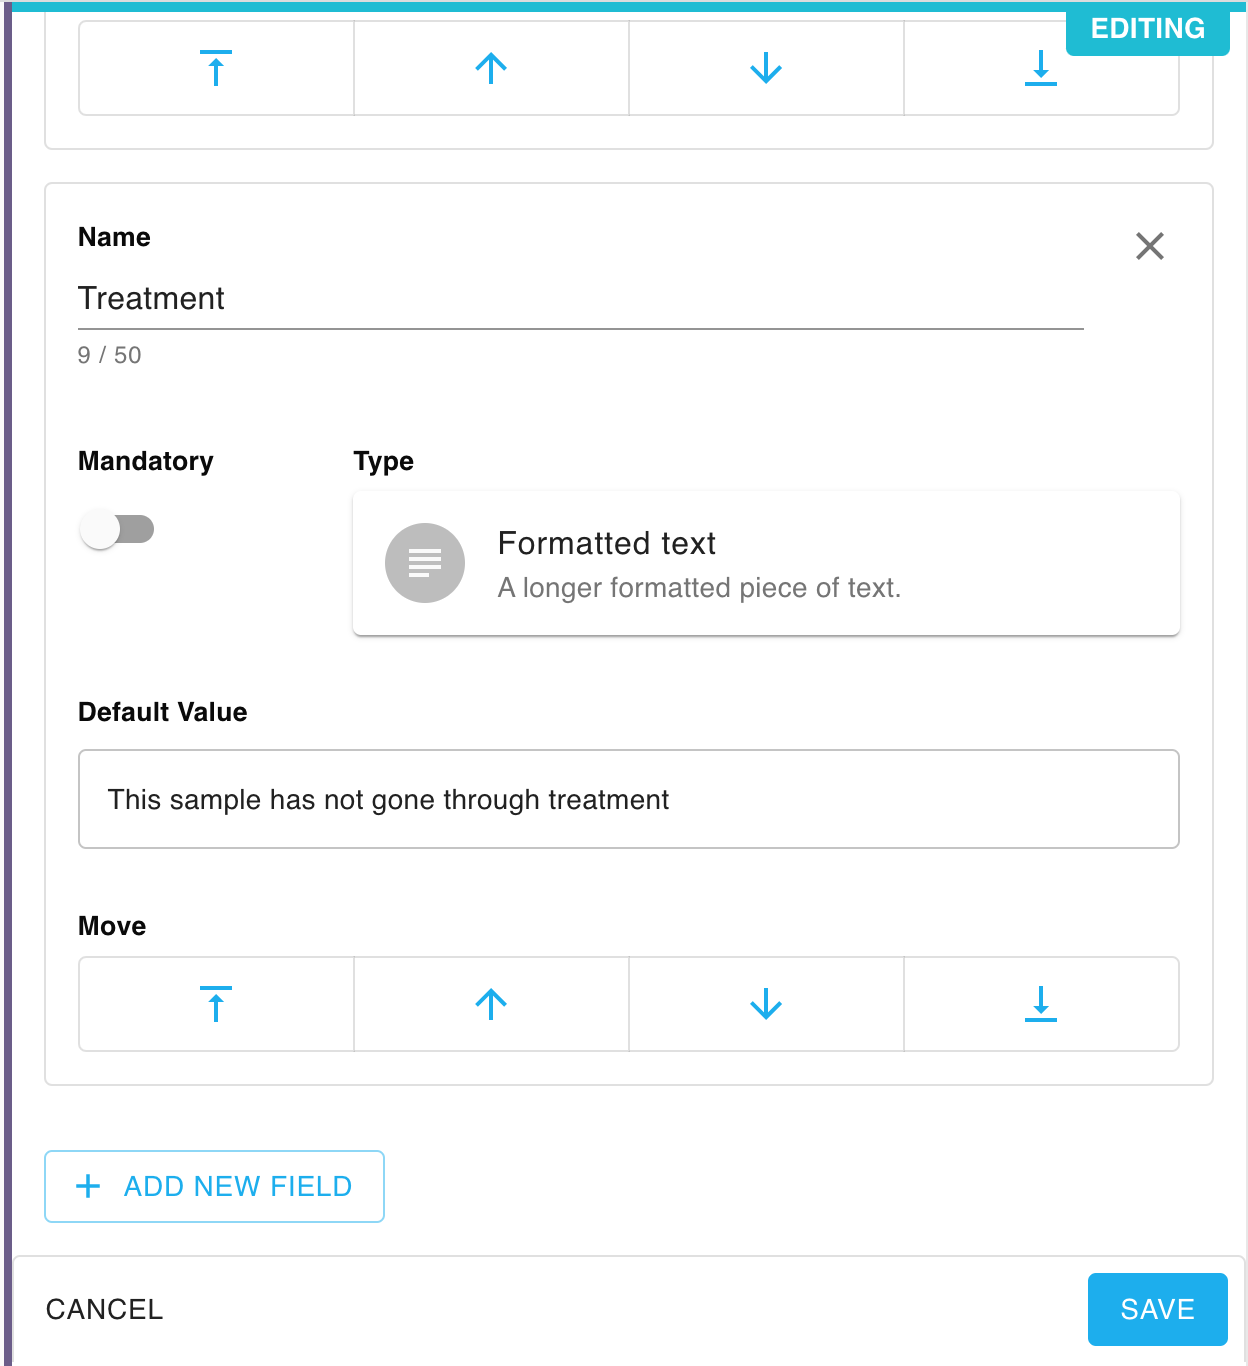
- You'll then be able to specify the name of the field, decide whether it is a mandatory field (i.e. all samples created from the template must have a value for this field), its data type, optionally give the field a default value, and move the field up or down the list. Once you are done, click on Save.
If there are existing samples based on your template and you want to add a new mandatory field, first add a field as non-mandatory, then update existing samples to latest template version, set the value for newly added field in existing samples, then update template field again to make it mandatory.
- Your template will be saved, and any new samples created from this template will have this new field. Note that existing samples that were created from this template will not be automatically updated. You can update the samples by clicking "yes" on the Update existing samples popup; you can also update all samples or specific samples later, as described lower down on this page.
Delete an existing Field from a Template
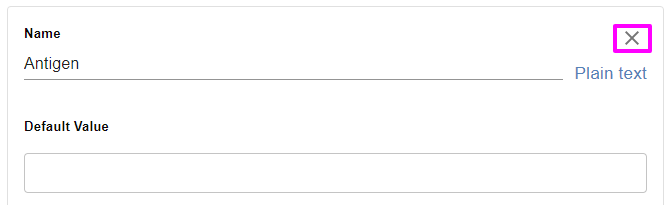
- When editing a template, scroll to the field you want to delete, and click 'X' button in the right corner of the field area.
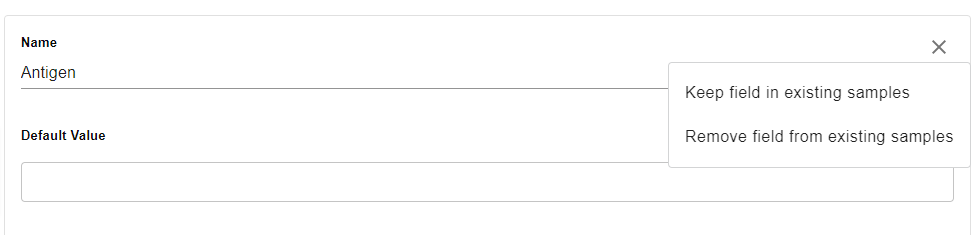
- There are two variants of deletion that decide whether the field should, or should not, be deleted from pre-existing samples based on the template. If 'Remove field from existing samples' variant is selected, the pre-existing samples will have the field deleted when they are updated to latest template version.
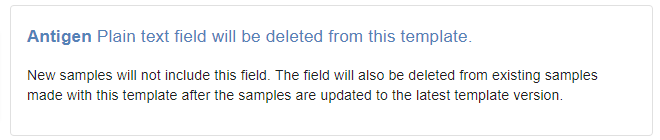
- After selecting a deletion variant, you'll see a confirmation that the field is going to be deleted. You can continue editing the template, as the field is not actually deleted until you Save.
- Once you are done, click on Save. Your template will be saved, and any new samples created from this template will not have the deleted field. Existing samples that were created from this template will not be automatically updated; you can update them by clicking "yes" on the Update existing samples popup; you can also update all samples or specific samples later, as described lower down on this page.
View all Samples created from a Template
When viewing a template, scroll down to the bottom to see a list of all samples created from that template. You can also perform a search, or use advanced search to view samples owned by a specific individual.
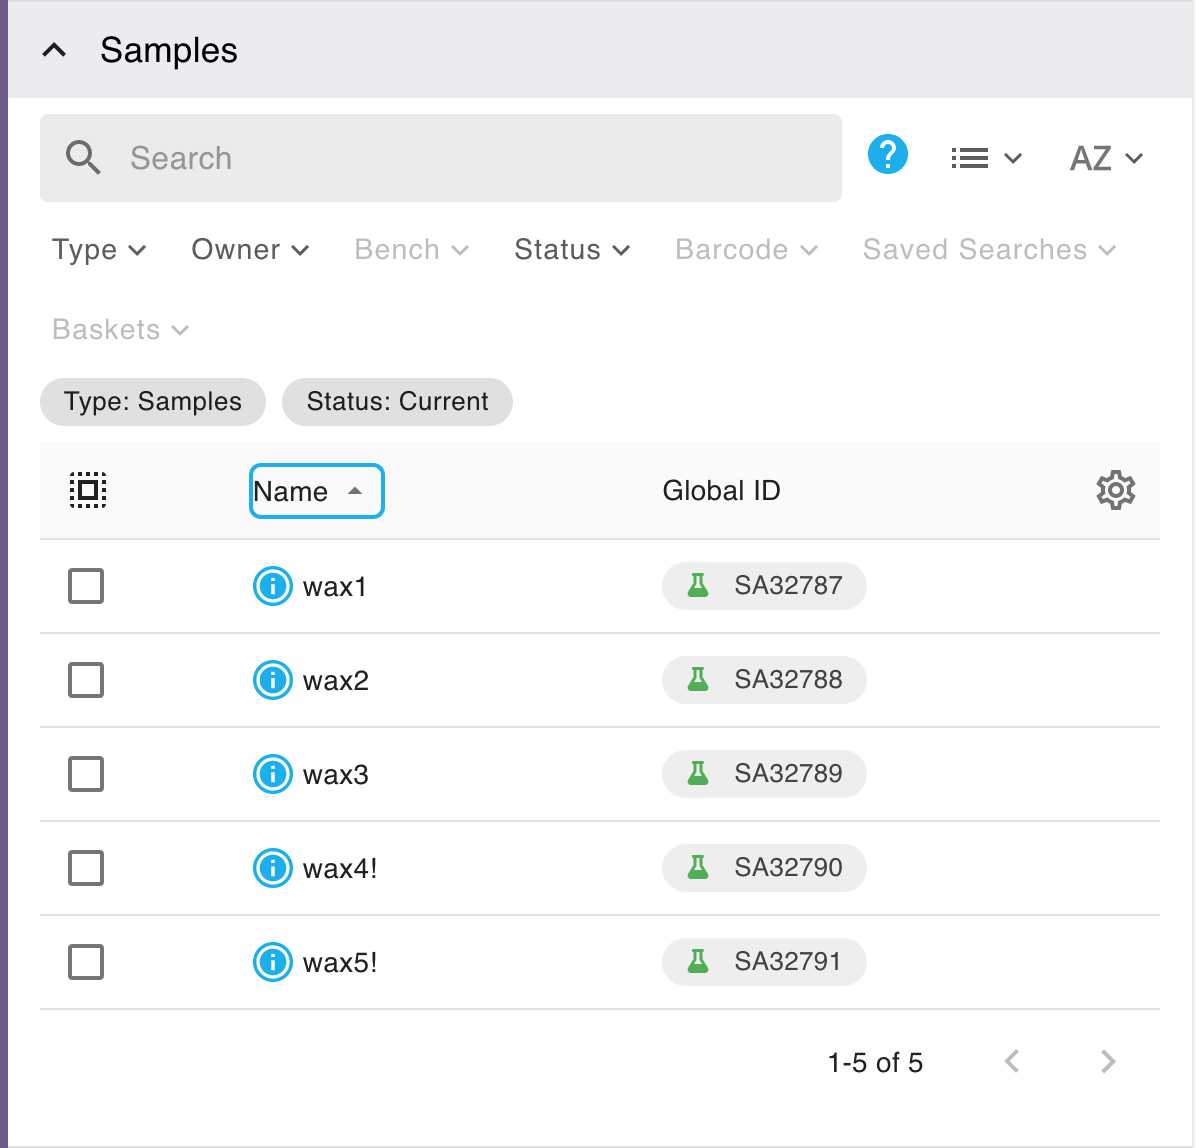
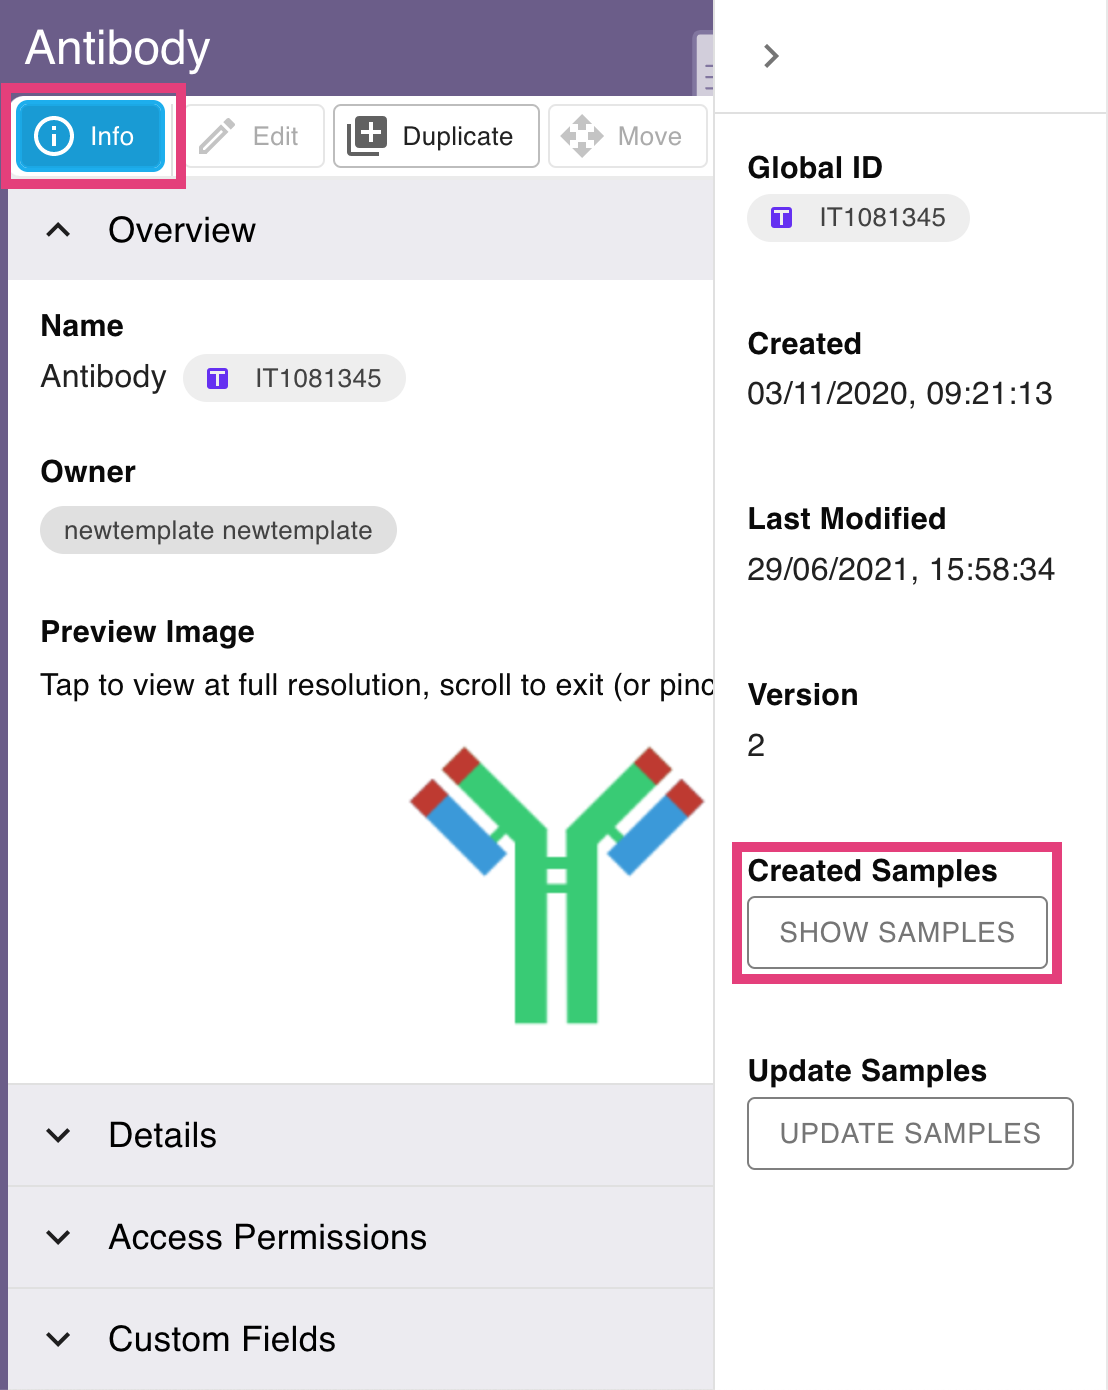
You can also click on Info, then select Show Samples to instantly scroll down to this section.
Update a specific Sample to latest Template Version
- When viewing a sample, the template from which it was defined is linked under the section called "Sample Template". If the sample is based on a template that has since been updated, an "Update" button will be shown. Here, this sample is defied using version 2 of the Antibody template, which can be viewed by tapping the versioned Global ID link, and it can be updated to the latest version with a single tap.

- Your sample will then be updated to the latest template version, following the rules below with any changes to the template reflected in the sample.
Update all of your Samples to latest Template Version
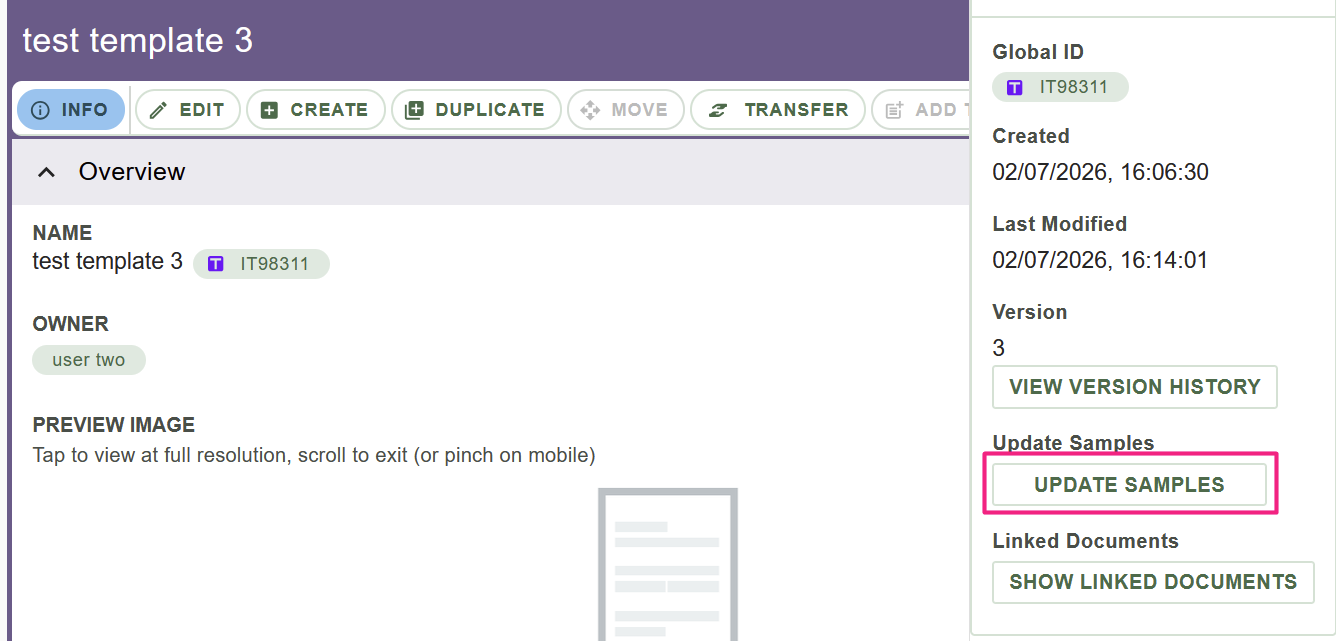
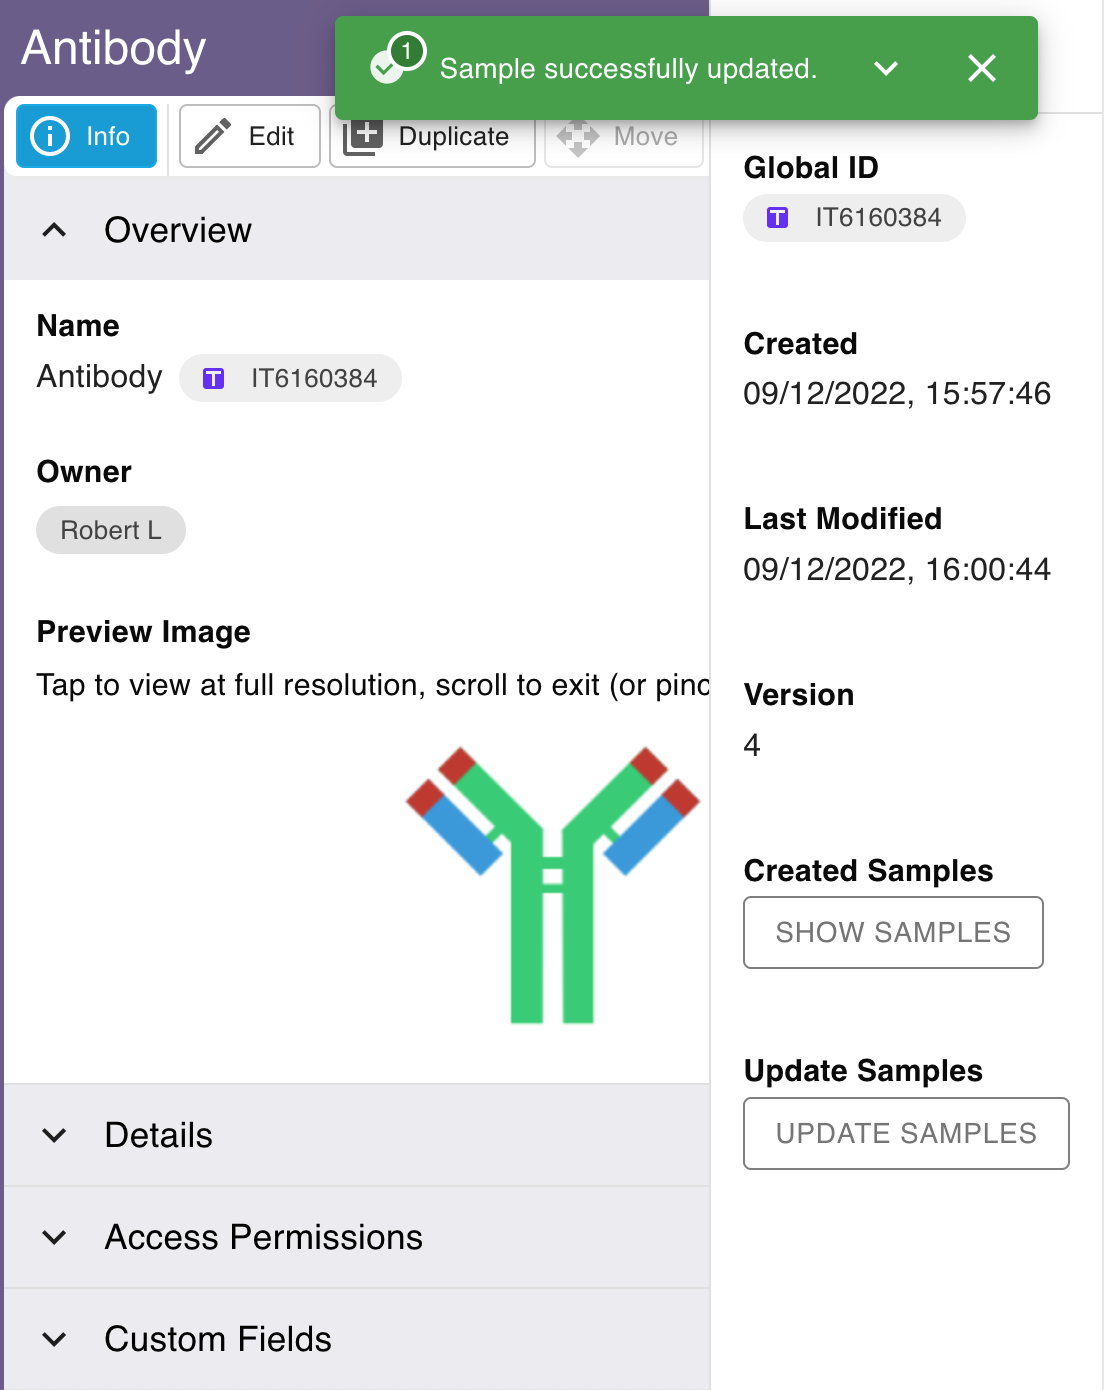
- When viewing the template, select Info, then Update Samples in the sidebar that appears.
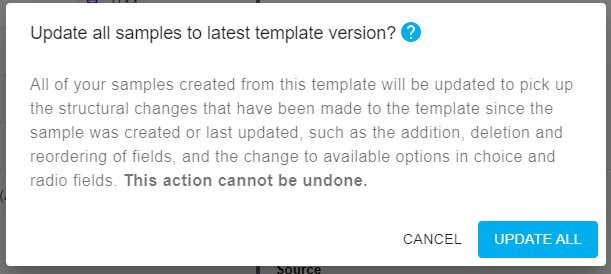
- Click on Update All if you are happy with how updating the template version will affect your samples.
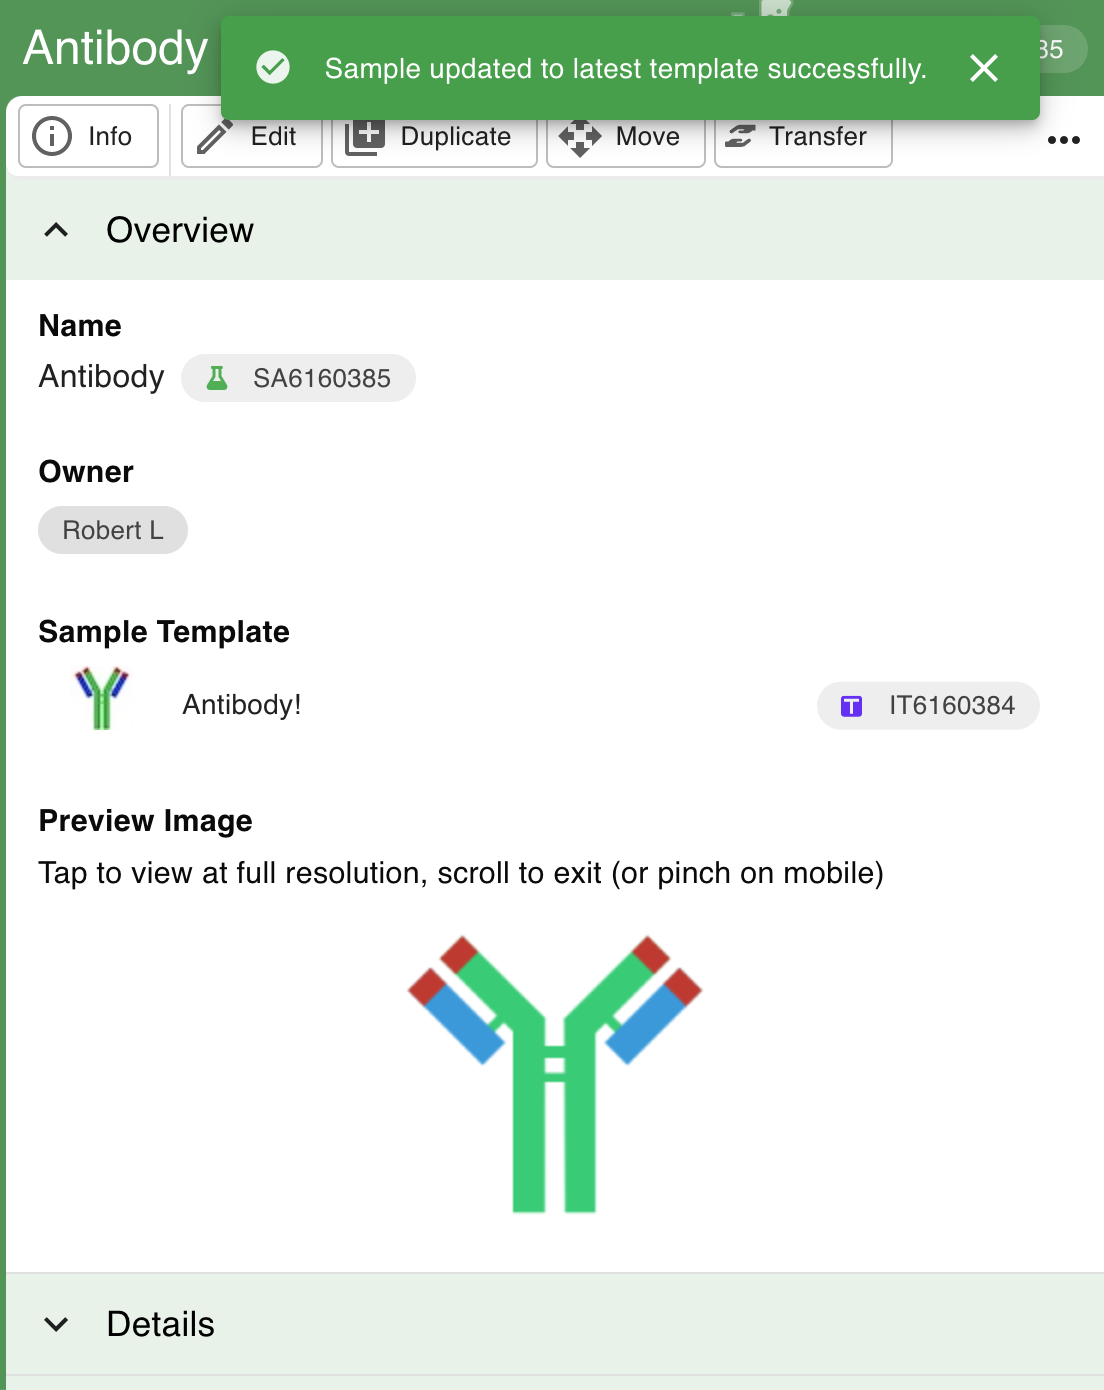
- You will get a confirmation that your samples have been updated. You can click on the dropdown arrow in the notification to expand it and obtain direct links to the samples that were updated.
Rules for applying template changes to existing Samples
As a general rule updating a given sample to latest template will not modify any data stored in that sample. Only structural changes (for example, adding or deleting of fields) will be applied, assuming these changes are compatible with data stored in that sample. Updating a sample to latest template will remove an existing field if the person who modified the template explicitly decided that updated samples should loose the fields when deleting the template field. Updating a sample to latest template will add fields if the latest template has new fields, with an empty value being set.
In particular, changes to Default Value of template field won't be applied to field value of existing samples. The default values are only used when creating new samples. Data in existing samples can be only updated by editing these samples - individually or with batch edit.
Below is an exact set of rules that are applied when updating a Sample (S) to a new version of the Template (T).
- Check difference between T and S properties:
- if T has new subsample alias, update subsample alias of S
- For each S field check difference between S field and connected T field:
- if the connected T field was deleted with 'Remove field from existing samples' option, delete the S field
- if the connected T field was renamed, rename the S field
- if the connected T field is radio/choice, and the set of possible radio/choice options has changed:
- if the option selected in S is valid with new set of possible options from T, update the set of possible options in S
- if the option selected in S is not valid with new set of possible options from T, REJECT WHOLE UPDATE ATTEMPT FOR THIS SAMPLE
- for each T field, if there is no connected S field (i.e. it's a new field added to T):
- if the new T field is not mandatory, add the field to S, with empty value (even if T field has a default value, it won't be used)
- if the new T field is mandatory, REJECT WHOLE UPDATE ATTEMPT FOR THIS SAMPLE
How did we do?
Navigate Inventory 🧪
Using Inventory Lists of Materials in the ELN 🧪